
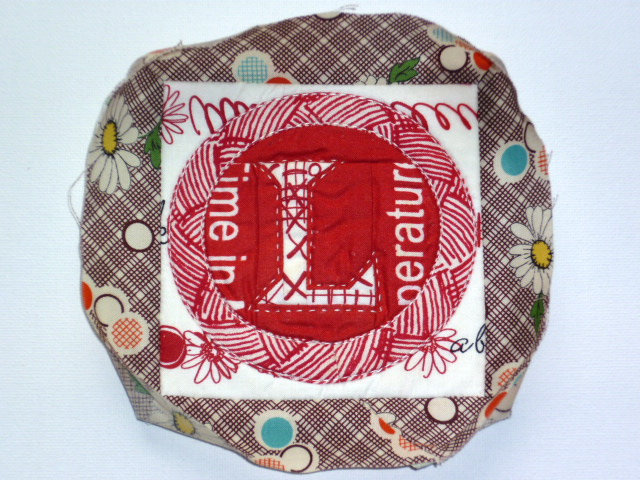
Quilting those smaller items- mini quilts, mug rugs, coasters, placemats etc is tricky. Double bindings are too chunky and sewing them on by machine l doesn't seem to work out the same on these little things. A good binding lifts your creation and a bad binding can detract from all your hard work. I am sharing all my best tips in a picture-packed tutorial The pics show a coaster but I call it a mini quilt throughout for ease.
1. Trim your item with a rotary cutter and rule, then zigzag round the edge. Don't zig zag into the corners as they tend to distort- I pivot around them. This stage is optional but it does keep the edges nice and neat.

2. Cut your binding a scant 1 1/4" wide using a rotary cutter and rule. Cut across the grain; selvedge to selvedge. Unsure what scant looks like? That's my scant 1 1/4" inch version below. This is going to create a narrow close-fitting binding. If this is your first time with this technique, you can cut your binding 1 1/4" wide for a big of wiggle room and not worry about the scant option.
If you want to use bias binding (cut on the bias diagonal of the fabric rather than across the grain) for round mats or rounded corners, cut a little wider, 1 1/2"

3. At one end of your binding, turn over the corner to make a right angle triangle and press.

4. I normally start binding at the mid-bottom edge of the project. Remember the join between the start and end of your binding will be here. I don't use pins when machining small items, but if you would rather go ahead!

5. You have to allow for joining your binding so on a really small piece like a coaster although the binding lies halfway across the bottom, I am only going to sew the last inch towards the corner, the first bit of binding will therefore not be attached yet, just lying ready. Use a 1/4 inch seam allowance- I use my 1/4 foot to guarantee it, accuracy on this makes a big difference. Secure at the beginning and end an stop and secure 1/4 inch before the end of the mini quilt corner.

6. You will need to mitre the corners. Not sure how? See my mitred corner's tutorial here! I attach the binding all the way round until I am within 3-6 inches of the where the binding began depending on the size of the object. Secure your last bit of stitching at this point.

7. Line the edges of binding up diagonally, you will need to turn the end of the binding away from the mini quilt. You need to make sure that the unattached binding is not too slack here or it will be too loose when you come to machine sew it. Press the diagonal folds.

8. Take a small needle and co-ordinating thread with a knot at the bottom and push between the diagonal folds- see how the needle is going through at a 45 degree angle?

9. I folded back the left hand binding fabric here so you could see how the needle tip angled through.

10. Push the needle back through angling the opposite way and keep this going until you have line of little hand stitches joining the binding. You can always put in the odd back stitch for security. I have found hand stitching more accurate for joining binding especially when there is so little room to join the two edges by machine.

Just showing you the other side of the join here.

11. Trim the edges to 1/4 inch and press open. Now you can machine stitch across the last bit of unattached binding

One side of binding is attached.

12. With your fingers, open the binding outwards so you can see its right side and give it a good press with your iron.
Get right into the corners with the tip of the iron. A little iron helps, I use a travel iron.

This is how it looks on the underneath side.

13. Turn your mini quilt so the underside is facing you and along the edges (avoid the corners) turn the binding in so that the edge of the binding meets the edge of the mini quilt. Take your time here. Doing this bit really well will given you an even, narrow, close fitting binding.

14. This is how it will look. The corners are too fiddly to do with the iron, we'll do these with pins in the next step.

15. Take the pressed folded edge of binding and line it up ever so lightly above the stitching line, pin to secure.

You can fold and overlap to get your corners nice and sharp.

It ends up looking like this.

16. With a little needle and a thread with a quilters knot in the end, secure your thread into the mini quilt seam allowance to hide the end and we are going to hand sew the back of the binding with ladder stitch. If this is new to you there are lots of diagrams and you tube videos but it is pretty easy and the stitching is almost invisible. I take a stitch just above the machine stitching line where the binding was first attached...

and then a stitch through the pressed fold of the binding, pull gently and repeat- that is ladder stitch! Stitch all around the binding.

Your mini quilt/mug rug/coaster/placemat binding is complete!

This method is not super speedy but it gives me good results, I hope it works for you.

Any queries or problems with it- email me and let me know!
Great tutorial Kerry!
ReplyDeleteSo sweet. Love your Suzuko coaster.
ReplyDeleteThanks! I was wondering how that was done on those smaller pieces. Great tutorial.
ReplyDeleteThis is genius Kerry. How did I not think of this? You are so clever and I am going to use this in future on smaller items - you should have seen the thickness of my binding on my DQS9 quilts - it looked pretty bad. I'll be book marking this. Are you going in for the DQS this time? I resisted and resisted but gave in tonight and applied - just too much fun, even though I vowed not to so I could concentrate on home projects. Have you seen Lucinda's door? I haven't got a clue where to start on that one - my mind is completely devoid of ideas - hopefully something will nudge me in the right direction. L X
ReplyDeleteThanks for the tutorial, I've got a couple of mug rugs/pot holders in my near future so this will come in handy!
ReplyDeleteGreat tutorial Kerry, thanks! I really struggle with binding full stop so now I'm going to go look at your mitred corners tute!!
ReplyDeleteThanks so very much!!
ReplyDeleteAfter some gentle persuasion from our beloved Ayumi, I'm making an exclamation mark coaster to join the rest in the I love SK coaster set. Tonight I started this binding method but gave up - I was tired and ushing it and hadn't read the tutorial through again. Re-read it now and see where I was going wrong and will try again tomorrow - I love the effect of the lighter weight binding - you're a genius. My mosaic was for the DQS but I don't want to announce it as that just yet. Your teapot is going to be in so many mosaics this year.
ReplyDeleteThis is great! I always struggle with binding very small things, and hate when any extra bulk shows. Thank you so much for writing this up!
ReplyDeleteI really really really needed ths this tutorial and can't wait to try it out. Thank you so much Kerry. I think you've helped me with the worst part of my small quilting projects.
ReplyDeletethank you so much for sharing!!! i was wondering about his very thing the other day. i always use double fold for my quilts, but wondered how to use single fold on 'smaller' quilty things! (espically the miter)
ReplyDeletei too can't wait to try it!-shannon
I have a couple of other tutorials, but have a little difficulty with them. I will try yours to see if it is any easier. Thank you for posting this, really appreciate it.
ReplyDeleteElaine
I love this tutorial. Perfect for mug rugs which are a bit fiddly. Thanks so much.
ReplyDeleteThe tutorial is fantastic! Even a novice like me understands it. :) came along at just the right time as I need to make a bday gift of quilted potholders today! Best wishes, and I love the blog! Jen
ReplyDeleteOh! Ohohohoh Joy and Rapture! This tut is brilliant! (I'm excited that you're in the UK too, AND you sell fabric! You're my new favorite person! :D I'm an American expat who married a Geordie and lives up here in Newcastle among the natives. I'm always tempted to do a Attenborough style documentary about them...:D)
ReplyDeleteThis is fantastic. I will definitely be doing this type of binding on all of my smaller projects from now on!
ReplyDeleteI have just popped over from Quiltstory and have been enjoying the posts on this page! I have signed in as your newest follower...please feel free to come and visit me too, I look forward to seeing you and reading your posts during the year.
ReplyDeleteFantastic! - I could have really used this when I was trying to bind a cafetiere coaster before Christmas and got myself in all sorts of strange contortions. Will be very useful next time. Thanks,Kerry.
ReplyDeleteFabulous, fabulous post! Thank you so much!
ReplyDeleteThank you for sharing, Kerry! I will try your way next time...
ReplyDelete; )
Thanks for the concise and comprehensive tutorial, you've thought of everything!!
ReplyDeleteI'll have to try it out. I just actually cut a double fold binding off of a mug rug because I hated it. I'll try your method...
ReplyDeleteReally good tutorial. Thanks for sharing your know how with us.
ReplyDeleteThank you Mrs A and all the rest of you for whom I couldn't find an email- I am so glad it has helped so many
ReplyDeleteI've just joined up for my first ever swap...a mug rug. The timing of your tutorial could not be more perfect. THANKYOU. Regards, Alison
ReplyDeleteFantastic tutorial, thanks for sharing.
ReplyDeleteI used your tutorial tonight for a mug rug and doll quilt. It was awesome!!! Thanks.
ReplyDeleteAlways good to hear that a tutorial works Katie!
ReplyDeleteI have often wondered about binding on little things - a double is too thick. Thank you so much Kerry! Danielle x
ReplyDeleteNo problem Danielle!
ReplyDeleteGreat tut! Thanks!
ReplyDeleteHello Kerry, wish I'd known about this yesterday, I struggled to get my mug rug binding on over the thickness of the wadding etc, it wasn't too bad until I realised I hadn't sewn the join up the right measurement and had to unpick it and do it again as it left a little pucker, I was NOT HAPPY JAN, I tell you.
ReplyDeleteBut, thank you for this tute, will try it this way next time.
Elaine
This is fabulous! Thanks for taking the time to do this tutorial for us. The pictures are great and you explain it very clearly. I never thought about how I could reduce the bulk by using single-fold for a small project. Well done!
ReplyDeletewow wow wow this is the binding tutorial everyone was talking about! You've done such a great job explaining this! I had never thought about folding 45 degree angle like you did, which you've proved that is a way to get a perfect binding for small projects!! I am so sure I will come back to this post when I make coasters next! Thank you for this!
ReplyDeleteKerri,
ReplyDeleteThis is a great tutorial! I used it to bind my mug rugs after struggling to get my other bindings neat, and it was perfect. I linked to this post in my blog about them too because I think everyone should try it!
I just completed my first Rug Mugs. I think I am hooked!. Thank you for the tutorial - easy to follow and great pics..
ReplyDeleteGlad it worked for you Diane and Jennie!
ReplyDeleteThanks so much for this helpful tutorial! I just used it on my first mug rugs and it was super helpful and well explained :)
ReplyDeleteHave just found this at the right moment Kerry - always use double fold but am making my 1st mugrug for a swap and will def do the single version, it will be so much lighter. Thanks for the tute.
ReplyDeletethanks for this i always struggle with the corners so from now will be looking to your way as my way !!! thank you :))
ReplyDeleteHi!
ReplyDeleteI've just finished a mug rug using this binding tutorial. I cut my strips 1 1/2 inch wide, though because I used a thicker batting.
Thanks for sharing!
Beatrice (from France).
I am so happy I found this tutorial it is exactly what I needed.
ReplyDeleteI am so happy I found this tutorial it is exactly what I needed.
ReplyDeletethanks for this tutorial but I have a question; my sewing machine can'tsew in zigzags only straight lines (it's very old!); would sewing around the edge in straight lines be ok at the start or would it be better to hand tack it or something?
ReplyDeleteSewing round the edge within the 1/4" seam allowance is fine. it is just to hold the layers at the edges.
DeleteI just followed the crumb trail from Craft Gossip--thank you, such a clearly written tutorial!
ReplyDeleteexcellent tutorial! I'm going to try this tonight on my first quilted coaster. Thanks for sharing!
ReplyDeleteexcellent tutorial! I'm going to try this tonight on my first quilted coaster. Thanks for sharing!
ReplyDeleteThank you so much for this excellent tutorial. I have just used it on a 3 3/4" mini quilt and it worked perfectly.
ReplyDeleteGreat tutorial! Thanks for the great directions and pics!
ReplyDelete