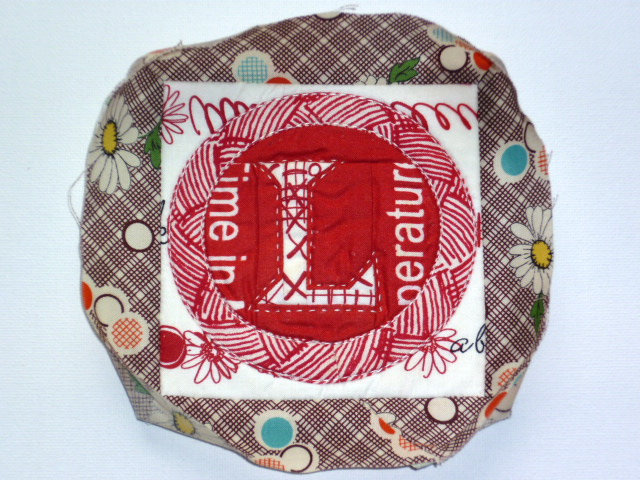
I have decided after seeing Nettie's rounded corner quilts here and here that I fancy the effect for this quilt. Her quilts were a big inspiration when I started quilting and continue to be so. I used a tea plate with a diameter of 7.5 inches.
 The curve runs 3 inches either side of each corner, my quilt corner starts at 1 inches on the cutting mat.

I pinned the curves about an inch from the edge after I cut them just to hold them for the next stage. I always zig zag around the edges of any quilt before I bind, from a coaster to a full size quilt. It makes life much easier to do this with the walking foot as this gives an even feed to bottom and top fabrics so there is less chance of ripples in the top fabric.
 I worked out how much binding I needed using Julie at Jaybird Quilts wonderful bias tute and calculation table. I used the second method with a standard 18 x 22 inches fat quarter which, with 2.25 inch wide binding, yielded the perfect amount of binding and some extra for this quilt. Although you have to cut using scissors, it only takes one straight seam to have a whole reel of continuous binding- fantastic! I hate joining with diagonal seams and by using this method I will only have to do it once at the beginning and end of the quilt binding.

Press the binding in half long ways- this takes ages! I don't use steam as it tends to distort but a bit of that homemade starch spray to stabilze really helps here. And then roll the binding up ready to use. If you want right angle corners and straight binding there are links at the end of this post to helpful sites to work out quantities, cut and attach the binding. You cannot use straight binding for curvy corners just incase you thought you'd try it! I would zig zag the edges of folded straight binding at this point (see Red Pepper tute below) but I didn't with the bias binding as I want a bit of give round the corners. If you can manage with it, keep the walking foot on for attaching the binding, it will yield more even results. I use the foot to help keep a quarter inch seam as I stitch the binding on.

I use the Red Pepper binding method but with some adjustments. I start by attaching the binding to the back of the quilt and I chose the left side of the quilt, near the bottom before the corner starts to curve as my starting place. I use 2.4 stitch length. I don't use any pins, I just guide with my fingers and keep my speed setting slow. If you are using the rounded corners method, the binding goes on much quicker- no corners to mitre! I sewed very slowly round the corners with a gentle tension on the binding to curve it round and used a quick unpic to hold the layers together.

About 12 inches before the end of the binding meets the start, stop, secure and get ready to join the binding ends together. I used Julie's method which is pretty standard but I find this bit the hardest of the whole quilt making process! Take your time, you might even want to tack/baste it before you machine together to check it works. I had to do mine a couple of times. Now, I do a good press and use the homemade starch spray. I press the binding away from the quilt.
 Use the tip of the iron to get right in the seam and the corners- the binding won't lie flat here but it will be fine when you flip it over. A small iron helps, I use a good quality travel iron all the time!

Turn the quilt over. I fold the binding so it lies a little over the stitch line and press lightly and without starch. All that pressing is a faff but it will make the binding finish so much better and lessen the chances of having to unpick bits if you are machining for the final stage.
 I now follow Rita (Red Pepper Quilts) method but with the right side of the fabric facing up. I have a colour to match the binding as top reel on the machine (YLI Machine Quilting in grey 011) and a colour to blend into the backing fabric on the bobbin (Gutermann Sulky col.1071), Stitch length 3mm, no pins but my fingers and where necessary a quick unpic, and the walking foot again. The top thread tail is lying to the left and the bottom thread tail to the right- to stop tangles underneath. I hold the binding just over the stitching line, and stitch as close as I dare to the edge of the binding.

The aim is to have front stitches at the edge of the binding where it joins the quilt and the back stitches blending into the quilt backing on the reverse.

 I never get this perfect in one go, but I usually only have a small amount to redo and it works out quicker for me than hand sewing.
Here is a neat machine sewn edge on the front...


I pinned the curves about an inch from the edge after I cut them just to hold them for the next stage. I always zig zag around the edges of any quilt before I bind, from a coaster to a full size quilt. It makes life much easier to do this with the walking foot as this gives an even feed to bottom and top fabrics so there is less chance of ripples in the top fabric.


Press the binding in half long ways- this takes ages! I don't use steam as it tends to distort but a bit of that homemade starch spray to stabilze really helps here. And then roll the binding up ready to use. If you want right angle corners and straight binding there are links at the end of this post to helpful sites to work out quantities, cut and attach the binding. You cannot use straight binding for curvy corners just incase you thought you'd try it! I would zig zag the edges of folded straight binding at this point (see Red Pepper tute below) but I didn't with the bias binding as I want a bit of give round the corners. If you can manage with it, keep the walking foot on for attaching the binding, it will yield more even results. I use the foot to help keep a quarter inch seam as I stitch the binding on.

I use the Red Pepper binding method but with some adjustments. I start by attaching the binding to the back of the quilt and I chose the left side of the quilt, near the bottom before the corner starts to curve as my starting place. I use 2.4 stitch length. I don't use any pins, I just guide with my fingers and keep my speed setting slow. If you are using the rounded corners method, the binding goes on much quicker- no corners to mitre! I sewed very slowly round the corners with a gentle tension on the binding to curve it round and used a quick unpic to hold the layers together.

About 12 inches before the end of the binding meets the start, stop, secure and get ready to join the binding ends together. I used Julie's method which is pretty standard but I find this bit the hardest of the whole quilt making process! Take your time, you might even want to tack/baste it before you machine together to check it works. I had to do mine a couple of times. Now, I do a good press and use the homemade starch spray. I press the binding away from the quilt.


Turn the quilt over. I fold the binding so it lies a little over the stitch line and press lightly and without starch. All that pressing is a faff but it will make the binding finish so much better and lessen the chances of having to unpick bits if you are machining for the final stage.


The aim is to have front stitches at the edge of the binding where it joins the quilt and the back stitches blending into the quilt backing on the reverse.


Here is a neat machine sewn edge on the front...

and a line of invisible stitches close to the binding on the back.

And yummy rounded corners, I will be sewing a lot more of those! I love this method!
So the quilt is finished, needs a label and some decent light to take finished photos. How is yours going? All the tutorials to make this quilt are here and you can do it any time and put pictures in my Flickr group, I'd love to see your work!
Binding links-
Binding basics, working out quantities and cutting binding Jaybird Quilts
Cutting bias the easy way and calculating quantities for bias from a square of fabric Jaybird Quilts
Continuous, straight or bias, attached by machine, hand sewn finish Jaybird quilts
Binding basics, working out quantities and cutting binding Jaybird Quilts
Cutting bias the easy way and calculating quantities for bias from a square of fabric Jaybird Quilts
Continuous, straight or bias, attached by machine, hand sewn finish Jaybird quilts
Continuous, straight or bias, attached and finished by machine Red Pepper Quilts