Showing posts with label mini quilt. Show all posts

Wednesday, 31 October 2012

Liberty Home Mini Quilt

Nova and Jo have been hosting the Liberty Scrap Challenge all through 2012 showcasing beautiful projects and tutorials featuring Liberty lawn.  The master list is here, a great resource with the gift making season upon us.  October is my turn  and I just snook in on the last day of the month!

I wanted to do a  foundation paper pieced design as Liberty lawn is an amazing fabric to piece with.  It has strength, vibrancy, and print variety whilst being incredibly lightweight and reducing bulk on seams.  Any of you who have paper pieced with linen  and dealt with the humps and bumps it creates surely know what I mean!  I have kept the design simple, suitable for a first time paper piecer and you can foundation or freezer paper piece.  You can find beginner resources here and at Sew-Ichigo and there are a wealth of videos on Youtube.  Techniques can vary but the principles remain the same.  As all these pieces are square/rectangles it makes for an ideal project to learn basic paper piecing an conquer any fears.  If a mini is not your thing, the house block could be used to make multiple terrace rows or just singularly for a little zip pouch. 
 Liberty Home Mini Quilt

You will need:
Home pattern sheet: To print correct size, open link, look for print icon top left corner and check 'actual size' is ticked.
Liberty lawn scraps including pieces suitable for fussy cutting windows and doors, roofs, path
Linen/light neutral scraps for house walls
Liberty lawn blue print: 2 1/2" x 11 3/4" for sky
Liberty lawn print for border: 2 strips 2"x 9 1/2", and 2 strips 2" x 14 1/2"
Batting 14" x16'": a cotton rich poly blend makes hand quilting a lot easier e.g. Quilter's Blend
Backing fabric 1 Fat Quarter
Assorted thread for hand and machine quilting

Finished size 11 1/2"x 14"approx.
Use 1/4" seams throughout.

Foundation Piecing
1. Print pattern and cut out pattern sections A and B allowing 1/4'' around both pattern pieces for seam allowance.
2. From your Liberty Fabrics fussy cut 3 windows 2" x 2" and 1 door 2'' x 2 3/4''.  The finished windows will be 1" x 1" and the door 1'' x 1 3/4''.   I have allowed a generous seam allowance for pre-cutting the fabric which is often a good idea for paper piecing. 
3.  Foundation piece sections A and B, trim seams as you sew to 1/4''.   Press each seam as you sew,
4. Join section A to B.  Remove paper, press seam downwards.
5.  Repeat steps 1-4 to make 2 more houses.
Freezer paper piecing
1. Print pattern.  Lay waxy side of freezer paper on top and trace with fine permanent marlier, e.g. Pigma Micron 01.
2.  Cut  out section A and divide int o separate pieces.   Freezer paper will be ironed to the reverse side of fabrics.  You will need to add a 1/4'' around edge of freezer paper when your cut the fabric out.  
3.  Join pieces in numerical order.  Once section A is complete, repeat same process with section B.
4. Join a to B.  Remove paper which can be reused for further houses.   Press seam down. 
5. Repeat steps 1-4 to make 2 more houses.
Assembling Mini Quilt
1. Join houses together in a row of 3.  
2. To create a path/pavement: Randomly piece small Liberty scraps that are at least 2'' wide.  You can improvise here.  Trim to make a strip 1 1/2" x 11 3/4".  Stitch to the base of the houses.
3. Add a 2 1/2" x 11 3/4" blue Liberty strip for the sky.  Stitch to above roof of houses. 
4. For border, add 2 strips  2"x 9 1/2" to sides of mini quilt.  Add 2 strips 2" x 14 1/2"
5. Press and baste or baste spray to batting.  Hand quilting can be added at this point. 

6. Trim excess batting. Place on lining, right sides together, and use as template to cut lining.   Keep mini quilt and lining right sides together and stitch around edges using 1/4" seam and leaving a 4" opening to turn through. Turn through, press and slip stitch opening closed.  You can add stitch-in-the-ditch quilting to hold the layers together e.g between the houses.  Bury the thread ends.
Your mini 'Home' quilt is complete!
Giveaway in exchange for a tutorial!
If you have a Liberty Scrap Challenge idea, Jo has a bag of Liberty scraps all ready for you.  Leave a comment describing your idea at then end of this post and I will pick one next Wednesday and Jo will send you the scraps-  open internationally so don't hold back wherever you are in the world and 
worry you wont be expected to post a tutorial until next year!    You are of course welcome just to comment normally without an idea so I don't feel too lonely in this post!
sib blog

Monday, 5 March 2012

Modern Mini

Modern Mini Challenge
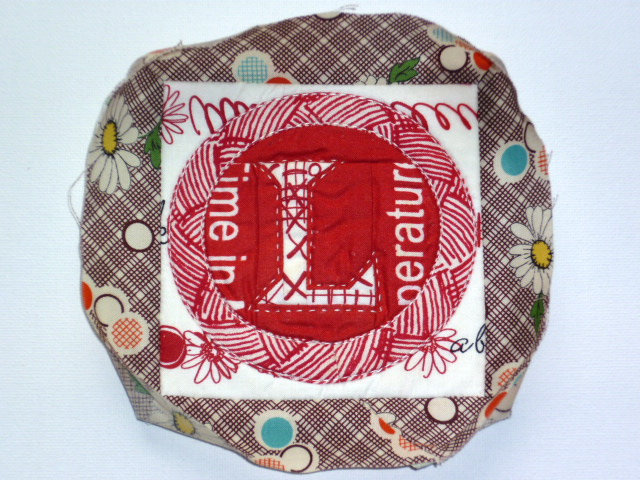
Here is my entry to the Modern Mini competition, 'Vintage Notions'
vintage Notions Modern Mini Quilt Entry
This mini started with a quilt block that  I have been working on for the Sew Out Loud quilt-a-long run by Julianna and Joanna and a big thankyou goes out to them for letting me preview it now in this mini.  I wanted to show how one 12 inch block could easily be the starting point for a mini quilt.  I know not everyone has time to make every quilt block in a quilt-a long and any of the Sew- a -long quilt blocks or many other quilt blocks would lend themselves to a mini.
My inspiration was a vintage sewing basket .  I have a few of these that I pick up for a few pounds at car boot sales and keep vintage treasures in.  These baskets often make me think about their previous owners: what they sewed, where the scraps and buttons and threads have come from.
  Many of us are only able to sew and quilt because our skills have been taught to us and passed on by mothers, aunties and grandmothers.  You might be lucky enough to have a sewing box or spools and tools that belonged to a relative and they thought of you when it was time to pass them on.  Very little is new in quilting or sewing, we just reinvent, reinterpret what has gone before.  We can pass our skills on over the web as well as in person, I just love that about the internet, the sharing.  So this mini quilt celebrates all those things.  Vintage notions that we use; the buttons and thread, vintage notions: the ideas that inspire us to make something new.
Vintage Notions close up
The centre sewing basket block,  will be available to download from Monday 19th March, the spools will be shared with those attending Fat Quarterly Retreat in June-I am running a workshop about freezer paper, Y seams and spools and the quilt will act as a teaching aid/ security blanket to hide behind.  I bought my train ticket yesterday, I can't wait!
VIntage Notions close up
  Technical details: 23" wide, 22" tall.
Freezer paper pieced, rotary cut piecing and a bit of free piecing.
Machine quilted and a bit of hand quilting.
There is a rouleau loop at the top of the basket for all you dres makers out there and the odd vintage button here and there.
Mini quilt single binding tutorial here.
And a thankyou to Jennifer for coming up with and organising the Mini Modern comp, I have really enjoyed seeing the blog hop contributions and ideas.
sib blog

Monday, 23 January 2012

Man Mini

A little while ago, maybe a year or so, a friend bought an old Ladybird book, Making a Transistor Radio.  Inside were the usual evocative illustrations including a great colour block image of radio resistors, an idea hatched but it has taken till now and a big birthday for my friend James for me to realise it.
The design is straight from the book, I love radio but have no idea what it means beyond a colour coding system.  That doesn't matter, James knows what it means and I like the way it looks.  A mini quilt, mug rug, man mat- whatever, it is on the wall in their family kitchen with some other makes from me in a mini gallery.
The colours are from a Kona rainbow charm pack, the gold and salmon 'Tolerance Colours" are from vintage scraps.  I have no % symbol in my stamps so I improvised, need often makes for inventive moments.  Versacraft ink as usual for the stamping.

The back is a funny Japanese text print all about String theory and other rather weird references.  The whole thing is only 9" x 7".  Fun to make and well received.  The same book had this , what a great little source of inspiration.
sib blog

Thursday, 19 May 2011

Spring Quilt Festival

Want to be inspired?   Take a visit to the Spring Bloggers Quilt Festival 2011 over at Amy's Creative side.  Everytime I find something that I haven't seen before.  
If this is your first time here, I should say hi and welcome.  I am Kerry and I share my vintage and sewing life here.  Small scrappy projects are what I enjoy the most so it is no surprise that my entry is a mini- I haven't made a big quilt in a while but a whole load of work goes into my little quilts.
I made the for the Doll Quilt 10 Swap on Flickr.  It was for Terrie Sandelin her work is normally teeny tiny, intricate and ordered with a traditional feel..  Her tastes are pretty flexible and she had a lot of circles on her inspiration mosaic so that was my starting point.  I love piecing curves and circles and I have wanted to try a radiating pattern for a while.  I used Flickr to find pictures of spirals and circles- dandelion heads, broken glass etc- they all helped with building the idea.  Then a song crept in, it all fitted together- search through for the lyric!


 I used an Ez Dresden cutter to help with the pattern pieces and a mix of ticker tape pieces onto neutral wedges and pieced strips.  The stamping is with Versacraft ink, perfect for fabric and heat sets with an iron.
I then added some hand quilting with chunky perle cottons and appliqued the centre circle in.  It was one of those quilts where you just keep working it until you feel it is done.  All those yellows and turquoises make me so happy and I still feel really happy looking at it!
Enjoy looking round x
sib blog

Thursday, 24 February 2011

The Kitchen, that's where You'll FInd Me...


I made this for a fun secret swap on Flickr- Favourite Little Quilt Swap, run by Kendra. There was a date to complete by and then all the mini quilts were anonymously displayed and the creators vote for their top 10 out of all the completed entries.   We are then secretly told who and where to send our quilts.  Then we must wait to see which one we will receive from our top ten list!
 As there is no one specific partner in mind, there is complete freedom to design any quilt you like.    This idea has been in my head for some time, inspired by some blocks in Kumkio Fujita's 318 Patchwork along with bright enamel vintage kitchen wear.  The piecing was surprisingly straightforward,   however the hand written note was nearly my undoing.  I felt like Goldilocks tasting the three bears' porridge...
Hand sewn, polyester thread- melted under the iron
Linen, machine sewn- too big
Hand sewn, embroidery floss- too bold and chunky
Stamped- too close together
 
Stamped with correct spacing- just right.  
 I can't even show you the stamping I did with red ink that I couldn't set on tiny scraps of linen- my little dog, Lottie kept finding them and eating them so they ended up in the bin!
Vintage large polka dot fabric on the back along with scraps from some of the front fabrics.
The prairie points on the shelf were adapted from Penny's great tutorial at Sew take a Hike.  The mini quilt was posted a few days ago and is on its way to its secret new home x
sib blog

Thursday, 20 January 2011

Quilt-a-long with me?

It was my friend Kathy's birthday.  She is a great friend, very supportive and lots of fun plus our dogs were from the same litter, so we have a bond!  Last year I made her a little log cabin coin purse/pouch,  it is wearing out a bit now so time for a new one.
I made the shape up so it was a bit experimental.  At one point it was way too big and like a toiletries purse- not the look I was aiming for. I free pieced the K with purple linen.  I squared off the bottom to give a bit of body to the shape so it can comfortably hold coins, this meant the fabric spelt out Cups Butt on the bottom, noticed of course by her teenage son-it had completely bypassed me.  The fabric is Suzuko Koseki cotton/linen cooking print, and there is a layer of cotton batting between that and the black polka lining.
 It is small enough to fit in your hand, large enough for notes.
Having used much of my solitarty FQ of Cosmo Early Bird Yellow plaid in a quilt block I knew I would need more.  When I bought this I thought I wouldn't use yellow much and now I can't get enough of it.  The teal and the exercise book stripes are a great accompaniment, all bought from Quilted Castle (USA), although I think stocks are going.  The cup is the most beautiful Le Cresuset graduating turquoise colour .
I yielded to that and having read Amber's blog One Shabby Chick this morning, I checked out the link to an etsy shop  and bought a pile of Ruby Star Rising at a price that is cheaper than it will be in the UK.  I already know what I plan to make so I can sort of justify this but no more buying, making instead.  I have been drawing inspiration together for DQS10, this is for shapes and form.
And I am working on another secret mini quilt for Favourite Little Quilt Swap.  I wish I could show you, I am so pleased with it but the swap works on secrecy even of pics so no sneaky peeks.  So in the mean time, I am starting on a wonky Circle of Stars Baby Quilt- care to join me?  I am going to make it a quilt-a-long.  I am not sure if any one wants to quilt-a-long with me but as I am going to blog it I thought it was worth putting the offer out!  It will be made of 9 wonky star blocks, easy peasy! You will need some scraps and other stuff, list below.  Mine will be pink, your will be...?

 You will need:
1.  At least one yard of solid fabric, or being more generous 1 meter- (equivalent to 1 yard and 3 inches)
2.  Scraps for the starts, I am fussy cutting centre squares so you will need  9 x 5 inch squares (larger to allow for the fussy cutting.
3.  Scraps for the triangle points-great scrap buster.  Scraps need to contrast with the solid.
4.  1 yard/1 meter cotton batting, I use warm and natural.
5.  Fabric for binding.  Could be pieced or all one fabric.  If you do the bias binding option the way I do it, 1 fat quarter will be ample.  If you do straightgrain binding. you would need under 1/2 yard or a 1/4 metre length which is cut selvedge to selvedge.
I will make a button in case you want to put it on your own blog- I am on it now!  In the meantime, the sketch above gives you an idea of the layout.  It will be very flexible and a lot of the choices are up to you but I will give you the instructions to make a circle out of 9 wonky star blocks.   I need to get this made for the end of February at the latest so I will post the first instructions asap. Leave me a comment if you are joining in, nice to know if you are x
sib blog

Monday, 3 January 2011

Single Binding Tutorial

Quilting those smaller items- mini quilts, mug rugs, coasters, placemats etc is tricky.  Double bindings are too chunky and sewing them on by machine l doesn't seem to work out the same on these little things.   A good binding lifts your creation and a bad binding can detract from all your hard work. I am sharing all my best tips in a picture-packed tutorial  The pics show a coaster but I call it a mini quilt throughout for ease.

1.  Trim your item with a rotary cutter and rule, then zigzag round the edge.  Don't zig zag into the corners as they tend to distort- I pivot around them.  This stage is optional but it does keep the edges nice and neat.


2.  Cut your binding a scant 1 1/4" wide using a rotary cutter and rule.  Cut across the grain; selvedge to selvedge.  Unsure what scant looks like?  That's my scant 1 1/4" inch version below.  This is going to create a narrow close-fitting binding.  If this is your first time with this technique, you can cut your binding 1 1/4" wide for a big of wiggle room and not worry about the scant option. 

If you want to use bias binding (cut on the bias diagonal of the fabric rather than across the grain) for round mats or rounded corners, cut a little wider, 1 1/2"


3.  At one end of your binding, turn over the corner to make a right angle triangle and press.

4.    I normally start binding at the mid-bottom edge of the project.   Remember the join between the start and end of your binding will be here. I don't use pins when machining small items,  but if you would rather go ahead!


5.  You have to allow for joining your binding so on a really small piece like a coaster although the binding lies halfway across the bottom,  I am only going to sew the last inch towards the corner, the first bit of binding will therefore not be attached yet, just lying ready. Use a 1/4 inch seam allowance- I use my 1/4 foot to guarantee it, accuracy on this makes a big difference.  Secure at the beginning and end an stop and secure 1/4 inch before the end of the mini quilt corner.  
6.  You will need to mitre the corners.  Not sure how? See my mitred corner's tutorial here!  I attach the binding all the way round until I am within 3-6 inches of the where the binding began depending on the size of the object.  Secure your last bit of stitching at this point.
7.  Line the edges of  binding up diagonally, you will need to turn the end of the binding away from the mini quilt.  You need to make sure that the unattached binding is not too slack here or it will be too loose when you come to machine sew it.   Press the diagonal folds.
8.  Take a small needle and co-ordinating thread with a knot at the bottom and push between the  diagonal folds- see how the needle is going through at a 45 degree angle? 
9.  I folded back the left hand binding fabric here so you could see how the needle tip angled through.
10.  Push the needle back through angling the opposite way and keep this going until you have line of little hand stitches joining the binding.  You can always put in the odd back stitch for security.  I have found hand stitching more accurate for joining binding especially when there is so little room to join the two edges by machine. 
Just showing you the other side of the join here.
11.  Trim the edges to 1/4 inch and press open.  Now you can machine stitch across the last bit of unattached binding
One side of binding is attached.  
12.  With your fingers, open the binding outwards so you can see its right side and give it a good press with your iron.
Get right into the corners with the tip of the iron.  A little iron helps, I use a travel iron.
This is how it looks on the underneath side.
13.  Turn your mini quilt so the underside is facing you and along the edges (avoid the corners) turn the binding in so that the edge of the binding meets the edge of the mini quilt.  Take your time here.  Doing this bit really well will given you an even, narrow, close fitting binding.
14.  This is how it will look.  The corners are too fiddly to do with the iron, we'll do these with pins in the next step.
15.  Take the pressed folded edge of binding and line it up ever so lightly above the stitching line, pin to secure.
You can fold and overlap to get your corners nice and sharp.
It ends up looking like this.
16.  With a little needle and a thread with a quilters knot in the end, secure your thread into the mini quilt seam allowance to hide the end and we are going to hand sew the back of the binding with ladder stitch. If this is new to you there are lots of diagrams and you tube videos but it is pretty easy and the stitching is almost invisible.  I take a stitch just above the machine stitching line where the binding was first attached...
and then a stitch through the pressed fold of the binding, pull gently and repeat- that is ladder stitch!  Stitch all around the binding.
Your mini quilt/mug rug/coaster/placemat binding is complete!
This method is not super speedy but it gives me good results, I hope it works for you.  
Any queries or problems with it- email me and let me know!