Wednesday 30 September 2015

My Small World Quilt Along: Conclusion

 As the My Small World quilt along posts come to an end, I've basted my version and started quilting.


I'm not a planner when it comes to quilting.  I had thought that I would just grid quilt it to make it robust for family use- it will go on our sofa.  I am grid quilting the sky but have other plans for the other sections.


As you can see in this pic, I am added hand quilting.  I don't know how much, but I did know that I didn't want to machine quilt the curves so I started with a few hand stitches and kept going. 


Hand quilting does not come easy to me.  I find it a strain on the hands so I'll be doing little and often rather than long stretches.  I am using Coats Cotton 20wt hand quilting thread bought from Amazon which is similar to Gutterman hand quilted thread- Chase recommended this and I greatly enjoy using it.  It has a coating like the Gutterman but is a little thicker.  Lovely to sew with.  Wynn sent me the Fujix Quilt Farm which is very similar and although it's polyester it feels just like cotton.   I have a pretty basic rocking technique and I don't use a hoop as I find they annoy me!  I do use leather thimbles, one to push the needle through and the other to meet the needle on the reverse side.  Here's hoping that more practice will improve my skill.


For those still looking for the My Small World quilt pattern, Jen Kingwell is releasing it as a pattern soon, I believe it is currently at the printers. Thank you Jen for a design that has inspired so many quilters to make their own small world.  It is definitely a quilt for learning!  I know I've certainly improved my small piecing skills and accuracy along with appliqué and hand piecing.  I'd like to say a big thank you to my co-hosts and their tips and tricks, John, Megan,  Lisa, Danielle and Cindy.    Cindy has finished quilt to show you which is stunning!  And another big thank you to all of you who have taken part and shared your work, it has been a pleasure to see so many! All the quilt-along posts will stay up if you are still working on earlier sections.  I'd love to see and finished tops and quilts, you can tag my on any pics on Instagram, I am @verykerryberry.  It has been a wonderful experience quilting along with so many people.

sib blog

Tuesday 29 September 2015

September at Plush Addict

The end of September is proving to be glorious weather in the UK, especially down here in the UK.  I'm making most of the daytime sunshine, wearing my summer dresses before they finally get put away for six months.  Time to visit Plush Addict and see what's in store this month...

Plush Addict has a variety of special offers each month- you can see them in one place here.  The 20% discount on Little Darlings cotton/spandex jersey caught my eye with these nautical prints:
Although the print range  which also includes cats and rainbows is obviously great for children's clothes, I think the anchor print would make great women's wear jersey tops too. These are 150cm wide and I generally buy 1.5m of jersey in this width to make long sleeve tops and its usually ample.


Another couple of jersey fabrics caught my eye- I wear a lot of jersey tops over autumn and winter!  This bamboo jersey in green melange is a deep forrest colour, very wide at 164cm and a mix of 90% bamboo and 10% polyester.   Bamboo usually has a lovely feel so I'm tempted to order some of this to try it out.  It's also available in black


I'm also tempted by this navy/white pin dot viscose jersey which looks very wearable with all the blue in my wardrobe!


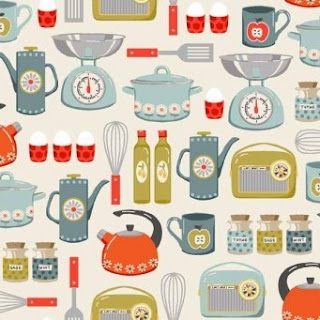
In the quilting fabrics, you know I have a bit of a weakness for kitchen prints so Makower's new Lila's Kitchen has a lot to like!  The Accessories print is my favourite from the collection:


I think a lot of people will like the Clocks pattern too, it would make a great bag outer or lining.


Moda have a gorgeous Kawaii inspired fabric collection by Abi Hall, an English designer, which is gloriously illustrated.  This is Happy Town- hints of Richard Scarry in there too!  I have a feeling this range will fly out of the shop!


Happy Friends in Aqua (also in white) features all the animal characters.


There's a treehouse panel that would make a lovely and simple wall hanging.


There are prints which are not so obviously animals and kawaii fun like the Patchwork Garden multi print.   It makes me think of kitchen chair pads, table cloths and quilt backs.


Finally, I always ask Kellie if she has anything special in that I may have missed and she mentioned this amazing high quality oriental images chambray jacquard.   There are amazing floral and animal images woven into the fabrics!


sib blog

Monday 28 September 2015

Farmer's Wife 1930s QAL Blocks 5 and 6: Anne and April

Welcome to the third weekly post in the year long project of the Farmer's Wife 1930s Quilt Along.   Block five is is 'Anne' (p.164, letter p.46) Jo is posting about this block over at A Life in Lists.  A little note for foundation piecers, because of the way the pattern is designed your block will spin the opposite way to the block in the book. Technically, the pattern pieces needed to be reversed to match the book photo. Jo goes into this on more detail on her post.


Fabric Credits

Block six is 'April' p.165, letter p.134: 


Fabric Credits
Robert Kaufman Fabrics, Penny and Friends, Square Dance Camelia
Bella Solids in Peacock
Kona Corn Yellow

I found the construction of this block relatively straightforward,  but there are an awful lot of pieces which are easy to muddle up, the block pattern is seen more clearly on point rather than square on and choosing the right level of contrast was hard!   I went through three combinations before I got the contrast right!  Less is more: reducing the number of patterned prints in a block works better for me than two or three patterns, and if in doubt, use a solid.  There's a reason that these blocks work well with 1930s reproduction prints.  The small, often multi directional designs lend themselves to tiny pieces.  These are my various combinations and I am not totally sold on the colours I finally went with but some blocks are going to end up at the end of rows cut in half and this may be one!


Foundation Paper Piecing Fabric Cutting
These shapes are all rectangles, squares or right angled triangles so this is a very straightforward block to cut out.  I used the rotary cutting instructions for all the shapes with the addition of ½" so for example a 2" square would become a 2 ½" square which adds some extra fabric for foundation piecing.  For shapes A1, B1, C1, D1, I cut out 2 ½" squares.  As these are the first pieces in theses sections, they will get trimmed to shape as you add the triangles (A2 and A3 etc).   You can download a free guide to foundation paper piecing here.

The tricky part of this block is not the piecing, it's the arranging the colours and fabrics and getting them in the right order to piece.  The block is symmetrical when on point but not when square on (the symmetry line is diagonal). I used a dash of coloured pencil to keep myself sane and I looked a lot at the photograph on page 165 as I was piecing.


These things made my piecing easier!
  • check your fabrics for contrast
  • colour code pieces on foundation patterns
  • remove paper just before stitching sections together
  • check your block with the book images square on and on point 
When it comes to joining the sections.  I trimmed them down, removed the paper just before I was ready to join so I knew I had the right piece and the right orientation and then pressed the seams to the side so they would nest together with their corresponding section.  This makes joining a lot easier!  There is an instruction to 'Sew these three large sections together as in block diagram'.  It's slightly confusing because the block diagram has rows joined horizontally and the foundation method has columns joined vertically.

Any questions, please comment and I'll answer below.
  • Use #fw1930sqal on Instagram and there's also a Flickr group if you like to share there.  
  • You can also copy and paste links to any of your blog posts for these blocks into the comments - I'd love to visit and take a look. 
  • For individual blocks, you can use #anneblock and #aprilblock on Instagram
  • I'll be introducing this post on Periscope with a short broadcast talking about contrast with fabrics around 2.15pm GMT today and it'll be available for 24 hours to replay before it disappears! Link will be in my twitter feed @verykb
Please note:  I have linked to my sponsors on items bought through them and elsewhere for anything that has come from other shops.
Don't forget to visit Jo's post on Anne.  Back next Monday with Justine and blocks 7 and 8.

sib blog


Saturday 26 September 2015

The Art of Papercutting by Jessica Palmer: Book review

I like other crafts apart from sewing.  I'm a fan of papercutting, it's more appreciation and enjoyment of others' artistry rather than producing papercut artwork of my own.  My husband makes me papercut cards.  He's not a particularly artsy person, but we both love papercut art, especially those with a dark, fairy tale aesthetic.  Search Press sent me a list of their latest art and craft titles up for review and rather than the usual quilting books, the cover of Jessica Palmer's The Art of Papercutting caught my eye,


You may recognise her name and style from the hugely popular Tangle Wood, a deluxe colouring book printed on beautiful quality paper.  Her papercutting aesthetic is slightly different; I can see lots of European art traditions  influencing her work and I especially like her use of colour in amongst all the back and white.  The bird image below is a Polish Style wycinaki piece.


I handed this book first to my husband as he has done a lot more papercutting than me and we ended up going through it together.  We both agreed it is a practical book, packed full of amazing inspiration and papercutting eye candy but with easily accessible text and instructions.  Jessica encourages you to get started, find inspiration and sketch your idea. 


She lists easy-to-find equipment, no frills.  After a little digging around, I found I had all the materials I needed in the house and I use sewing carbon paper to transfer my design.


Around a third of the book is history, techniques and papercutting genres, the rest is about art in paper and shows examples  of different papercutting art from book covers to life drawing and includes additional techniques and information with it.  The 'Cutting with a Knife' section in the first part of the book has concise text and large photographs so you can see each step of the process in detail.  There are practical tips sprinkled throughout the how-to sections and I picked up some useful ideas like wrapping the end of the knife in masking tape so the blade doesn't dig into your fingers!  The iris design on these pages is one of the templates included at the end of the book.


Jessica's artwork is jaw-droppingly good.  She's bold and exploits the contrast of colour that can be easily created with solid paper as well as the fragility of the form.  I love the variety of artwork that she's included in her selection, it's a pleasure to browse through.


The templates at the end can be seen in their finished art work form elsewhere in the book.   I'm not sure they were totally necessary, they seem like a bit of an extra addition but if you want a starting point they can be traced or scanned for you won use.  The text says they are of 'increasing complexity' although that is not reflected in the order they appear- that seems very mixed up!  The Iris design below is relatively straightforward but the Fern papercut next to it is a real challenge!


I originally chose to review this book with an eye to my husband being encouraged to do more  papercutting but I was so taken with the imagery that I gave it a whirl.  Paper crafts are not my strong point.  I find paper rather ephemeral and although I love drawing, cutting and fragility make me a little tense!  I chose a vintage image from a Singer Sewing book as a starting point.


I simplified the design along the way; I omitted the flower, kept the bobbin and added the needle and thread.  I used some  brown wrapping paper for the underlay behind bobbin and some marbled paper from distant primary teacher days (that paper must be 18 years old!).  The design was simple enough to cope with my lack of experience and I liked the result!

These are a couple of cards my husband has made for me over the years.  Much treasured!


We both rated The Art of Papercutting very highly .  It's got a great mix of practicality and artistic inspiration.  Jessica Palmer's artwork is so enjoyable to look at and there's a huge breadth in her work. 

*This book was sent for free for review purposes. I only review books that I have a genuine interest in. All opinions are my own*

sib blog

Friday 25 September 2015

Blue Brumby Skirt Review

This make has been sitting in a back log of projects waiting to be blogged, meanwhile, I'm aware that whilst the sun is out for the next few days in a glorious end to September, Autumn is kicking in!  The notable thing about making the Brumby skirt, pattern by Megan Nielsen, is that all the instructions can be followed from the Megan Nielsen pattern app and I did just that.


It's a straightforward make and you can view each step of construction on the app.  Notable features a shaped waistband, deep pockets and an exposed zip.  The shorter version of the skirt is based on a rectangle shape, the mid calf view is made with shaped, slightly A-line pattern pieces and the pattern includes separate skirt pattern pieces for each.   I bought it as a download.  I didn't find the pattern pieces especially easy to navigate so that I could print particular pieces and I know Megan is thinking of adding a pattern pieces map at the start of the app but I can't see it yet.  I made size S and lengthened the skirt by a couple of inches.  The fabric is a light weight denim, left over from my 70s style trousers!


I am a little unsure about the gathers all round my waist.  I like how it looks in these pics but in everyday wear I found that much bulk around my midriff a little uncomfortable.  I might modify it to have no gathers at the sides but it was great use for a small remnant of fabric.  Clogs are from Lotta of Stockholm, they were seconds and that section is always worth checking out!
sib blog

Thursday 24 September 2015

Sew Brit Bag Sewing Camp

Lots of UK quilters and a few Europeans too are heading off to West Yorkshire for a weekend retreat ofsewing with Justine, Lisa and friends at Simply Sew'In and yet more quilters are travelling up to Scotland to Jo Avery's annual sewing retreat, Stitch Gathering, which is also on this weekend.  If you fancy doing something similar,  Katy of Littlest Thistle sent me some info last week on Sew Brit Bag Camp, a  retreat planned for next March where the focus is bag making.
It's taking place in a beautiful looking venue in the south of the Peak District national park.  Find out more here

sib blog

Monday 21 September 2015

Farmer's Wife 1930s QAL Blocks 3 & 4: Alice and Ann

Welcome to the week two post in the year long Farmer's Wife 1930s Quilt Along.   I've been enjoying seeing your blocks, especially on Instagram.  Look at the hashtag #fw1930sqal and you'll see what I mean.  I had a brilliant suggestion from Amanda of @thepatchsmith who came up with a hashtag formula for each block #name block so this week's blocks are Alice and Ann and will be #aliceblock and #annblock.  This allows you to see not just what's going on in the quilt along but also how other pople have interpreted specific blocks.  Block 3 is Alice (p.162, letter p.85) and she's a tricky one!


Fabric credits:

Do check the errata page for this block.  The foundation paper pieced pattern is fine (although the labelling needs revising on J and K sections see errata), as is the block diagram but there are issues with the templates and you will need to use a different version than the one currently on the CD.  There are alot of small pieces in this block which is what makes it so challenging.   If you would like to English Paper Piece this block like Jo Avery of Bearpaw, do go and read this excellent post about how she is going about this.  For EPP,  I would also suggest using the block diagram for your paper pieces.  It prints out at 6" square and will provide all the pieces you need for a block in one printed sheet of paper.  This is just a screen shot so you know what to look for, it is not the correct size!


I did have to starch (I use Soak as a final spray for all my #fw1930sqal blocks) and press this block into submission after removing the paper, it was a little wavy!  As with last week's block, here are my cutting suggestions which allow around ⅜" to ½" around the seam lines for each piece so that the piece of fabric is always bigger than needed:

Foundation Paper Piecing Fabric Cutting
A2, A3, A4, B3, B4, B5, C3, C4, C5: cut (9) 1 ½"squares
A1, A5, B2, B6, C2, C6, G1, F1, H1, I1: cut (12) 1 ½" x3"
B1, B7, C1, C7, G2, F2, H2, I2: cut (2) 2 ½"squares, sub-cut each square twice diagonally to make 4 quarter square triangles, 
J1, K1, L1, M1: cut (2) 2" squares, sub-cut each square once diagonally to make 2 half square triangles
J3, K3, L3, M3: cut (4) 1 ¼" x 2 ½"
N1,O1, P1, Q1: cut (4) 1 ¾" x 2 ½"
O2,O3, N2, N3, P2,P3, Q2, Q3: I used freezer paper templates and this technique.

The order of sewing on foundation paper piecing blocks varies between having to be in numerical order to work and being up for interpretation so you may find that you would rather sew some sections in a different order.  For example on sections B and C, I would add the end triangle pieces last but it still works as it is on the pattern.  You can download a free guide to foundation paper piecing here.  For the N,O,P,Q sections I used freezer paper templates for the pieces that sit either side of the points.  First I prepare the points N1,O1, P1, Q1 by sticking the rectangle to the back of the section with a Sewline glue stick.  I then fold the pattern along the pre-creased lines and trim off the excess fabric leaving a ½" seam allowance.


I then prepare the side pieces using a freezer paper template (no seam allowances on the templates) I add ½" all round as I cut it out.


 Here's a finished section!


The message to take away from the letter this week is for mother's to not worry about cooking and cleaning but instead take time to play with the children.  My daughter is past the play stage but I do take every opportunity to share time with her- today's activity might be watching a YouTube comedy clip or baking together but I'm well away that she'll be off to uni in no time at all!  She's already bagged this quilt for when she goes.

Block four is Ann (p.163, letter p.24), Charise is guest posting on this block so scoot on over to Charise Creates to see her creation and pick up her top tips!  Here's my version.


Fabric credits:
Robert Kaufman Penny and Friends- Plaid Aloe
Kokka Lighthearted: Kitchen floral in turquoise
Kona Buttercup

  • Use the hashtags  Don't forget to use #fw1930sqal on Instagram and the Flickr group if you like to share there.  
  • You can also copy and paste links to any blog posts you do on these blocks in the comments and I'd love to visit and take a look. 
  • I'll be introducing this post on periscope.tv/@verykb with a short broadcast  around 2.30pm GMT today and it'll be available for 24 hours to replay before it disappears! Link will be in my twitter feed @verykb and I'll post on Instagram and twitter about 15 minutes before it does out.
Please note:  I have linked to my sponsors on anything that I have bought through them and elsewhere for anything that has come from elsewhere.

And an extra bonus, I had an email from Kam of Needle Plus Thread who, with permission from the publisher, has created a free colouring sheet you can download featuring the first five blocks.  Go to her  blog for details.   I know I could've done with this for block 6, I'm on my third version!

Back next Monday with Jo and blocks 5 and 6.

sib blog