Wednesday 12 December 2018

All You Need to Know About Pattern Trace/Swedish Paper + Discount Code!

I've been sent a roll of Patterntrace Swedish Tracing Paper to review.  It's actually something I've used for years when tracing clothing patterns!  I used to buy it from various obscure online sellers who knew it's secret powers and I think it was shipped from Canada then.  At times, supplies were hard to find and deliveries could be delayed for months.  In 2014, Clare devised a business idea having watched Sewing Bee and heard about the wonders of Swedish Paper and managed to find a UK manufacturer, she's been selling it ever since.  So, I thought I'd share with you what it is and why I like to use it, plus there's a discount code coming up...


Patterntrace is a lightweight translucent tracing paper that is ideal for tracing garment patterns.   Swedish paper doesn't really feel like paper- it's much softer and more forgiving to handle, it even has a little drape to it!  Instead, it feels similar to a very fine, nonwoven interfacing but much smoother and although it is thin, it's got some resistance to tearing.  I've traced many of my favourite tried-and-tested patterns with it and they have stood the test of time.  It has a wide width at 1m so there's no need to tape sheets of paper together and I save the offcuts for tracing smaller pattern pieces like pockets and facings.  I like to use a soft pencil when I'm tracing, preferably a Sewline Ceramic pencil as it glides over the surface and can also be erased if I trace the wrong line or notch!  You can see my other tracing tools- a quilt ruler (whichever I grab first), and pattern weights (the mini irons).


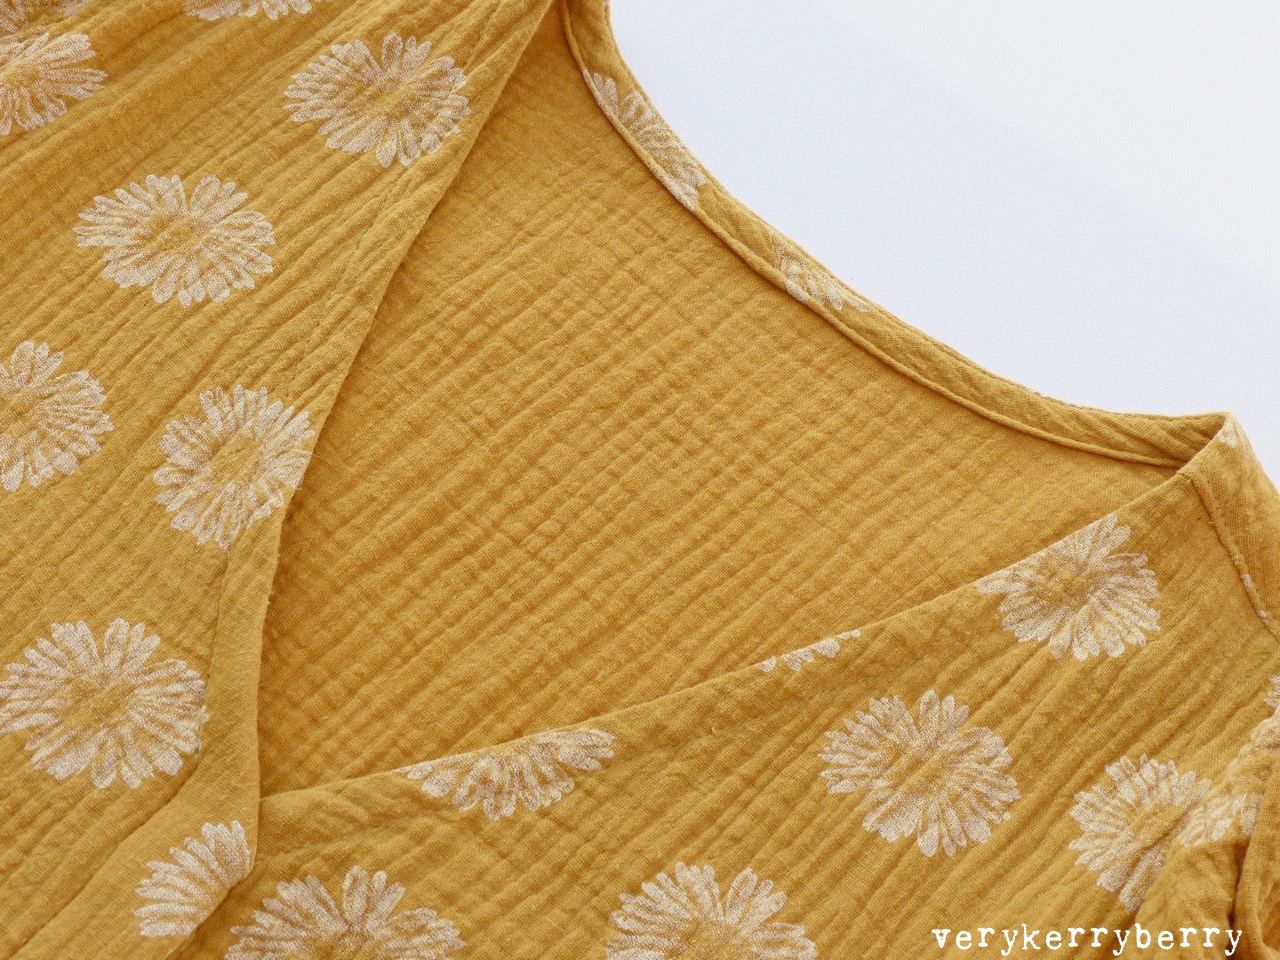
So why trace in the first place?  I don't trace every pattern, but when I make a garment with bodice pieces, I know that usually needs several alterations and by tracing, I'll retain the original pattern as a reference if I mess anything up!  I also use it if I'm making a garment in more than one size, e.g. one for me and one for my daughter.  At other times, I trace particular elements, especially sleeves so I can have a short, mid-length and long variations.   I've tried greaseproof paper, dot and cross paper and brown paper and they can be awkward to handle as well, hard to see through, as well as creasing and folding when I don't want them too and generally irritate me when I'm using them in large pieces.  Because Patterntrace is soft, the pattern pieces can be pinned and draped on the body so I can get an early idea on fit.  The softness is also more forgiving when working in a small space as it will gently crumple rather than tear and easily flattens.  I sometimes iron swedish paper pattern pieces I've used before that have been stuffed in ziploc folders and the storage creases come out easily.  It takes up less room up than standard paper when the pattern pieces are folded up.


 I also trace when I want to experiment with an alteration.  In the example below, I'm tracing The Assembly Line Apron dress which I'm going to lengthen by 2 inches using a slash and spread method.  I want to keep the original pattern intact so I can still make a shorter summer version.  I trace the front dress and back skirt and add a horizontal line to each, the same distance up from the hem.  This is then cut and pulled apart so there's a 2" parallel back between the two pieces.  This is a rare occasion when I'm quite happy to use fabric scissors or paper scissors as I don't find Swedish Paper blunts the blades, it cuts easily too!  I use an invisible tape (like Scotch Magic Tape) when I'm altering pattern pieces.  It lies very flat and it can be drawn on (although avoid the iron!).


Ultimately for me, Patterntrace makes tracing a more pleasurable experience.  The resulting pattern pieces are easier to handle, I can try the pattern pieces on and it takes pins much more easily than standard paper - what's not to like?
You can get a 10% 0ff all orders including Patterntrace with the code Verykerry
Pattern Trace is available as a 10m roll (1m width), or you can try a mini sample piece.
Check my Instagram @verykerryberry for a Patterntrace giveaway...

Thursday 6 December 2018

December at Plush Addict and Eternal Maker

I wanted to get my monthly sponsor post in early in December so there was still time to order and receive items for Christmas. I've chosen a mix of quick gifts you might want to make,  quilting and dressmaking suggestions that you might like as a gift, or make for yourself (or others), plus some fabric that you just might need to have!

Plush Addict


  1. Dashwood Geo Forest 7 FQ Bundle.  Lovely colour palette and a mix of geometric and woodland designs. 
  2. Tilly and the Buttons Nora Top Pattern.  A relaxed fit jersey top with lots of variations from T-shirt to sweatshirt style, with and without a neckband.  This Ponte fabric would give you a more structured long sleeved Nora with neckband and is quite a stable stretch fabric so an easier knit to cut and sew.  This Cherry pattern cotton/elastane jersey would be good for a softer long or short sleeved Nora.
  3. Quantum 28 FQ Bundle (also available as individual yardage).  All the saturated colours from Giucy Giuce, geometric patterns galore! 


Eternal Maker

  1. Robert Kaufman Navy Plaid Tahoe Flannel. Thick brushed cotton flannel.  This would make a super snuggly check shirt like the Grainline Archer), dressing gown or pj pants.  Or a simple scarf or pillowcase.  Also available in a lighter Cream Olive Plaid colourway.
  2. Perfect Rainbow Kona Bundle (15Fqs).  Always have the perfect Kona colour to hand!
  3. Sweet Ton of Tags Kit.  Baby blankie tag kit, easy-to-sew kit to make a baby's first Christmas present.
  4. The Bear Necessities Cute animal print by Como Tex, hard to resist those bears...

Wednesday 5 December 2018

The Assembly Line V-Neck Dress in Chambray

As promised, here's my second The Assembly Line make: the V-neck Dress.  I was 
 attracted to this style by the narrowness of the V-neck and the back neck collar, plus I knew I'd enjoy working through the collar construction. I used some Robert Kaufmann medium weight Chambray Dobbies Hash that I've had for three years waiting for the right project and it turned out to be a winning combination!


The standard seam allowance on Assembly line patterns is 1cm (3/8") so I made a rough toile of the top part of the dress to test the depth of the V and fit around the sleeves.  I went for quite a close fit and ended up raising the V point by around 1/2" which also brings the neckline in slightly and added a rounded back/shoulder alteration which is standard for me.  Fitting for this style is all about the neck, shoulders and bust; getting those areas to fit well avoids the sack-like potential that can easily happen on a dress with optional waist definition.   


 My other alterations were to move the end of the bust dart upwards by 1/2" and redraw the dart,  and I also extended the dress hem by a couple of inches. Otherwise, I cut the pattern in size XS and the combination of the fabric and instructions meant the construction was a joy.  I love it when details like exactly when to overlock on a trickier section are included as it makes for such a neat finish.


The tie belt has an interfaced centre section so there's a little extra body against your back and I think it helps it to stay in place too.


If I'm working at home, I take the belt off.  It's a relaxed fit but not voluminous.  I'm really happy with it!  It's quite a quick make so I'm planning my next version,  I've got some lovely Intermix chambray from Plush Addict which is a soft woven in a medium weight and I'd like to try the sleeves at full length and add a little extra length in the lower skirt.  The boots are Sanita Puk, I sold a few bits and pieces and bought myself these and I love them!  There's nothing like the sound of clog boots. 


It's such an easy elegant style to wear, another win from The Assembly Line.  The Apron Dress is next...

V-Neck Dress Pattern: Draper's Daughter, or go to The Assembly Line Shop
 Fabric suggestions: Quotes Chambray at Eternal Maker

Friday 30 November 2018

A Very Vintage Christmas Sew Along: Vintage Pinwheel

Welcome to my second post for the A Very Vintage Christmas Sew-along! with Fat Quarter Shop and Lori Holt.  Catch up with all the SAL info including the schedule here.  


You can read my book review and Gingerbread house block post here.
As with my first block, I turned to the Vintage Christmas Projects section of the book which includes a tablerunner, place mat, two pillows and a Merry Mug mat.   The mug mat uses a 6" block with a little extra fabric for sashing and the side pocket- perfect for a cake fork or a small pair of scissors!


I made two: one for me and one as a gift for my daughter so she can get into the Christmas spirit with her uni friends- they have already started on flat decorations!  It's a quick make and an ideal gift if you are making presents for friends or sewing swaps.  Each year,  I find that part of getting into the mood for this time of year is making a few extra Christmas themed items and Vintage Christmas is perfect for this.  

Fabrics Used
Aqua, Robin, Cherry Christmas by Aneela Hoey for Moda
Pink, Little Joys, Elea Lutz, Penny Rose Fabrics for Riley Blake
Green (pocket), Little Joys, Elea Lutz, Penny Rose Fabrics for Riley Blake 
Binding, Color Theory Selection, V and Co for Moda- Ta Dot in Ceda by Michael Miller

Vintage Christmas is available at The Fat Quarter Shop (USA)
In the UK, stock has arrived  but is selling quickly. It's due to arrive back into stock here at Patchwork Dreamer.  Currently sold out at Sew Hot maybe contact them to see if more are due?

Tuesday 27 November 2018

The Assembly Line: Cap Sleeve Top in Manchester / Double Gauze

I first saw The Assembly Line shop patterns on Instagram a few months ago and was instantly smitten.  They are a Swedish pattern company and shop and Karen from Draper's Daughter was quick to stock their patterns.  Initially, they were only available as single size paper patterns, this has recently changed to multi-size which is great news as they are at the upper price end.  I started with the easiest pattern, The Cuff Top.


I was almost embarrassed to spend so much on something so simple and I did fear it may be too boxy but actually, it worked really well and it's a basic that I will make multiple versions of so well worth it.  I traced the pattern and made a toile version in a very lightweight linen.  I am very flat on my upper bust area so I ended up reducing the extra fabric below the front neck by pinning darts in the excess and then taking these alterations to the pattern with scissors and washi tape.  The first version was made in Manchester yarn-dyed cotton (now sold out at Eternal Maker, but there are lots of colours available at M is for Make.   This fabric is soft with a bit of drape and works well for this style.  I omitted the centre seam and cut front and back on the fold. I also fed elastic through the casing rather than sewing it directly to the fabric, I found this much easier to do!


The second version was sewn from a gorgeous Nani Iro double gauze remnant, bought from Eternal Maker's excellent destash account.  It's one of Naomi Ito's older Fuwari Fuwari prints; there's a hint of metallic and I love the colourway.  It's soft but less drapey so creates a different effect.  You can find other Nani Iro double gauze prints here.
The neck is finished with a facing and the instructions recommend using the woven label that's included in the pattern to help secure the back.  I find labels a bit scratchy so used bits of soft cotton tape from my stash and I like adding this sort of personal detail.  I made an XS and for sizing reference, my upper bust is 32" and full bust 33".  I've also bought the V-neck dress pattern and The Apron Dress so Assembly Line patterns are making up the majority of new winter wardrobe additions.  As I get closer to 50, I'm aware my style is changing and I really like how their aesthetic works for me.   It reminds me of Toast, maybe a little softer in style.  The instructions are straightforward- each pattern comes with an A4 size black/white booklet with clear diagrams.  The fabric requirements have been very accurate so far too, so much less wastage.  Seam allowances are generally 1cm or smaller for areas like necklines.  I'll share the V-neck dress next.

Thursday 22 November 2018

Black Friday Round Up!

Here's a round-up of the Black Friday 2018 offers from my sponsors...

Plush Addict is offering a range of discounts plus free goodies when you spend over a set amount from Friday to Monday inclusive.  Find the offers now on this page!
Offers
  1. Kam Press Bundle - Press, Die (size 20 only) - 500 snaps (5 x 100 sets in colours) - £115.50 reduced to £85.50.
  2. Gutermann Thread Kits - 20% off
  3. Queen Wadding - HL90 was £27.25, now £19.99
  4. Rose Gold Thimble Desk Tidy was £10.20, now £7.20
  5. Four Tier Cantilever Sewing Box was £88.99, now £58.99
Free Gifts*
  1. Free Madeira Thread Snips worth £3.99 with all orders over £25
  2. Free 21cm universal Fiskars scissors (in a choice of design) worth £14.95  on all orders over £100
*If you spend over £100 you get both free gifts

Eternal Maker is running a mega Instagram destash on Friday (follow @eternalmaker_destash to keep up to date and read how it works) and look out for Black Friday offers on the shop website.

Amy and Angela at My Sewing Box are offering 20% off all orders under £50, and 25% off orders over £50 plus free delivery over £50.  You'll need codes for these at the check out: BLACKFRIDAY20 for the 20% off, BLACKFRIDAY25 for the 25% off over £50.  They've got quilting, dressmaking and of course their sewing boxes packed with gifts and notions to chose from.


Tuesday 13 November 2018

Sew Over It Dana Dress In Double Gauze

Back in September, I bought the Sew Over It e-Book, Work to Weekend and made the Dana dress, as we are heading towards December, I thought it was time I shared it!  It was still warm when I sewed it up and I made it for my birthday at the end of September.  I'm guessing next time I wear this it will be late spring.  The pattern fabric recommendations all feature drape - viscose and rayon wovens, crepe, georgette.  I find crepe and georgette a bit impractical for my everyday wear so I used a soft cotton double gauze, very similar to the fabric used for this dress which I wore repeatedly during the summer.  I picked it up as an end of roll from Stitch Fabrics at Festival of Quilts so I only had 2 metres (wide width) and had to cut very creatively.  This included piecing strips to make the belt, to squeeze the dress out of what I had and there were only tiny scraps left over.  This fabric has more drape than a Nani Iro/Kokka double gauze and is very soft.


I made a straight size 8, no changes.  I usually find I am a size 8 in less fitted SOI patterns and a size 10 in those with less ease.   The fit is good apart from the V which is too low for my small bust- too much rib revealed!  It's a relatively straightforward make with added interest from the covered button placket.  I hadn't sewn one of these before and this fabric was a little bouncy for creating the extra pleat that lies over the fastenings, but I made it work. 


As the V-neck is generous, the dress fits over my head without needing to unfasten any buttons so I omitted the button holes and stitched shell buttons through the placket layers.  I hand stitched the V where the front pieces crossover to secure it.


My only addition was a belt loop at each side seam.


It's a very informal style to wear- I really liked the patch pockets, especially in this fabric and the sleeve length is flattering.  I also liked the tie belt- I cannot bear anything restricting around the waist at the moment.  However, the belt also has a touch of dressing gown about it which makes me wonder whether this style has staying power in my wardrobe.  I'll have to see how much wear it gets next year, maybe it was a bit of an Indian summer fling!   

Friday 2 November 2018

A Very Vintage Christmas Sew Along

Welcome to my post for week two as part of A Very Vintage Christmas Sew-along!  with Fat Quarter Shop and Lori Holt.  You can read all the SAL info including the schedule here.  Before I get into details about my make (Gingerbread House block made into a Snowglobe cushion) I'd love to show you a little more from Lori's brilliant new book!

I don't know how Lori does it.  Her books are packed full of makes - quilts and small projects - and her designs have such wonderful retro references; she must never stop sewing to make all the things, and as with her other books, the photographs are beautifully styles.  This book one is obviously Christmas themed, but many of the blocks and projects could be used for other times of the year, and as with her other books, it's spiral bound for easy use and the blocks instructions are for both 6" and 12"finished squares.


I especially liked the Vintage Christmas projects.  These are quick useful makes and I can never resist making more Christmas things, even when I already have quite a few!
     

The two colour quilts caught my eye, book marked as a future project maybe!?


The Gingerbread House block was fast to sew up.  Lori uses her tried-and-trusted technique of drawing diagonals on the reverse of squares and rectangles to create the 45-degree angles that make up details like the window awning, chimney sides and roof.  I like to tick the cutting list as I prep the fabric, as well as using a design board to lay all the pieces out before I sew.  The Snow Globe cushion used the 6" block and it only takes a few pieces of background fabric to create the snow globe effect.  I cut my red background slightly wider to produce a cushion bigger than the 12" square size in the book.  Mine is approx 16" square.


For the chimney smoke, I drew the line on removeable marker, threaded my machine with Aurifil 12wt in the top thread/50wt in the bobbin and stitched slowly, tying the ends in on the back.   A larger needle size helps with this.  I used a 100/16 Superior Needle.


Fabrics Used
Chimney/House -Kona Wheat
Roof- Riley Blake?  It was given to me and I'm down to tiny scraps.
Window/Door Glass- Cherry Christmas by Aneela Hoey for Moda
Door and Window frame- unknown scraps
Window Awning- Red Hatch from Day Sail, Bonnie & Camille for Moda
Grass and Path, Eat Drink and Be Ugly, Sandy Gervais for Moda
House/Globe Background- Sevenberry Dots blue on white
Globe Base- Cosmo Cricket Early Bird for Moda (I really miss Cosmo Cricket fabrics!)
Red background - Cherry Christmas by Aneela Hoey for Moda
Binding- Ta Dot in Ceda by Michael Miller

The Vintage Christmas book is available at The Fat Quarter Shop (USA)
In the UK, it looks like stock is still arriving but these shops usually sell Lori's quilting books: Patchwork DreamerSew Hot, Hulu Crafts.

I'll be back later in the Sew Along with a Vintage Pinwheel block!  

Thursday 25 October 2018

Wabi-Sabi Sewing Book Hop: Helping Hands

Welcome to the second stop on Karen Lewis' new Wabi-Sabi Sewing Book!  This book tour flows between blogs and Instagram accounts. Check out #wabisabisewing on Instagram to find posts related to the book.  'Wabi-Sabi' is a Japanese aesthetic celebrating beauty in that which is imperfect, impermanent and incomplete. It embraces flaws, irregularities, wear-and-tear and finding contentment in what we have.  Karen has created twenty home decor projects embracing a wabi-sabi approach and covering a range of techniques (piecing, applique, sashiko for example).  She uses a variety of natural fibre textiles -barkcloth, linen, quilting cotton, denim- and a restrained colour palette to make a beautifully harmonious sewing book.   


I chose to make the Helping Hands mitten-style pot holder.  Part of the book's ethos is to use what you have so I used offcuts from a couple of projects- barkcloth from a dress and a heavy Art Gallery denim from a bag- along with thread, large eyelets, small hammer style rivets, leather, insulated fleece and wadding scraps all from my drawers and cupboards.


There are cutting plans, photos and diagrams alongside the written instructions so it's a quick, simple make. You can't tell from the book photos, but the upper section is shorter than the back section to make it easier for your hand to slide in.


I added some hand stitching in linen thread as I had such a lovely colour match, I couldn't resist fitting it in somewhere!  


I used a single rather than a double binding as the fabric was quite thick.


For me, Wabi-Sabi Sewing is a springboard type of a book where looking through it leads me on to make something inspired by it, so, after making Helping Hands,  I made another potholder- standard rather than gloved and with other fabric scraps.  This time I used linen left over from my Burnside Bibs and some Japanese print kitchen-themed scraps. I pinned the scrap on to the top layer, frayed the scrap edges and used running stitches and linen thread to attach one layer to another.


 I've recently been trying the Clover open-sided metal thimble for any hand sewing where I need a bit of push and I really like it!   It does leave a bit of a metallic scent on the skin but it is strong and with the adjustable prongs at the front, I found I could easily adjust it for a close fit.  I used a size M.


The quilting was the same sashiko stitches pushed through the layers.  The lines are a little wobbly and uneven as hand quilting is not my strongest sewing skill, but the effect is soft and textural.  For the loop, I used Prym snap pliers to cut out a little hole in the potholder corner and in the leather before slotting the small rivet pieces in and using a hammer to close them together. I've had these rivets for ages and I've put off using them as I wasn't really sure if I'd need a special too, but it turns out that a wack with a hammer is perfect!


Wabi-Sabi is such an appealing idea. We could all do with finding perfection in the imperfect, rather than constantly striving for more.  Wabi-Sabi Sewing is a lovely gentle book which guides you through the projects; nothing too challenging but still plenty to learn, and there are fast or slow makes depending on your mood.  The photos are pure eye candy with Karen's trademark blues, greys and mustards flowing through the imagery, gorgeous! I've got a copy of Wabi Sabi Sewing to giveaway today on Instagram today @verykerryberry and watch out for other's doing the same in the book tour.

Resources:
Large Eyelets
Small rivets
Wabi Sabi Sewing book - Amazon, Book Depository, signed copy
Insul fleece
Linen thread
Prym Vario Pliers
Clover metal thimble

Monday 22 October 2018

October at Eternal Maker and Plush Addict

Time for a visit to my sponsors, Eternal Maker and Plush Addict and rummage through their new arrivals...

Eternal Maker

  1. Essex Linen Classic Wovens Navy Check.  Timeless, large woven check, love it!
  2. Comic Book Heroes FQ Bundle.  No shop puts together a curated bundle quite like Eternal Maker.  These fabrics are also available singularly but the easy route is buying them in a quilt-ready stack like this!
  3. Snowy Polar Bears Japanese Cotton.  I find these softly coloured cute Japanese fabrics irresistible, especially as the weather gets cooler.
  4. Equations in Black, Science Fair, from Robert Kaufman.  A great take on a text fabric, also available in white.

  1. Mammoth Flannel in red from Robert Kaufman.  Extra squishy cotton flannel fabric, ideal for adult lounging PJ pants. Not a huge amount left of this, just saying!
  2. Stretch Cotton Jersey- Swans in Yellow.   Cotton lycra blend so good recovery and ideal for tops, dresses, leggings etc.
  3. Riley Blake Blue Carolina, 11 Fabrics.  This is the first time I've seen this collection from Christopher Thompson, The Tattooed Quilter and there's a pleasing mix of pretty prints.
  4. Sevenberry Leopards in Black. Leopard print seems to be everywhere in the shops this year so I couldn't resist this print. 

Monday 8 October 2018

Tips and Tricks for Taking Part in an Instagram Photohop

If you are a sewer and on Instagram, chances are that you've taken part in at least one photohop. These usually take place over a month, are themed (e.g. quilting, dressmaking, sewing) and you post a daily photo following a daily prompt from the organiser and have a hashtag so you can search and meet other people taking part.  There may be giveaways and prizes which are sponsored by fabric shops/companies/designers as an incentive for taking part and aiming to complete all the prompts.


This September, I co-hosted the  #GreatBritishQuilter photohop with Sarah Ashford.  This involved us each posting a daily prompt at 8am plus posting our personal response to the prompt, whilst also prepping the images and texts for a month of prompts and giveaways! September was a busy month for me so I knew I had to get organised and along the way, I discovered some tips and tricks that were helpful as a participant as well as a host. Instead of my previous photohop experience of scrabbling around on the day of a prompt trying to create a particular image, getting frustrated and usually abandoning the photohop or posting intermittent responses, I felt more relaxed, I could actively read comments and 'meet' the other people taking part and I really enjoyed it!  Here are my tips and tricks...

1. Print and Plan
Before a photohop starts, the organisers post an image with all the prompts.  For the #GreatBritishQuilter I posted a PDF in a blog post so this could be printed off at a large size.  If this is not the case, screenshot the prompt post and print it off so you can write on it and plan your photos.  This may sound time-consuming but a little time spent doing this before the photohop starts will save you time and stress on those difficult days when the unexpected has happened and finding an image of your favourite fabrics is not going to happen!
Read through the prompts and have your phone/tablet/laptop/desktop or wherever you have the majority of your photos stored.  The likelihood is that you'll already have some images that will work for the prompts- I've shown these below with an asterisk.

Now you don't have to use these older images, you could take a new one, but it's good to know that if push comes to shove, you have at least something to hand.  I did this mainly on my desktop computer so I made sure that all the photos I thought I might use were copied into an iPhoto folder.   For example, I found a photo from a family holiday in Amsterdam a few years ago that was perfect for prompt 27. Show Us a Rainbow:


This image ended up as one of my most popular posts!  Although there's no fabric, there's a definitely a rainbow and it was a great example of how quilt inspiration can be anywhere! 

Next, look at either a week or 10 days ahead at the photos you will need to take.  These are marked 'To Do' on the prompt sheet above.  This gives you a focus so that you can think, ok, on the next day with good light, I need to get my fabrics out and take a pic, or,  I need to walk to my local fabric shop and take a photo of the outside.  If you can get ahead,  work out what you have and what you need, a photohop becomes so much easier!

2. Cloud Storage: Dropbox
I found straightaway with my old photo search that I had some images on my phone, and others on my desktop (they'd been long deleted on my phone).  Because Sarah and I were co-hosting, we also needed all the prompts and text files in a place we could both access and Sarah had already done this using Dropbox.  I already the free version of Dropbox as Cloud storage for files on my desktop and I have the app on my phone, so we had a GBQ folder for the prompts images and text files, and we separately had our own folders for our personal images- for me this was KGBQ.  I copied all the photos I thought I might use into this from my various photo devices and numbered them to correspond with the prompt number. On the Dropbox app, when you open an image and hold your finger on it, an option comes up to 'save to camera roll' - this is on an iPhone, I assume a similar/same option for Android- and then the image on your phone and easily available to post on Instagram. 

There are other Cloud storage websites and apps, choose the one that works best for you.

3. Utilise Current Projects


I was making a quilt for an exhibition in September so I maximised the number of prompts that this project could cover, it was 7. My current WIP, 11. Project Last Finished, 20. Walking Foot, Free Motion or Hand Quilting, 28. Quilt Basting,  with different photos as appropriate. 

4. Get Creative
Some prompts can make you scratch your head- how will I show that in photo form.  For me this was 'Quilty Quote'.  I didn't want to repost a meme I'd found on Google images, so instead I used the Over app and wrote a quote from one of my favourite sewing songs, Coat of Many Colors by Dolly Parton.


On many of the prompts, people came up with all sorts of visual and linguistic interpretations and it was part of the fun of reviewing each day's responses!  Don't be afraid to get creative with a prompt!

5. Try Something New
There's usually a prompt in a photohop that may mean you need to try something new- whether this is   creating a Boomerang video or working out what a 'Flatlay' is.  Google is your friend here,  do your research, google what it is and have a go.  Some of the first time Flatlay images in #GreatBritishQuilter incredible!


6. Instagram Drafts
I had no idea about Instagram drafts before co-hosting #GreatBritishQuilter and when Sarah mentioned it and how helpful it could be, I was straight onto Google and working out how to do it- this video tutorial is helpful.  This a relatively recent addition to Instagram and now I've found it, I use it all the time!  It allows you to prep a series of posts, edit them as many times as you need to and save them as drafts.  When it comes to posting, you tap drafts instead of your camera roll photos and you can post quickly and easily.  A revelation!  The carousel feature which allows you to post multiple photos in a single post is also very helpful if that's something you've not found yet- example of how it works here

7. Use a Photo Editing App/Website
Sometimes you want to add something extra to your prompt image like additional text, or collaging a series of images and there are lots of websites and apps available for this, many offer basic features for free.  I use Picmonkey and Layout App and Kim recently suggested Canva which is a free app to create images and designs.  I made the first image using Canva for the first time!

8. Use the Suggested Hashtag
Follow your hosts and use their preferred Hashtags.  It means they can find your posts, like and comment on them, and other people taking part can do the same.  Photohops are all about finding new people in your tribe.  I met loads of new-to-me quilters in #GreatBritishQuilter, found out new tips, shops, books and so much more.


I hope these have been of help and also encourage you to get prepared and take part on a whole month of photo prompts.  I found #GreatBritishQuilter got me through an emotional month as our daughter got ready to leave for University and gave me fresh creative inspiration.  If you have any additional tips, please share in the comments!