Showing posts with label mug rug. Show all posts

Tuesday, 28 July 2020

Foundation Paper Piecing returns: Mug Rugs

I've been returning to foundation paper piecing again after a long break.  I had a commission which I'm currently working on- can't show that I'm afraid- but I can show you the FPP pattern I've designed especially for an online interactive CraftyMonkies class.  


The pattern is for a mug rug.  There's a choice of mugs- plain or striped, and choice of text and these reflect easier and harder skills that I'll cover in class along with sharing as many paper-piecing tips as I can in the three-hour class!  If you're tempted to join in, you will be very welcome.  The class runs on Saturday 8th August, 10-1pm BST and bookings are welcome from anywhere in the world, find all the details here, scroll down.   


If you are a first-time Zoom class participant, don't panic! CraftyMonkies classes have an experienced host, Rachel, who settles you into class, sorts out technical niggles and controls sound and vision! This means that everyone gets their chance to interact without being talked over and to ask the question you really want to ask You 'll be able to have a close view of my hands, cutting mat and sewing machine presser foot so you can see exactly what I am doing.  It's a gentle, happy sociable experience too.  I'm really missing my sewing meet-ups at the moment and an interactive Zoom class like this is a great replacement.  

Monday, 23 January 2012

Man Mini

A little while ago, maybe a year or so, a friend bought an old Ladybird book, Making a Transistor Radio.  Inside were the usual evocative illustrations including a great colour block image of radio resistors, an idea hatched but it has taken till now and a big birthday for my friend James for me to realise it.
The design is straight from the book, I love radio but have no idea what it means beyond a colour coding system.  That doesn't matter, James knows what it means and I like the way it looks.  A mini quilt, mug rug, man mat- whatever, it is on the wall in their family kitchen with some other makes from me in a mini gallery.
The colours are from a Kona rainbow charm pack, the gold and salmon 'Tolerance Colours" are from vintage scraps.  I have no % symbol in my stamps so I improvised, need often makes for inventive moments.  Versacraft ink as usual for the stamping.

The back is a funny Japanese text print all about String theory and other rather weird references.  The whole thing is only 9" x 7".  Fun to make and well received.  The same book had this , what a great little source of inspiration.
sib blog

Thursday, 10 November 2011

Showcase mini

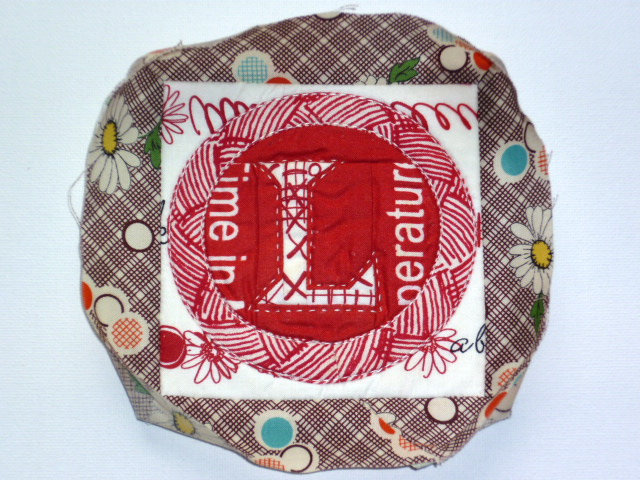
I have another showcase for you, just mini, and a little bit Christmassy too!  First, Kris made this mug from my Freezer Paper Piece Mug Rug tutorial.  Now, Kris doesn't know why it loaded sideways on Flickr, but just turn your head a little to the right- and you can see her mug and saucer- she choose lovely reds for this.
redmug
And Connie has made my Scandinavian Christmas tree pattern!  This is the first one I have seen so I was very excited to see this on Flickr.
Christmas tree .....
Connie has put a great mix of scraps in, the shapes and fabrics remind me of Christmas presents  all stacked up!  I think a lot of you know that teaching is my day job, I think it must be in my blood- my parents and aunt were all teachers.  The patterns and tutorials are all part of my teaching side, I just love to see your work, gold stars all round!
sib blog

Tuesday, 27 September 2011

Tutorial Part 2 Mug Rug: Foundation piecing


I am using a different technique for piecing the spoon- foundation paper piecing.  This is where you stitch your seams through a thin paper foundation.   Its plus points are that it is very accurate, and requires less preparation than the freezer paper method.  Its downsides are that you are working in reverse/mirror image (you'll see what I mean later), you cannot control how you iron your seams, it is harder to get the grain of your fabric right or to fussy cut, it is more wasteful of fabric and it is less flexible when designing patterns.  I like the accuracy but I hate sewing through paper and I don't enjoy picking the bits of paper off at the end.  No freezer paper is needed for this technique.    We will be foundation piecing the spoon in two sections.
Start by printing out this PDF pattern onto thin paper.  Roughly cut the two sections out but keep the seam allowances intact.  It can help to print two copies and cut one of these up to act as a pattern piece guide but remember to allow for the seam allowance too if you do this.
We are starting with section B: the head of the school.  You will need a piece of grey fabric that covers the whole of the spoon area including the seam allowance and a little beyond.  If you put the fabric behind the paper and hold it up to the light you will be able to see if your fabric is big enough.  Scroll further down for a photo of this.  Secure with a pin. If your fabric has right side and wrong side, the right side faces down and the paper is pinned onto the wrong side.  Next, you need to cut triangles big enough for pieces 15,16,17,18 plus seam allowances.  You can see the size of mine- they are on an inch grid.  You always need to go a bit bigger with this method as you will trim the seams down as you stitch.
Take a triangle and place it under the paper, right sides together with the spoon fabric.  The corner of the triangle lies inwards toward the centre of the spoon.  It takes a while to get the hand of this, remember the fabric will open out after your stitch.   Place a pin along the seam line- this is where your stitches will go.
Check that the fabric is big enough, the pin will hold it in place, just flip the triangle outwards, it should extend to the seam allowance at least.  
This is how it looks on the reverse- this is going to be the right side so you are working in reverse and in mirror image!
Flip everything back so the paper is on top and the triangle is flat underneath with the right angle corner facing inwards.  You are ready to stitch.  You need small stitches- 1.5mm, a larger needle helps to perforate the paper and you could use a thicker thread rather than a piecing weight- mine held up fine though.   For a lot of foundation piecing patterns you need to start  and stop exactly with the seam line and secure but that is not necessary with this simple shape.  You can start in the seam allowance and will not need to secure your stitches if you choose this.  
You will need to flip over and press your seam, trim  the seam allowance to quarter inch with scissors (scroll further down for a picture of this) and press the triangle outwards.  Then repeat with triangles 16, 17, 18.  It should look like this.  
Trim the outside edges to line up with the dotted line of the seam allowance.  The spoon head section is complete but do not remove the paper yet!
We are working on the handle (section C)  next.  Just like before, find a piece of grey fabric that covers the whole of the handle area (19) including the seam allowance and a little beyond.  If you put the fabric behind the paper and hold it up to the light you will be able to see if your fabric is big enough.  Secure with a pin along the centre of piece 19.
We are working on the long side pieces 20 and 21 next, so cut out two pieces of background fabric large enough to cover each area plus seam allowances all round.  Starting with piece 20, hold right sides together so that the fabric extends at least quarter inch over the seam line and the lies behind piece 19.  Pin through the paper and  along the seam line , flip over and check the fabric opens out to cover piece 20 plus the seam allowance.  Stitch along the line, you can start in the seam allowance at the top and stitch into the triangle 23, if you stitch a long way it is going to be hard to trim the seam so a quarter inch will do.  
 Flip over, press, trim the seam, open out and press again,  In this photo I have added pieces 20 and 21 and I have started to trim one of the seams. 
Cut and add pieces 22 and 23 just like you did with the corner triangles of the head of the spoon.  It should look like this untrimmed,
and like this one you have trimmed up to the seam allowances.
You now need to join the head and handle together, place the paper sides together, stitch right along the lines at the top of the handle and the bottom of the spoon head  
Open out, and carefully peel off the paper and give the spoon a good press.
Your pieced sections are finished.
Ready to put the whole thing together?  I'll be back soon...
Ready to win this mug rug?  Giveaway soon...
sib blog

Wednesday, 8 June 2011

Time for Tea

I have had this book for a little while.  I bought it from a Japanese site, second hand but in perfect condition, it can be a bit hard to get hold of
I was really taken with these tea coasters and cozy
and inspired to make a mini mug rug for myself.  Only 6.5" x 4" , it is the perfect size to sit on the arm of the sofa for my large cup of Earl grey and a little snack- giant chocolate buttons are a fav.  I used shot cottons for the background and cup, the letters are linen.  It makes me smile :)

I could not resist joining in this quilt-a-long after seeing the blocks pop up on Flickr.  Quilt a longs are just online groups of people all working towards the same goal- in this case, slowly working my way through 111 traditional block.  I like variety and I needed a quilt block education.  
It is a beautiful book even without a quilt a long, detailed pages, original farmer's wife lettters and A CD with all the templates on.  It is a bit like art, you can only go abstract once you have covered the basics.  Lots of interesting quilters are taking part so it should be interesting.   I am more of an urban chick than a farmer's wife but that doesn't deter me.   I won't get my first blocks done till the weekend.  I am having my kitchen partly replaced- the sink area changes tomorrow, the rest will be happen over the summer.
I can't wait!  You all know how I feel about kitchen things and a slice of retro kitchen action is coming to my little house.  I don't like the upheaval and I can't get to my work space but it should be over quickly!
sib blog

Monday, 3 January 2011

Single Binding Tutorial

Quilting those smaller items- mini quilts, mug rugs, coasters, placemats etc is tricky.  Double bindings are too chunky and sewing them on by machine l doesn't seem to work out the same on these little things.   A good binding lifts your creation and a bad binding can detract from all your hard work. I am sharing all my best tips in a picture-packed tutorial  The pics show a coaster but I call it a mini quilt throughout for ease.

1.  Trim your item with a rotary cutter and rule, then zigzag round the edge.  Don't zig zag into the corners as they tend to distort- I pivot around them.  This stage is optional but it does keep the edges nice and neat.


2.  Cut your binding a scant 1 1/4" wide using a rotary cutter and rule.  Cut across the grain; selvedge to selvedge.  Unsure what scant looks like?  That's my scant 1 1/4" inch version below.  This is going to create a narrow close-fitting binding.  If this is your first time with this technique, you can cut your binding 1 1/4" wide for a big of wiggle room and not worry about the scant option. 

If you want to use bias binding (cut on the bias diagonal of the fabric rather than across the grain) for round mats or rounded corners, cut a little wider, 1 1/2"


3.  At one end of your binding, turn over the corner to make a right angle triangle and press.

4.    I normally start binding at the mid-bottom edge of the project.   Remember the join between the start and end of your binding will be here. I don't use pins when machining small items,  but if you would rather go ahead!


5.  You have to allow for joining your binding so on a really small piece like a coaster although the binding lies halfway across the bottom,  I am only going to sew the last inch towards the corner, the first bit of binding will therefore not be attached yet, just lying ready. Use a 1/4 inch seam allowance- I use my 1/4 foot to guarantee it, accuracy on this makes a big difference.  Secure at the beginning and end an stop and secure 1/4 inch before the end of the mini quilt corner.  
6.  You will need to mitre the corners.  Not sure how? See my mitred corner's tutorial here!  I attach the binding all the way round until I am within 3-6 inches of the where the binding began depending on the size of the object.  Secure your last bit of stitching at this point.
7.  Line the edges of  binding up diagonally, you will need to turn the end of the binding away from the mini quilt.  You need to make sure that the unattached binding is not too slack here or it will be too loose when you come to machine sew it.   Press the diagonal folds.
8.  Take a small needle and co-ordinating thread with a knot at the bottom and push between the  diagonal folds- see how the needle is going through at a 45 degree angle? 
9.  I folded back the left hand binding fabric here so you could see how the needle tip angled through.
10.  Push the needle back through angling the opposite way and keep this going until you have line of little hand stitches joining the binding.  You can always put in the odd back stitch for security.  I have found hand stitching more accurate for joining binding especially when there is so little room to join the two edges by machine. 
Just showing you the other side of the join here.
11.  Trim the edges to 1/4 inch and press open.  Now you can machine stitch across the last bit of unattached binding
One side of binding is attached.  
12.  With your fingers, open the binding outwards so you can see its right side and give it a good press with your iron.
Get right into the corners with the tip of the iron.  A little iron helps, I use a travel iron.
This is how it looks on the underneath side.
13.  Turn your mini quilt so the underside is facing you and along the edges (avoid the corners) turn the binding in so that the edge of the binding meets the edge of the mini quilt.  Take your time here.  Doing this bit really well will given you an even, narrow, close fitting binding.
14.  This is how it will look.  The corners are too fiddly to do with the iron, we'll do these with pins in the next step.
15.  Take the pressed folded edge of binding and line it up ever so lightly above the stitching line, pin to secure.
You can fold and overlap to get your corners nice and sharp.
It ends up looking like this.
16.  With a little needle and a thread with a quilters knot in the end, secure your thread into the mini quilt seam allowance to hide the end and we are going to hand sew the back of the binding with ladder stitch. If this is new to you there are lots of diagrams and you tube videos but it is pretty easy and the stitching is almost invisible.  I take a stitch just above the machine stitching line where the binding was first attached...
and then a stitch through the pressed fold of the binding, pull gently and repeat- that is ladder stitch!  Stitch all around the binding.
Your mini quilt/mug rug/coaster/placemat binding is complete!
This method is not super speedy but it gives me good results, I hope it works for you.  
Any queries or problems with it- email me and let me know!