Showing posts with label binding. Show all posts

Wednesday, 3 April 2013

Machine binding with a little help from glue

I generally make quilts for using.  I don't enter my quilts in competitions or displays so I like my binding to be strong and resilient.  I hand sew small item bindings and any that have a single binding but I machine sew my quilt bindings and I like that to look neat.  Rita's machine binding tutorial is my go to for method and I generally use a 2.25" binding, sometimes wider.  For the Baby Bear Paw quilt I decided to try a few new things.  Firstly, I used a Sizzix Bigz XL die for cutting 2.5" binding strips.


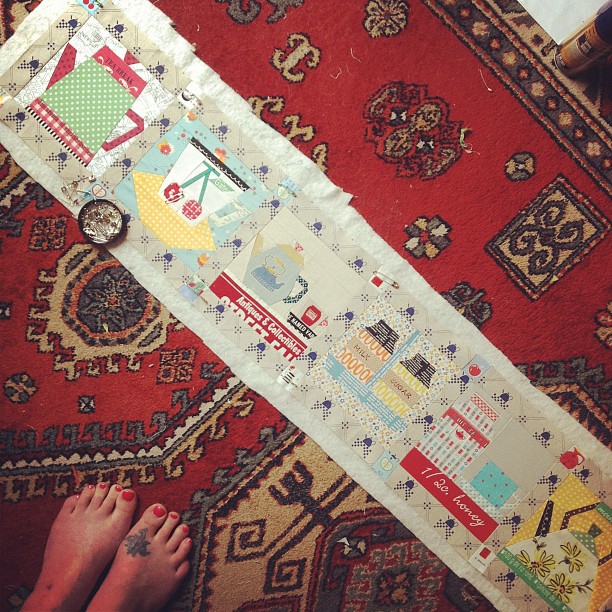
I had a beautiful binding fabric all ready to use, Art Gallery voile in Praline Honey (Village Haberdashery stocks it here).  This has a silky light texture and is a beautiful rich golden colour.  I wasn't sure if the Sizzix would cut voile cleanly but it powered through with no problems.  This die is extra long and cuts the length of the strip and not the top and bottom so it cuts folded 44" fabric into 44" long strips.  Voile is wider width so I needed to clip the end of these strips to finish them off but it still cuts far more accurately and quickly than I can on a tricky fabric like this.  
As the fabric is lighter weight a smaller size machine needle helps, 70 Microtex are great for voile and lawn.  For joining the binding strips I used a leader to stop the machine from swallowing the edge of the fine fabric.  


A leader is a little scrap of material folded over, placed under your machine to start a seam.  You stitch the leader and then keep sewing onto your seam- my machine doesn't need this help on quilting weight but anything fine or slippy benefits from this.
I stitched the binding on to the front of the quilt as usual, but on the back instead of pinning like crazy so I can machine from the front I used a little basting glue. I used Roxanne Baste it which is a temporary fabric glue with a long fine tip so tiny amounts can be applied.


 A fabric glue stick doesn't work well on a big sticking job like this.  The applicator on the Baste-it is very helpful at getting the glue exactly where you want it.  I worked on around 24" at a time and applied glue to the quilt seam allowance.


Clover Wonder clips are perfect for holding down the binding until the glue dries.  I used a pin for each corner.


Once tacked down with the glue I flipped the quilt to the right side to stitch in the ditch just catching the binding on the back.  You do need to make sure that your spool and bobbin threads match the front fabric and binding fabric.


This really sped up the binding process. it meant no unpicking and re-sewing which is what I usually have to do especially at the corners.  The corners were the best bit, it made for excellent corners!  This is the binding from the back (top of pic with label) and front, (bottom of pic).


I hope this helps any of you who like to use machine binding.

The Baby Bear Paw quilt plan is here
Making the blocks is here
Completing the top is here
Spiral quilting is here

Tuesday, 12 June 2012

318 Bee Table Runner

I have had a little mini stack of bee blocks waiting patiently to become a table runner,  I was in 318 Patchwork Bee a little while back and my theme was "Afternoon Tea".  I always had these blocks in mind for this purpose and now it is sitting on my table it makes me smile and think about all the people who made a block or two- Ayumi, Tamiko, Charise and Leila.  Simple construction, sashed with Kokka teapot print linen and mini fussy cut squares, I quilted it without backing...
Then added the backing to make a combined backing/binding blanket style edge.  It is an easy finish so her is a quick tutorial if it is new to you!   After the quilting, attache to a backing at least 1 inch bigger all round.  I use 505 spray and a few safety pins.  For a finished 1/4 inch bound edge, trim backing over hang to just over 1/2 inch from the edge of the runner all round.  At the corners, pencil a 1/4 border from edge of runner and then draw a  45 degree diagonal across the corner- just like the pic!  Trim this off with scissors.  
Fold the freshly cut edge in so it fits behind the corner of the runner.  Press the long unfinished backing edges  firstly towards the runner, and then turn the folded edge so it forms the binding around the runner.
Pin the binding on the front at each corner.  Hand stitch the mitred corners using ladder stitch- (Search on youtube if you are not sure what this is! It is a very useful stitch).  You can then stitch the rest of the binding down, by hand or machine- up to you!  I chose a small zig zag to add a bit of zing!

We have a smallish table so this is a narrow runner- it now lives along the back edge by the wall with my radio and cup of tea permanently on it!
And it constantly lifts my heart, thankyou to the block makers...loving your work! Left to right, tea pot- Tamiko, Cherry cup-Ayumi; Teapot/cup- Leila; Milk/Sugar- Tamiko; Tea/cup- Charise; Kettle-Ayumi.
If you like a bit of paper piecing, Leila's new house pattern can be found here, and Charise's Spool Starburst is here.
sib blog

Monday, 29 August 2011

Drunkard on the Sofa

I had forgotten about my love hate relationship with the quilting process.  When I first start the quilting I am convinced it all looks rubbish and I have ruined a quilt top, I pretty much think it is the end and  then as it progresses I relax and can see the bigger picture, its ok, I think it will work, I like it.  Truth be told, I do not like the actual quilting bit and it does not like me.   
 I like simple lines in quilting but my machine is very small and my arms can't take lots of shoving around of fabric layers, so even a small quilt like this is hard going for me- that's why I usually make small things.  I have designed and made hundreds of quilts in my head but in reality, stacks of fabric wait uncut whilst I work out a quilt as you go method that will work with the fabric and the design until my head hurts!  
As there was linen in some of the edges of this quilt I used a 3 step zig zag to catch any fraying fabric before binding and it worked beautifully- I will use that before I bind anything in the future, better than standard zig zag.
The binding is a Joel Dewberry print, Herringbone from the Modern Meadow range.  I have fancied this as a binding ever since I saw Meg use it on a cushion, it blended in to just the right amount.  Perfect for the sofa.  In a small room I have to apply a bit of caution and avoid too may quilted patchwork items for fear of it looking like this...quilted ceiling anyone?- from 'Prize Country Quilts', a rather wonderful old quilting book.

 In a small room I have to apply a bit of caution and avoid too may quilted patchwork items for fear of it looking like this...quilted ceiling anyone?- from 'Prize Country Quilts', a rather wonderful old quilting book.
The mornings are darker and school is starting to beckon... must make the most of the remaining holiday.  Thinking of those in USA affected by Irene, I have seen some frightening pics of the storm, and thinking of a few other people too.
 x to you all 
sib blog

Wednesday, 2 March 2011

Quilt-a-long Rounded Corners and Binding

I have decided after seeing Nettie's rounded corner quilts here and here that I fancy the effect for this quilt.   Her quilts were a big inspiration when I started quilting and continue to be so.  I used a tea plate with a diameter of 7.5 inches.
The curve runs 3 inches either side of each corner, my quilt corner starts at 1 inches on the cutting mat.

I pinned the curves about an inch from the edge after I cut them just to hold them for the next stage.  I always zig zag around the edges of any quilt before I bind, from  a coaster to a full size quilt.    It makes life much easier to do this with the walking foot as this gives an even feed to bottom and top fabrics so there is less chance of  ripples in the top fabric.
 I worked out how much binding I needed using Julie at Jaybird Quilts wonderful bias tute and calculation table.  I used the second method with a standard 18 x 22 inches fat quarter which, with 2.25 inch wide binding, yielded the perfect amount of binding and some extra for this quilt.  Although you have to cut using scissors, it only takes one straight seam to have a whole reel of continuous binding- fantastic!  I hate joining with diagonal seams and by using this method I will only have to do it once at the beginning and end of the quilt binding.

 Press the binding in half long ways- this takes ages!  I don't use steam as it tends to distort but a bit of that homemade starch spray to stabilze really helps here.  And then roll the binding up ready to use.  If you want right angle corners and straight binding there are links at the end of this post to helpful sites to work out quantities, cut and attach the binding.  You cannot use straight binding for curvy corners just incase you thought you'd try it!  I would zig zag the edges of folded straight binding at this point (see Red Pepper tute below) but I didn't with the bias binding as I want a bit of give round the corners.    If you can manage with it, keep the walking foot on for attaching the binding, it will yield more even results.  I use the foot to help keep a quarter inch seam as I stitch the binding on.

I use the Red Pepper binding method but with some adjustments.  I start by attaching the binding to the back of the quilt and I chose the left side of the quilt, near the bottom before the corner starts to curve as my starting place.  I use 2.4 stitch length.  I don't use any pins, I just guide with my fingers and keep my speed setting slow.  If you are using the rounded corners method, the binding goes on much quicker- no corners to mitre!  I sewed very slowly round the corners with a gentle tension on the binding to curve it round and used a quick unpic to hold the layers together.

 About 12 inches before the end of the binding meets the start,  stop, secure and get ready to join the binding ends together.  I used Julie's method which is pretty standard but I find this bit the hardest of the whole quilt making process!  Take your time, you might even want to tack/baste it before you machine together to check it works.  I had to do mine a couple of times.  Now, I do a good press and use the homemade starch spray.  I press the binding away from the quilt.
 Use the tip of the iron to get right in the seam and the corners- the binding won't lie flat here but it will be fine when you flip it over.  A small iron helps, I use a good quality travel iron all the time!

Turn the quilt over.   I fold the binding so it lies a little over the stitch line and press lightly and without starch. All that pressing is a faff but it will make the binding finish so much better and lessen the chances of having to unpick bits if you are machining for the final stage.
I now follow Rita (Red Pepper Quilts) method but with the right side of the fabric facing up.  I have a colour to match the binding as top reel on the machine (YLI Machine Quilting in grey 011) and a colour to blend into the backing fabric on the bobbin (Gutermann Sulky col.1071), Stitch length 3mm, no pins but my fingers and where necessary a quick unpic, and the walking foot again.   The top thread tail is lying to the left and the bottom thread tail to the right- to stop tangles underneath.   I hold the binding just over the stitching line, and stitch as close as I dare to the edge of the binding.

The aim is to have front stitches at the edge of the binding where it joins the quilt and the back stitches blending into the quilt backing on the reverse.
I never get this perfect in one go, but I usually only have a small amount to redo and it works out quicker for me than hand sewing.
 Here is a neat machine sewn edge on the front...
and a line of invisible stitches close to the binding on the back.
And yummy rounded corners, I will be sewing a lot more of those!  I love this method!
So the quilt is finished, needs a label and some decent light to take finished photos.  How is yours going?  All the tutorials to make this quilt are here and you can do it any time and put pictures in my Flickr group,  I'd love to see your work!

Binding links- 
Binding basics, working out quantities and cutting binding Jaybird Quilts
Cutting bias the easy way and calculating quantities for bias from a square of fabric Jaybird Quilts
Continuous, straight or bias, attached by machine, hand sewn finish Jaybird quilts
Continuous, straight or bias, attached and finished by machine Red Pepper Quilts
sib blog

Monday, 3 January 2011

Single Binding Tutorial

Quilting those smaller items- mini quilts, mug rugs, coasters, placemats etc is tricky.  Double bindings are too chunky and sewing them on by machine l doesn't seem to work out the same on these little things.   A good binding lifts your creation and a bad binding can detract from all your hard work. I am sharing all my best tips in a picture-packed tutorial  The pics show a coaster but I call it a mini quilt throughout for ease.

1.  Trim your item with a rotary cutter and rule, then zigzag round the edge.  Don't zig zag into the corners as they tend to distort- I pivot around them.  This stage is optional but it does keep the edges nice and neat.


2.  Cut your binding a scant 1 1/4" wide using a rotary cutter and rule.  Cut across the grain; selvedge to selvedge.  Unsure what scant looks like?  That's my scant 1 1/4" inch version below.  This is going to create a narrow close-fitting binding.  If this is your first time with this technique, you can cut your binding 1 1/4" wide for a big of wiggle room and not worry about the scant option. 

If you want to use bias binding (cut on the bias diagonal of the fabric rather than across the grain) for round mats or rounded corners, cut a little wider, 1 1/2"


3.  At one end of your binding, turn over the corner to make a right angle triangle and press.

4.    I normally start binding at the mid-bottom edge of the project.   Remember the join between the start and end of your binding will be here. I don't use pins when machining small items,  but if you would rather go ahead!


5.  You have to allow for joining your binding so on a really small piece like a coaster although the binding lies halfway across the bottom,  I am only going to sew the last inch towards the corner, the first bit of binding will therefore not be attached yet, just lying ready. Use a 1/4 inch seam allowance- I use my 1/4 foot to guarantee it, accuracy on this makes a big difference.  Secure at the beginning and end an stop and secure 1/4 inch before the end of the mini quilt corner.  
6.  You will need to mitre the corners.  Not sure how? See my mitred corner's tutorial here!  I attach the binding all the way round until I am within 3-6 inches of the where the binding began depending on the size of the object.  Secure your last bit of stitching at this point.
7.  Line the edges of  binding up diagonally, you will need to turn the end of the binding away from the mini quilt.  You need to make sure that the unattached binding is not too slack here or it will be too loose when you come to machine sew it.   Press the diagonal folds.
8.  Take a small needle and co-ordinating thread with a knot at the bottom and push between the  diagonal folds- see how the needle is going through at a 45 degree angle? 
9.  I folded back the left hand binding fabric here so you could see how the needle tip angled through.
10.  Push the needle back through angling the opposite way and keep this going until you have line of little hand stitches joining the binding.  You can always put in the odd back stitch for security.  I have found hand stitching more accurate for joining binding especially when there is so little room to join the two edges by machine. 
Just showing you the other side of the join here.
11.  Trim the edges to 1/4 inch and press open.  Now you can machine stitch across the last bit of unattached binding
One side of binding is attached.  
12.  With your fingers, open the binding outwards so you can see its right side and give it a good press with your iron.
Get right into the corners with the tip of the iron.  A little iron helps, I use a travel iron.
This is how it looks on the underneath side.
13.  Turn your mini quilt so the underside is facing you and along the edges (avoid the corners) turn the binding in so that the edge of the binding meets the edge of the mini quilt.  Take your time here.  Doing this bit really well will given you an even, narrow, close fitting binding.
14.  This is how it will look.  The corners are too fiddly to do with the iron, we'll do these with pins in the next step.
15.  Take the pressed folded edge of binding and line it up ever so lightly above the stitching line, pin to secure.
You can fold and overlap to get your corners nice and sharp.
It ends up looking like this.
16.  With a little needle and a thread with a quilters knot in the end, secure your thread into the mini quilt seam allowance to hide the end and we are going to hand sew the back of the binding with ladder stitch. If this is new to you there are lots of diagrams and you tube videos but it is pretty easy and the stitching is almost invisible.  I take a stitch just above the machine stitching line where the binding was first attached...
and then a stitch through the pressed fold of the binding, pull gently and repeat- that is ladder stitch!  Stitch all around the binding.
Your mini quilt/mug rug/coaster/placemat binding is complete!
This method is not super speedy but it gives me good results, I hope it works for you.  
Any queries or problems with it- email me and let me know!