
I thought it was time to get started with this, my arms are a bit sore so I can't race along and I am breaking this tutorial down so you can see it as I make it and then I will collate all the posts into one big tutorial at the end. The finished size of the pillow will be 18 inches- perfect for a plump look with a 18 or 19 inch inner or looser with 17 or 16 inch pad. I sketched out the design- I like to do this on paper not a screen, quicker and more responsive. You can see it is made of 9 blocks, each block is 6.5 inches unfinished. I am going to call the shapes that make up these blocks lanterns and half lanterns- makes life easier!

I am using a mix of grey and yellow plus black. There are lots of possibilities, you could stick to 3 fabrics, or go for solids- all would look good. I did contemplate scrappy lanterns in greys and yellows too with a big mix of fabrics in each- might try that another time as I think it will look good. But this time, I went for 1 fabric per lantern. I pulled all they grey fabrics I had that were similar in tone. I have 6 varieties and you can see there are 6 whole lanterns and 6 half lanterns so some grey fabrics will be used more than once. For the yellow I am going to alternate between a light yellow lantern- you can see these at the top of the fabric pic below- and darker yellow lanterns, fabrics seen at the bottom. Again 6 whole lanterns and 6 half lanterns so some yelllow fabrics will repeat.

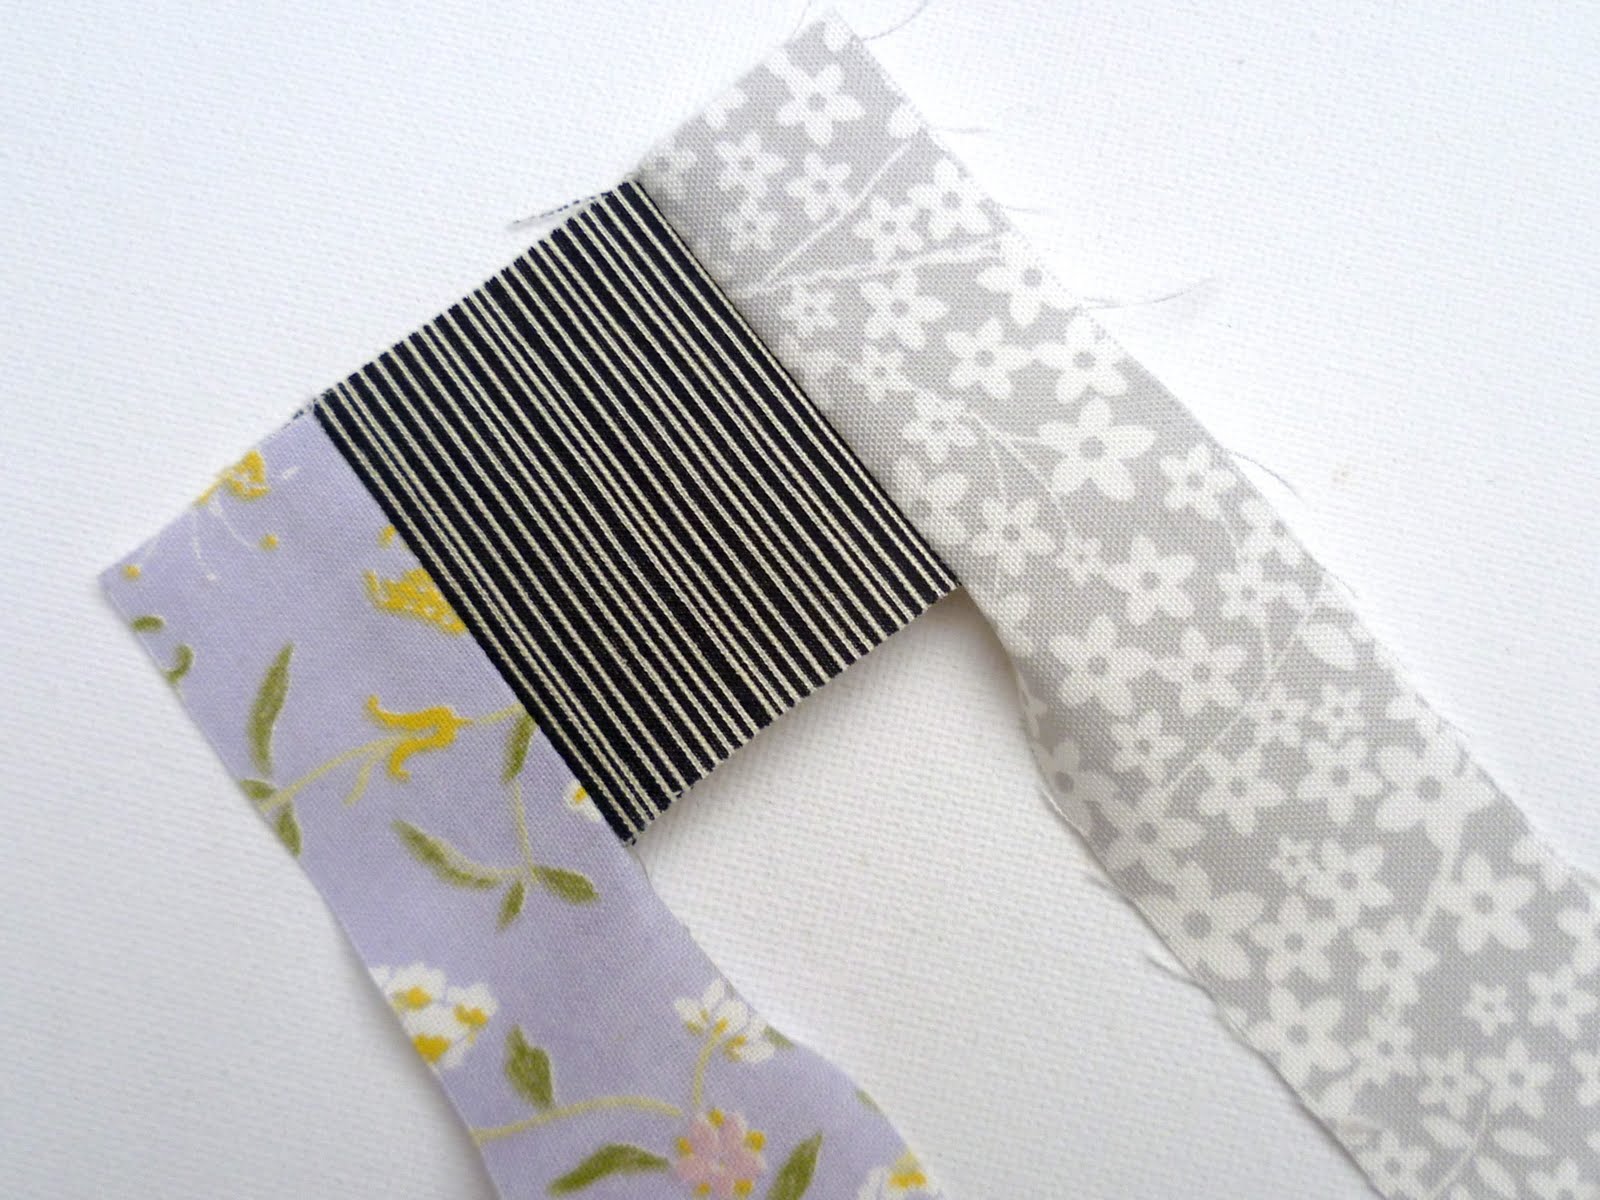
For the centre of each block you will need a 2 inch square of contrasting fabric. When cutting fabrics for piecing I cut slightly generously with ruler line on the fabric, in fact the fabric runs very slightly under the line. You can see on the pic below how I would line it up for cutting 1 inch strips. This allows for the tiny amount of fabric lost by the line of stitches and the pressing process and prevents your blocks from getting too small. You will need 9 of the 2inch squares for this cushion, I used black fabrics for these.

All the other strips are 1.25 inches wide, I cut a couple accross the width of each fat quarter- that will easily cover one whole lantern and then cut more if I need them. After the first block a bit of planning is needed to make sure your e lanterns match up across the blocks. For my blocks I will always need to start with the grey fabrics on the left and right edges of the centre squares. I stitch with small stitches 1.5 length so no securing is needed.
Press, flip the fabric over so the wrong side is facing you and then lay your cutting rule on top. At each stage of the block, as you add 2 strips at a time, the block should square up to fit along the inch or half inch lines. I even my block out each time. When the first strips are added it will measure 3.5x 2 inches.

The next two strips in yellow take the block to 3.5 inches square, you can see untrimmed below

and trimmed here! The seams are always pressed outwards.

A front view of the same stage. Keep adding alternating 2 yellow strips, 2 grey strips and using your rule to square off your block each time- it will alternate between rectangle and square and will line up with the inch and half inch lines!

On the next 2 strips you can see top left that my seams didn't quite meet, don't worry- its fixable!
Here it is in close up...

When I added on the next grey strips, I lined them up with the taller white and yellow fabric so the grey flowery fabric had one edge that was under a quarter inch, (see below). The little 1.5 stitches will hold it all together fine and the block will end up the right size instead of shrinking.

And the finished block 6.5 inches square. You will need 9 of these in total. I sew mine together in lines of three as I completed them.

I sew mine together in lines of three as I completed them. Still some more to do yet, I am having to go slow at the moment. You can see how the fabric matching works in this pic.

See you when 9 are complete. Meanwhile Tamiko is doing a Courthouse Steps tutorial - this is foundation paper pieced with a, check in at her blog to see what she comes up with- it is a beauty!

They look great - I love the variety of fabrics you've chosen, can't wait to see all 9 blocks are finished!
ReplyDeleteThis is going to be so lovely! It seems very fiddly at these sizes but then you're a master at the mini piecing magic.
ReplyDeleteI love courthouse steps! In fact this may be the perfect pillow for my swap partner, now all I need is to find the right fabrics. Thanks for the tutorial Kerry!
ReplyDeleteThis looks gorgeous Kerry, i love how such a traditional block is modernised by your great fabric choices and colours! Great tutorial.
ReplyDeletex
Beautiful. The colors and arrangment you've picked make it look like paper lanterns.
ReplyDeleteI love this block and the fabrics you chose are wonderful!!!!!
ReplyDeleteHappy week end!!!
I'm giddy with excitement to see this finished! And thanks for linking to me :) Although I've had a bad week and haven't felt like posting my tutorial. Hopefully I'll get on that this weekend.
ReplyDeleteThese look great Kerry - I love your fabric choices too x
ReplyDeletegreat colour choices, what is the fabric with the flower names on it called? i love it. can't wait to see the finished article.
ReplyDeleteLove your color and fabric selection! These blocks are small, and so perfectly stitched. You do beautiful work...
ReplyDeleteReally great, Kerry! I love the color combination, and of course the texty fabrics!
ReplyDeleteGrey + Yellow is my favorite color combo! This is going to be a lovely pillow!! Your tutorial is always thorough and easy to follow!
ReplyDelete