
A big thank you to Mia for hosting her December Christmas making special at Handmade by Mia, if you haven't visited yet, take a look. My make is today! This post is extra exciting for me as it is a threeway post- here, linking to Mia and on Kate's blog M is for Make and involves contributions from other bloggers along the way so think of it as a collaborative effort! It is a quick and easy tutorial for a Starbright pot holder/mug rug- it could be either- and a quick gift for Christmas. For the puzzled amongst you, a mug rug is just an oversized coaster, big enough for a cup of your favouite hot drink with room for a snack on the side.

If you haven't made a wonky star before, it is much easier than you would think. I went for Christmas colours rather than Christmas themed fabrics so it can be used all year round whilst giving a bit of festive cheer now. You can easily make several of these out of the generous fabric quantities below.
To make your Star Pot holder/mug rug you will need:
1/4 yard fabric for background
1/4 yard contrasting fabric for triangles- or scraps
Contrasting scrap for centre square
1/4 Fabric for backing
1/4 yard of insulbrite thermal padding (Optional)
1/4 yard cotton batting (or less if using insulbrite as well)
1/4 yard fabric for binding or 44" ready made bias tape
Ribbon or tape for a hanging loop, about 4" will be ample
(Finished holder/rug will be approx. 8" square)
Cut background fabric into 8 squares, each 3 1/2" square
Cut centre fabric into 1 square, 3 1/2" square

Cut triangle fabrics into 4 squares, 4 1/2 inches" and then stack the squares and cut along the diagonal to make 8 right angled triangles

To make the star follow Victoria's wonderful tutorial or reference Gwen Marston's Liberated Quilting 2
Place your completed star over your backing fabric as a guide and cut out a back piece slightly bigger that the top. Repeat for the batting. I used a layer of insulbrite and a layer of cotton batting. You could use 2 or 3 layers of cotton batting instead of a layer of insulbrite. Make your quilt sandwich- backing fabric right side down, cotton batting, insulbrite shiny side up, star square right side up.
As this is quite small I didn't spray baste, tack or pin but if you want to go ahead.
I used a Hera tool to make a crease corner to corner and then quilted from that point. I used a stitch length of 3 and the walking foot as a line guide.

I went for quite a dense textured pattern but do whatever you fancy.

Trim the edges making everything nice and square. Before I add binding I always zig zag around the edges of any quilted project, mini size or full size.

Now is the time to add a hanging loop. Stitch in the 1/4" seam allowance and secure with straight stitch and zig zag. Make sure the loop is pointing inwards out of the way of where the binding will go.

You could add a label or decorative tape as well- festive message maybe?

I use a single binding on small projects like this to. Cut your binding strips 1 1/4 " wide. Straight grain is fine, there are no curved edges so it doesn't need to be bias cut. Trim the start of the binding at a 45 degree angle- it will make life easier later.

Make sure your hanging loop is pinned down and tucked out of the way. A good finish to your binding will lift the whole project, so before you attach it, trim off all stray threads, cut the tips off the corners of the quilted square- just the tiniest amount, it will reduce the bulk on the binding corners.

I found a very helpful single binding tutorial here by Rachel at Contented. She has gone a bit wider with the binding at 1 1/2". I like mine tighter so I opted for 1 1/4". Take your time, use your iron on the corners, keep your seam to 1/4" and look at my tutorial for mitred corners if you find these tricky. Rachel is adding this to her binding tutorial as well.

You can stitch your hanging loop on to the finished binding or leave it as it is.

A useful little present or something to hang up and keep for yourself!
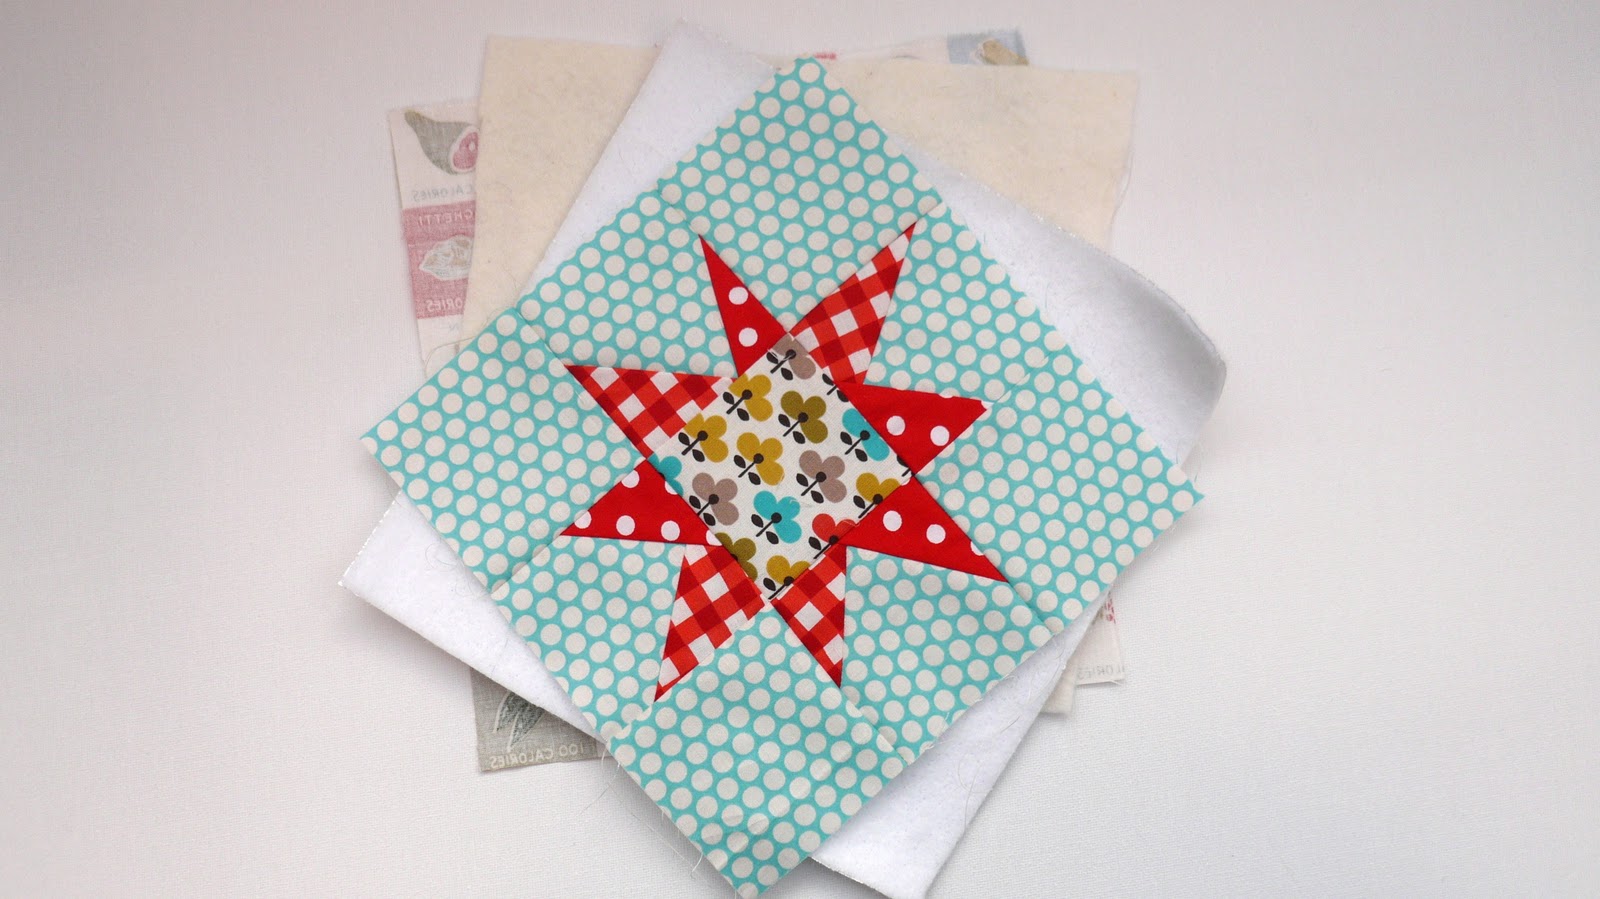
Fabrics: Green dots (binding) and aqua dots- Kei Honeycomb
Centre Square- Ellie in Amber- Michael Miller- all available from Kate at M is for Make
Red gingham print- Farmers Market Sandi Henderson, Red/white dots- local fabric store and Kitchen print Elsie's Pantry Windham Fabrics- from my stash

Who doesn't appreciate a little handmade, homemade love?

Keep checking Mia's blog for more December makes x And Kate's blog for fabric loveliness x

Those would be great for gifts all year round. Thanks for the tutorial! I need one of those Hera tools because it sure looks effective for straight lines.
ReplyDeleteBeautiful, thanks for sharing. I'm scared to get into quilting this might be thie thing to 'break me in'!
ReplyDeleteKandi x
Great post, thanks for sharing.
ReplyDeleteThey look great.
I LOOOOVE this potholder!!! I have to make one for myself!! Thank you Kerry for posting this tute!
ReplyDeleteJust a quick note to let you know that a link to this post will be placed on CraftCrave today [07 Dec 01:00am GMT]. Thanks, Maria
ReplyDeleteThank you so much, Kerry, for making this rug mug-tutorial! It's now on my blog too, with a link to yours :)
ReplyDeleteHappy and crafty week and many greetings from snowy Finland!
Yours,
Mia
Hello Kerry, I am popping over from Mia's blog, I am also the very lucky winner of her snowman scarf! Thank you for sharing your beautiful patchwork mug rug, I especially love the retro backing material! Have a great day and I hope you are not too affected by the icey blast of weather we are having?
ReplyDeleteJane x
Hello Kerry! How wonderful potholder/mug mat!
ReplyDeleteI love the colours! Thank you for all your lovely ideas and giving inspiration!
Wishes from Crete! Teje
Hi Kerry! I'm visiting from the mug rug swap and I think this is just darling. I've never heard of a "Hera" tool, but it looks pretty neat, I will have to check it out!
ReplyDeleteJennie
http://www.cloverandviolet.com
A quick reply for those whose emails I can't find- thank you Maria for linking on Craft crave, thankyou to Teje in Crete. If you haven't bought a Hera tool it is by Clover and is the most helpful and simple gadget! x
ReplyDeleteSo cute and cheery! The center MM fabric is one of my new obsessions.
ReplyDeleteso cute and beautiful fabric.
ReplyDeleteLove it! So cute, perfect for my cousin!
ReplyDeleteLove, love, love this, Kerry!
ReplyDelete