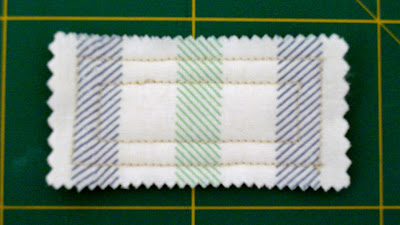
Friday, 30 July 2010

Busy Bee

I have been getting my online sewing duties finished today.  I made some mini bunting for my Modern Swap partner as a decorative extra, completed before breakfast yesterday and packaged today.  Most days I wake early so might as well sew.


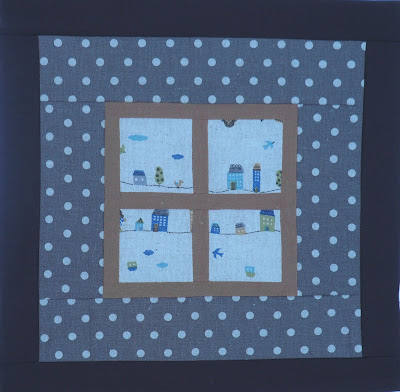
I have made and bought everything for this.  Next, some quilt blocks for Bee a little bit Japanese.  I love doing these as Jennifer's fabrics are of such a great quality , lots of linen cotton blends, as well as lovely prints and a subtle subdued palette.  I love the brown with beige polka dots.  I got into windows and doors when I was sketching what to do- the theme is straight squares and rectangles and is inspired by a Kaffe Fasset design, look at one of the inspiration pics here


I'm happy with them.  They took a while to do but partly as most blocks are new to me.  I do wonder how the people lots of bees cope,  impressive sewing stamina.  I need to sew a variety of things  

Now, a cool find, thrifted? No. Expensive? No.  


Free with a pack of Bodyform- yay Bodyform, made for you!

In the meantime my sewing machine threw a tantrum and wouldn't stop sewing- even with no foot on the pedal- spooky and just a bit dangerous.  In the two days whilst getting it fixed, I realised I needed a spare.  I knew what I wanted.  Watch this space, I found one...

Have a great weekend x

Wednesday, 28 July 2010

Tutorial True Colours/Colors Mini Quilt

This idea came to me when I was driving to a beach for a weekend away a few weeks ago.  We had the Glee soundtrack on in the car and Lula sang along to True Colors and her voice sounded so lovely- she will never sing in public, far too self conscious!- and it made me all emotional.  I loved the song when I was younger in the 1980s, Cyndi Lauper of course.


I could see the design in my head and when I drew a quick sketch and started making, it came out exactly as I imagined- hmm that doesn't always happen...


I made it for Ayumi of Pink Penguin  She showed her true colours with the time she spent translating and checking translations for a fabric order and is a truly lovely person!  When I randomly found the penguin fabric on etsy I knew it would be perfect for her.  It is a bit of a long post for the tutorial but here goes (or use the PDFs instead)

PDF pattern details download here
PDF applique letter templates here

True Colors/True Colours Mini Quilt

You will need:

Half a yard or metre Plain background fabric (I used Kona cotton in Coal) Cut a piece 14 x 9 inches plus 2 sashing strips 17x 1½ inches and 2 strips 12 x 1½ inches. There will be plenty left over.
Scraps –I used 11 strips 1½ x 12 inches which is enough for 46 squares and a different bit of fabric for each letter. Or you could use an assortment of scraps.
Heat n Bond Lite
Fabric for binding- I made a pieced binding, a strip that measures 1½ x 70 inches is easily long enough to bind with.
Fabric for backing – approx 18 x 15 inches
Batting -approx 18 x 15 inches
Basting Spray – I use 505
Embroidery or cotton Perle thread- for hand quilting and making hanging loops
Sewing supplies- piecing thread, needle, pins etc

1. Print off the appliqué letter templates and cut out. They are already reversed so place on to the back of heat and bond and draw around. I draw the arrows on for orientation on the l o s u. Cut roughly around the letters. ‘Colour’ or ‘color’ depending where you are from!

2. Arrange fabric strips (or scraps) into the desired order for the letters. I found the fabrics needed to be on the lighter side to contrast well with the background. I had to reject a few favourites that just didn’t show up enough- the middle 2 in the pic below had be abandoned and choose again! Press a heat n bond letter on the bottom of each strip (on wrong side of the fabric). There might be a bit of fussy cutting involved in this stage- up to you!

3. Cut fabric letters out, embroidery scissors help for this especially the space in the e. Find the centre of the background fabric. I use a Clover ‘Hera” creasing tool- very useful for marking any straight lines on fabric e.g. straight-line quilting. I drew a centre cross on to the fabric.

4. Peel paper backing off the letters and arrange on the background.
Check they are centred and the fabric borders at the sides and top/bottom are even. Press on letters according to adhesive instructions.

5. To decorate and give a bit of security to the letters I used a running stitch and 2 strands of DMC stranded embroidery cotton/floss. Shade 317 co-ordinates beautifully with Kona Coal! I used a quilter’s knot (if this is new look on YouTube for how to do this) and fastened off threads behind the letters.


6. Take your 46 1½ inch squares. Arrange around the edge of the mini quilt. There will be 12 across top and bottom and 11 for each side. The quilt will be too big for them at the moment, don’t panic! You will trim it down in a later step.

7. Stitch the square strips together- you could chain piece here.


8. Press the seams open. I use a wooden chopstick to hold the seam open so I can get the tip of the iron in the right place. They are a very useful sewing tool e.g for turning out fiddly things.


9. Trim the mini quilt, it should be trimmed to measure 12 x 9 inches but you can trim to match the length of your square strips. Sew top and bottom strips first and then add the sides. Press your seams- I like them open but you could press to one side if you prefer.

10. Now add your sashing strips, sides first and then top and bottom. They will be plenty long enough and you can trim of any excess.

11. Cut out batting to fit the mini quilt plus 1 inch extra all around. Do the same for the backing fabric. The finished quilt should measure 16 x 13 inches approx to give you an idea of size. If you want to add a label to the back now is a good time to do it especially if you are going to machine sew it on.

12. Sandwich the quilt layers together. I like to use 505 basting spray for this. It doesn’t clog the needle, holds everything and I hate pinning! I lie the backing facedown, spray one side of the batting lightly and lie it on top. Now lightly spray quilt top and position on. Spray basting allows you to reposition relatively easily.

13. Add any quilting stitches either by hand or machine. I used the same thread and hand sewn running stitch as the letters but a little bigger to go through the layers. I used the creasing tool to mark a ¼ inch line from the seams to sew along.

14. Prepare a binding strip. I wanted narrow binding so my strips were 1½ inches and pieced together using diagonal seams, but you could go wider, do a double binding etc. The binding strip needs to be 70 inches to allow for corners and joining ends. I pressed ¼ inch along each long edge of the binding

Then bring the folded in edges together pressing down the centre.

I like to zig zag around the edges of quilts before binding, it helps to keep everything still.

15. Bind using your preferred method. I sewed it on using ¼ seam on the front, mitred the corners and hand stitched on the back. I have a tutorial for mitred corners here if they are new to you.

16. Finish with embroidered hanging loops.  You can just see these in the top corners of the pic below.  Aneela at Comfort Stitching has done a great tutorial for this and has given permission to include it, take a look here  and do look at her other lovely patterns and projects,  she is a very talented individual.

17. Stand back and smile! Any queries or problems please let me know x

If you make a True Colors mini quilt- do send me a pic,  I would love to see it.  I am now finishing off mine.  Ayumi has hers safe and sound and I have even seen a pic of it hanging in her sewing corner.  The internet is a wonderful thing!

(Tutorial for your use- to make for yourself, for friends, for charity fundraisers but not to sell)




Winner!

Thank you to everyone who entered- a lot more of you than I thought there would be!  I liked reading what everyone was making and all the different fabrics mentioned.   The random number generator picked number 5 which is Justine. Congratulations!  An email is on its way to her.

Monday, 26 July 2010

Making

Looking for the Giveaway? Click here

I am having a lovely day with Lula making lots of bits and pieces.  She has just finished this


So cute.  She started this last school holidays.  It is very much her own work.  All the little cutouts are from a dollhouse supplies catalogue. The tin is approx 3.5" x 2.5"

It was her 10th birthday on Saturday.  We gave her a much longed for dolls house


The furniture will come gradually but she had a bathroom from my sister so requested a tiny bath mat.


More furnishings to come, curtains, quilts etc- good way to use scrappy bits.  Much better than making full size curtains- one of my least favourite sewing jobs.

I saw this on Lily's Quilts yesterday and made a couple of blocks with suitably masculine blue/grey fabrics asap, they are leaving today.  Follow her links if you want to Kick Trudy's ass 


Now to make circles, tutorial coming, the technique is fantastic!


Sunday, 25 July 2010

Much better

Looking for the GIVEAWAY click here 

Thank you for emails of support- my op went well and I am just waiting for the anaesthetic to get out of my system- still feel a little bit dreamy.  I did a tiny bit of sewing last night so definitely getting back on track.   I found a brilliant way to inset circles by machine and will do a detailed post on that soon.


 I have had some lovely things going on whilst I've been lying on the sofa over the last few days.  I have had help from Ayumi of the lovely Pink Penguin blog which if you have never visited ( surely you must have done!) I insist you visit now!  I have been wanting to buy some Suzuko Koseki fabric for so long and she finally helped me achieve this with a lot of emails and translation assistance that went way and beyond anything I expected.  I cannot reveal them as they are for my birthday in September and hidden away, I just know they are in the house somewhere!  This has lead to sharing a fabric order and swapping some stash bits- I feel incredibly lucky.  I have made her a pressie to thank her for all her help- can't show yet, it is in transit and she has sent me...


A lovely pouch!  I recognised the poodle straightaway and many of my other favourite prints


I love the personalised squares as well


Beautiful foodie lining fabric inside!
The fabrics below are from a Japanese shop called Cotton Crayon


Two colour ways- great advert images


This is lovely heavy Yuwa linen, I think this will go into my bee month


Love this, design and the colour palette


So cute- bonus of French text- tres jolie!


I can barely speak- these bits are all so lovely!  Thank you Ayumi, you are a *star*

Wednesday, 21 July 2010

(Giveaway here)

An emotional day today, last day of term.  I teach music classes for children 0-6 years so I said goodbye to two school age classes today and  goodbye to two younger children who are finishing for preschool and school.  I have known one since he was 6 months and he will be 5 soon!
 I also am a little nervous- I have a little trip to hospital for a small operation tomorrow and although I have barely had time to even think about it this week but now I am packing my bag ready and trying to get all my work out of the way for the next few days so I can have a quiet time.  It is the anaesthetic that I really don't like- I feel worse from that than from the op itself!


So, it was good to get this in the post from my friend Teresa.  She is an excellent jumble sale shopper, very skilled and I bet this is where this came from, unused and as new.   I loved Holly Hobby when I was little and still love it now,  might have to hang this in the kitchen, that feels like a bit of a mad lady thing to do but it is so pretty.


I will have a few hours of waiting time before anything happens tomorrow.  I don't buy any magazines but I won't be able to take my e-reader- no valuables allowed-  and I find paperbacks make my hands ache so a craft mag to distract and this fantastic compendium should keep me going.  I bought this book a couple of weeks ago and although the cover is a bit gaudy there are some fantastic tips and techniques inside.  I shall be inspired.


See you in a few days x

Tuesday, 20 July 2010

Mitred Corners Binding Tutorial

I have been working on a little project as a gift for somebody so I  don't want to reveal yet.  
It involves these
 and whilst finishing it off and binding it I thought it might be useful, especially for newer sewers, to put a little tutorial up about mitred corners- these were new to me as I hadn't made quilts until the last year- and I struggled when I started.  They key to success is the iron!

Tutorial... How to Mitre Corners when Binding
(Download PDF here)

1.  Prepare your binding, it can be single as in the pic or doubled over e.g. for a hard wearing quilt.   It can also be bias cut or straight grain.
2.  I start joining my binding a few inches before a corner, leave a long tail of binding for joining when you come to the end.  Stitch your binding to your fabric, use 1/4" seam.  Stop sewing and secure with a few back stitches when you are 1/4" from the end of the fabric edge at a corner.
3.Take the fabric strip and fold it back (see arrow).  You will get a nice diagonal line, an angle of 45 degrees and the binding strip will line up with the fabric edge that you are about to sew down.  Press the diagonal crease.
4.  Now, keeping the diagonal crease where it is, fold the binding strip downwards (see arrow).  Along the top left edge of the corner there will be a  horizontal fold where the binding fabric is doubled over, the rest of the binding will be lying along the next edge to be sewn.  Press the horizontal fold.  Place a pin to keep everything in place.  You will now sew down this edge using 1/4" seam allowance as before and starting at the very top of the corner.  Sew down until you get to the next corner, repeat stages 1-4 for all the corners.
It should look like this
 5. You can now flip the fabric over, press and sew the biding down on reverse either by hand using slip stitch or using your machine.  A lovely mitred corner- very neat!
  If you have any problems do email and let me know- my contact stuff is on my profile- see "about me".

You are welcome to link to this tutorial on your blog.

Happy sewing!  I will put a new tutorial up with the project that you can only see a bit of once it has reached its recipient x


Sunday, 18 July 2010

Birthday weekend 1

(looking for the giveaway? - Click here)

Not mine, but my lovely partner Damian's birthday.  We have been together 17 years and he gets better all the time!  Lula had prepared a birthday tray with a Manga style Top Gear themed card - he doesn't even drive but he likes the silly challenges on Top Gear and they watch it together- and matching birthday goodies.  


The Sylvanians represent real people, time for their close up...


Very funny, especially choosing the panda for Jeremy Clarkson, and Richard Hammond mouse being noticeably smaller than the other characters!  She is a funny girl x

I bought Damian a  grrrr 'man' present- big technic lego


and for his softer soppier side, a Rob Ryan key just to have because it is so beautiful


If you are not familiar with Rob Ryan, I beg you to check out the link and look at his website, shop and blog.  His work is primarily paper cut but has been used on fabrics, prints etc and is heart achingly gorgeous.  Lula's birthday next weekend, it is birthday season for us!