Saturday, 20 April 2019

Simple Folk Block of the Month Catch up

It's been a while since I blogged about my Sarah Fielke Simple Folk quilt.  It was one of her 2018 BOM and I was making good progress until around July when a mix of family commitments and a long work project took me away from regular sewing and it's taken a while for me to get going with it again.  I do sew sections of the quilt at the South West Modern Quilt Guild monthly meetings and I've just finished machine sewing border backgrounds which is dull but necessary canvas prep for the applique designs.  The bird is my final central picture block and is in part progress.  Choosing and prepping the fabrics for these blocks takes a long time and sometimes my choices change part way through if the colour or print isn't working; even the fabric texture can impact on the block.  In the bird block below, the legs were appliqued from some Japanese cotton lawn- anything thicker would've added to much bulk and frayed.  They are each about 1/8" in width. The tail fabric is a Denyse Schmidt print and is coarser than many of the other quilting cottons.  It was tricky to work with but I think I got away with it, despite the thick points.


This block has been tweaked a little from Sarah's original design- the top flower was redrafted.  I love the double leaves on this one, and the vase handles which I find much more pleasurable to sew than I first thought, curves are so satisfying, inner angles and points less so.

I am steadily working my way through all the tutorials.  That's the beauty of Sarah's BOMs, the tutorials and videos remain even though she's moved on to another quilt.  My aim is to complete the quilt top and have it professionally quilted before the year is out.

Meanwhile, Happy Easter!  We are having beautiful weather in the UK and I've been getting outside walking Joni, planting Alpines into pots to prettify my courtyard and spending time with my family.   It doesn't get better than that...I'm feeling very lucky.

Sunday, 7 April 2019

Norman Hartnell Exhibition of Costume 1943

I chanced upon a random local costume exhibition with a twist this weekend after seeing a friend's Instagram post.  In our local historic guild hall, there was a two-day exhibition of Norman Hartnell's dresses, sketches and related items to raise funds for SSAFA, the Soldiers', Sailors and Airmen's Families Association.  Norman Hartnell designer to Queen Elizabeth II and Princess Margaret.  He was also Godfather to Claire Williams, branch secretary for the Devon branch hence the local event.  She has a personal collection of dresses that he made for her, including her wedding and bridesmaids dresses, dresses she wore as a child with matching doll's frocks- all beautifully detailed with embroidery, original artwork with designs for the then Princess Elizabeth, needlework (beaded, gold work) from his couture house and evening dresses through the decades. There were about 15 dresses all wonderful to look at but difficult to photograph as the lighting wasn't great, but an enjoyable and unexpected local display for £5 entry.  In an upstairs room, there was an unexpected bonus extra of illustrations and a doll from a 1943 exhibition...

\

The original exhibition comprised of 20 dolls wearing international costumes, interpreted and designed by Hartnell, sewn at his London couture house with the spirit of make do and mend using the scraps from dresses.  It was sponsored by the Board of Trade with the aim of making connections between the London couture house and the Latin American Fashion Markets whilst also raising money for SSAFA.  The colour painted sketches have survived well.  Again, difficult to photograph but you can get a flavour of the designs from this Bolivian costume painting.  


This is a Hartnell with the Bolivian doll.  You can see the level of detail in the clothes and accessories.  The dolls were modelled by Helen Barclay and the faces painted by Hartnell.  


The most amazing exhibit was the original Bolivia doll.  I think she had only been recently discovered in storage and is now rather fragile and a little damaged but incredibly special to see.  I think she is also the only surviving doll. 


The exhibition ran from 1943-1946 and toured major cities in England and Scotland.  This image is from that time,  Queen Consort of King George VI with Norman Hartnell.  


This is a local poster from when the exhibition came to Exeter.  The entry was free so the money raised was through donations.  It raised £10 000 for SSAFA in total which seems like a large amount for the time-  the final years of world war two and just after.


The other sketches were rather wonderful- this is Peru...


I was rather taken with this preparatory sketch for Mexico.  The face reminds me of the actress Joan Crawford, very popular at this time.


I'm not really a royal fan, but I do like costume and history and this was such a quirky episode of fashion and wartime, a hidden gem!

Saturday, 23 March 2019

March at Plush Addict

There have been some hot deliveries at sponsor Plush Addict and I know a lot of you are big Libs Elliot fans so I wanted to be quick to show you the full Tattooed North collection.  There are also some great new arrivals in garment patterns and Spring in the Northern hemisphere combined with The Great British Sewing Bee inspiration makes it a great time to sew clothes!


Libs Elliot Tattooed North Collection for Andover: FQ Bundle 28 Fabrics
Lib's Elliot has nailed this geometric abstract collection.  All these prints are available as yardage (as stock allows) and I'm guessing this is going to be a very popular fabric range!  I like the range in scale across the prints and my favourite is Rocks in Gold, followed by Sand in Charcoal.   There's also a free quilt pattern to download too. On a side note, I really struggle spelling "Tattooed" correctly, is that just me?!


Tilly and The Buttons Eden Coat.  
Tilly is the queen of clear, simple, well-photographed instructions and that's so reassuring when tackling a bigger project like a coat.  Although it can seem a little overwhelming, a coat in this style has quite an easy fit so sizing is often much easier than a fitted bodice, and a coat is one of those garments that will see such a lot of wear.  This pattern includes instructions for making a raincoat in an anorak style, or a warmer longer duffle style coat.  Both include a lining, hood and optional zip. I especially like the duffle coat and though this fabric: Wool blend coating in blue/white combined with this Camel antic static lining would work well.  A large check so pattern matching shouldn't be too tricky and a good value wool blend. There is a wool blend solid charcoal if pattern matching is too scary!  These wooden toggles would be my choice, find others here.

Sunday, 17 March 2019

Simplicity 8529 Sew House Seven Toaster Sweater in Double Layer Jersey

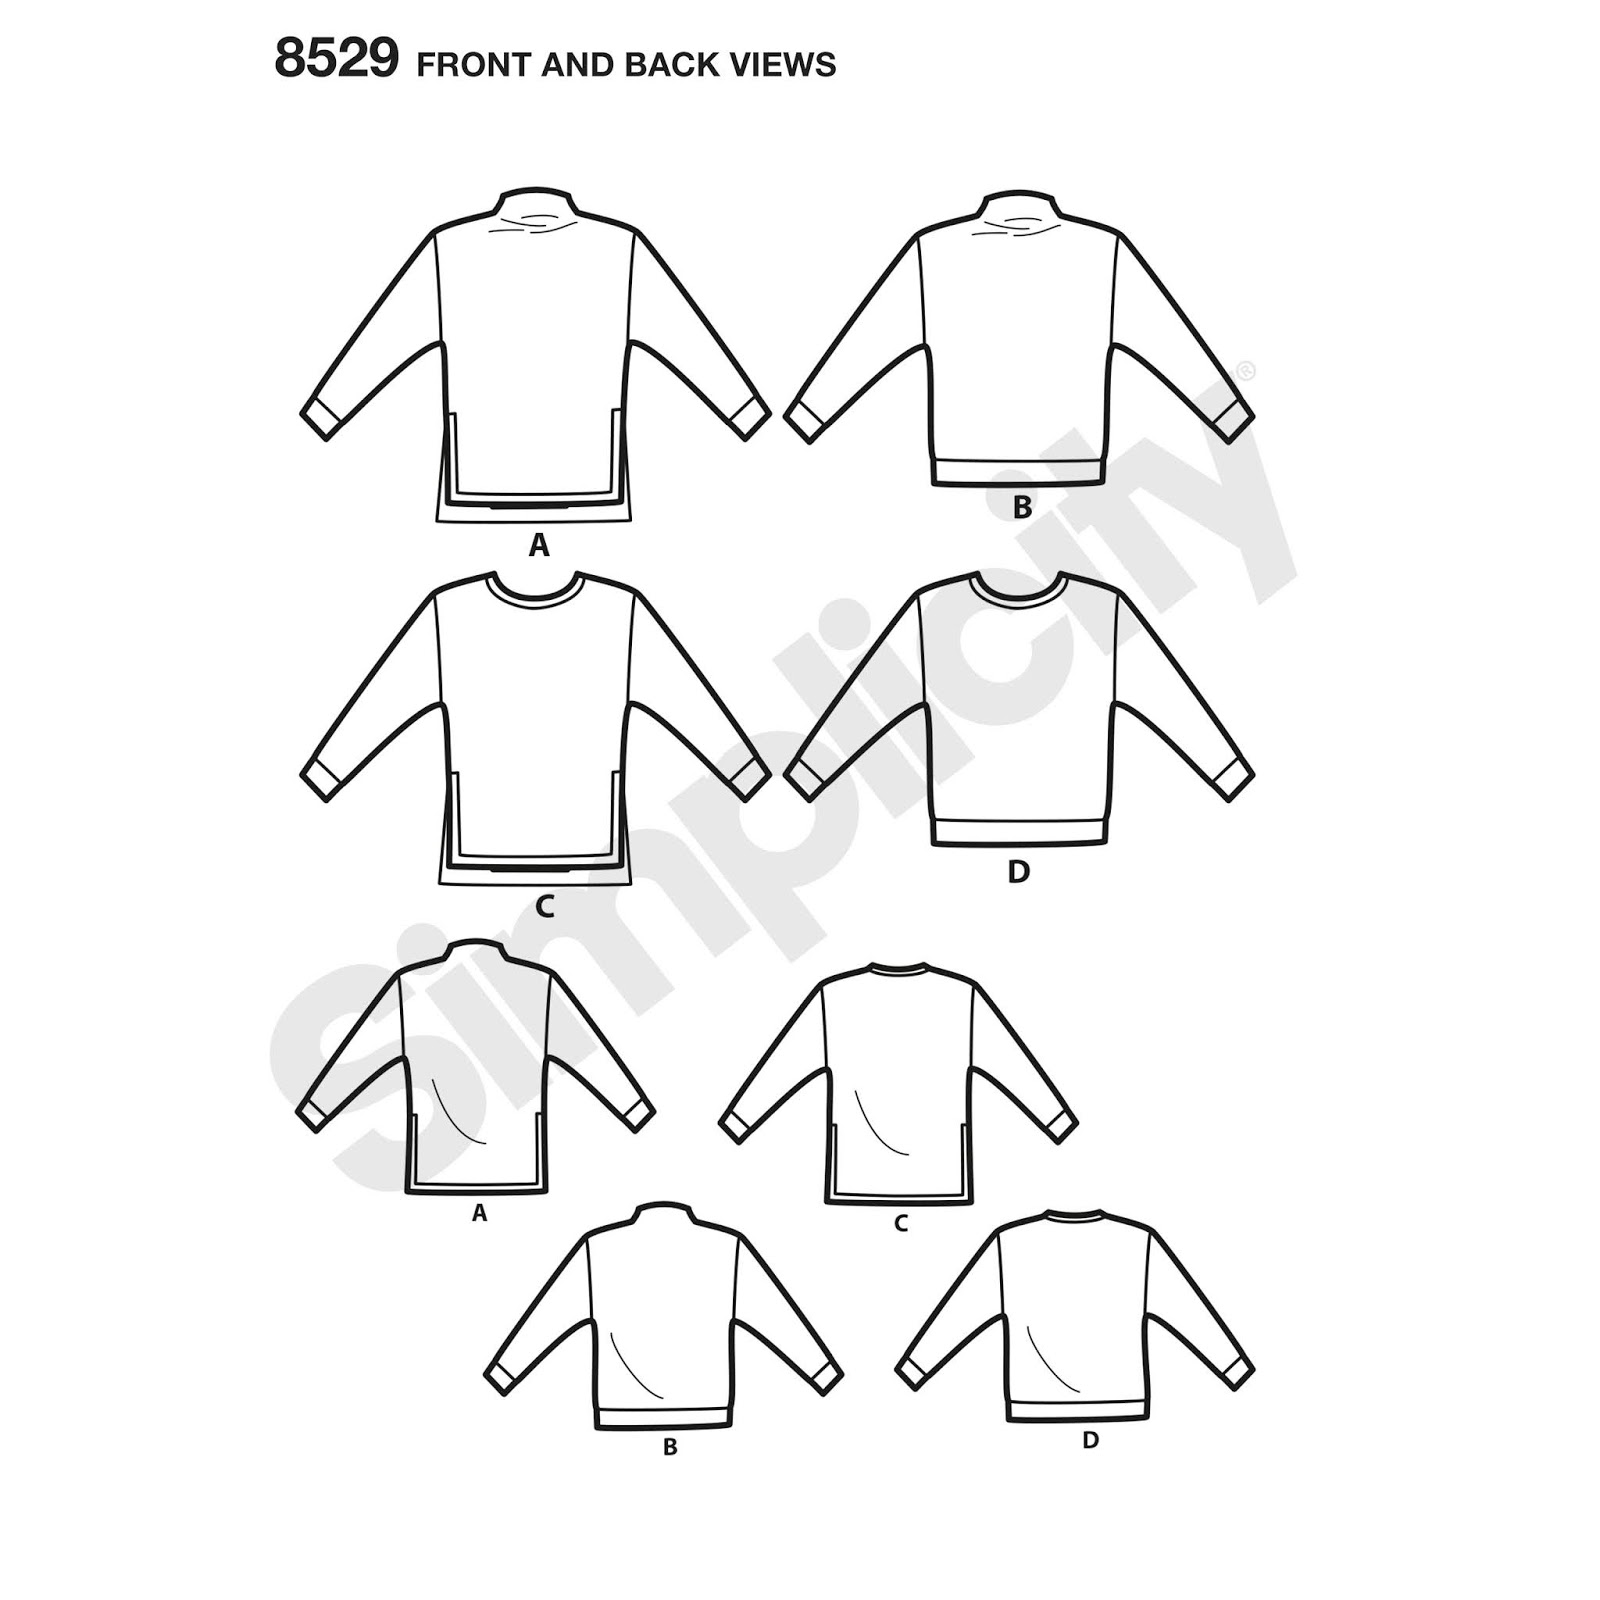
It's been extra windy in the UK recently so it seemed like making a cosy sweater was a good idea and I managed to get pattern/fabric and some small windows of time in the week before storm Gareth kicked in.  This is view A of Simplicity 8529.  This is the Simplicity licenced version of Peggy's Sew House Seven Toaster Sweater; slightly different from the original - the shoulder line is more dropped on this version and the neck construction uses another method.  It's a quick and satisfying make, I wore this all through last week!


I made size S as that was closest to my 33" chest measurement, my only alteration was turning up the front and back hems by an extra 1/4".  The fabric is a double layer Italian cotton jersey which I bought from this eBay seller who offers a sample service.  I found the samples incredibly helpful when choosing and successful for the seller too as I bought another knit fabric that I hadn't noticed as well as this one.  This has two layers of 100% cotton jersey held together by stitches like double gauze.  It's soft with moderate stretch and good structure and suited this style.  It was also easy to cut and sew as it lies relatively flat. 


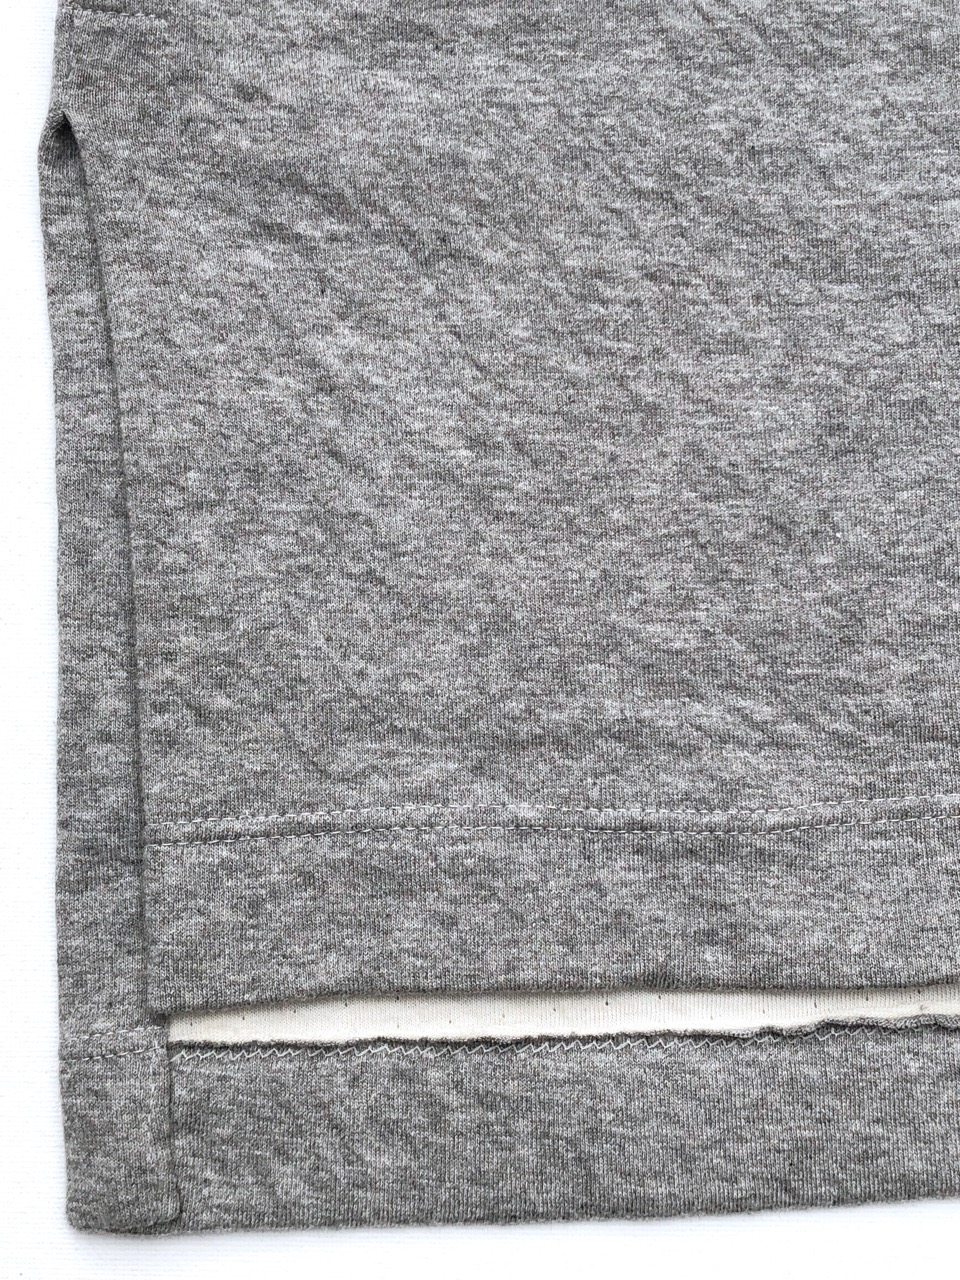
I decided to sew this on my Bernina 830 record using a Bernina walking foot, 80 ballpoint needle and Gutermann Sew-All thread.  My overlocker doesn't cope that well with bulk and the double layer does make for some thick seam intersections so I sewed some trial seams and ended up using a small zig-zag for the seams (1.5 width x 1.5 length), and a bigger one (4 w x 2.5 length) to encase the edges, trimming after I sewed.   it worked really well with neat stable seams and it does show how you don't need an overlocker/serger to sew knits!  I used a seam stabiliser tape on the back shoulders up to the neck curve and a double-needle for the slit hems, see here for tips, although a long straight stitch could also be used as the hems aren't put under strain. 

The funnel neck is warm without being restrictive and the clever facing method creates a neat finish.  This pattern was a great project to fit into small spaces of time: once it's cut out it comes together very quickly and the end result is satisfying.  I might try the shorter banded version with my remaining jersey fabric... 


Joni is taking up most of my free moments and I need to be very vigilant about not letting her into my sewing room unless she's sleeping to prevent her eating fabric scraps.  I've been keeping her busy with lots of socialisation opportunities and learning new tricks.  Puppy life is rather hands-on but she's a fast learner and we've been getting out and about on the lead. 

Sunday, 10 March 2019

Assembly Line Apron Dress Version 2- Lined

Here's my second Assembly Line Apron Dress, (read about my first here).  This version is made with medium weight cotton twill originally bought to make a raincoat and I've lined it with cotton lawn (originally intended for the coat lining) to give a bit of extra weight and a bit more swish when walking.  Both these fabrics have been stashed for around 5 years so it felt good to use them in a garment that will see lots of wear.


Some minor changes from the first version,
  • I added an extra 1" to the skirt length so I could turn up a deeper hem so the stitch lines are consistent throughout.  I also changed the topstitching a little at the bib top. 
  •  The fabric is lighter weight than last time so although I made the straps the same length, they were a little loose and I'm guessing the skirt weight doesn't pull as much as the heavier brown twill, so I ended up unpicking and shortening them by a further 1/2" after these photos were taken.  As I enclosed my strap ends this was a bit fiddly, but I'm good at covering my tracks and you'd never know!
  • I added interfacing to the facing this time, the fabric needed some extra oomph!  


The lining is basically a second dress cut 1" shorter. The outer and inner layers behave as one fabric when the facing is added.  It does make it feel extra good and it's always pleasing to see a blast of blue and orange together! The dress fabric is shot with a navy warp and a cornflower blue weft which has a slight shimmer effect, and as it was raincoat fabric, it's slightly water repellent which adds to the utilitarian vibe.  Thank you to Charlotte who kindly took my photos at a quilt guild meeting, that's always the tricky bit as I don't like using a timer and taking my own pics.

Find the pattern at The Draper's Daughter or go straight to the Assembly Line website.  I'm wearing the  dress with a Sew Over It Molly top in a viscose jersey.  

Wednesday, 27 February 2019

February Arrivals at Plush Addict


We are getting an early burst of Spring in the UK at the moment and I'm feeling the buzz of plants and colours emerging as I look at Plush Addict's latest arrivals for my February sponsor post.  I've chosen quilt cotton bundles in a range of sizes and a knit fabric suitable for tops, leggings, dresses and more. 


  1. Makower Fern Garden FQ Bundle.  I love the botanical illustrations in these vintage style prints, great colour palette too. Check out the Fern print, I think that's my favourite.
  2. Dashwood Stitch FQ Bundle.  Very cute modern mix of bright colours and sewing themed prints from Bethan Janine for Dashwood!  Six prints, also available as yardage.
  3. Art Gallery Sage Sunswept Canyon Knit.  I love Art Gallery knits, they are always great quality and have a good recovery to them.
  4. Dashwood Amelie FQ Bundle.  Adorable collection from Jilly P for Dashwood.   Her simple bold style is so distinctive and I love it!

Monday, 25 February 2019

Kansas City Star Sampler Book Review

As a fan of 1930s quilt blocks, I've been tracking the publication date of The Kansas City Star Quilts Sampler and jumped at the chance to review it!  It's a mix of archive patterns from the Kansas City Star newspaper with modernised instructions and a history lesson.  In the 1920s American newspapers started to regularly feature quilt patterns.  This was popular with readers and the Kansas Star column started in 1928 and lasted until 1961 when they were replaced with TV listings- a sign of changing times.  The blocks featured in this book are a range of sizes just like the originals, although the sizes have been standardised a little, and there's an option in the last few pages to combine them all in a sampler.


The blocks are presented in decade order from a few 1920s blocks, a large selection of 1930s and 40s blocks during the height of the quilt revival, a smaller range from the 1950s and three blocks from the 1960s.  It's a detailed book with 64 blocks and 263 pages in all.


Throughout the book, there are regular profile pages compiled by quilt historian, Barbara Brackman and these are a fascinating read.   They are largely stories of the women, like Edna Marie Dunn, who helped to shape the quilting industry as we know it today: developing illustration aesthetics and quilt block design, creating businesses and methods of producing patterns like mail order and syndicating content to reach more customers.


Each block includes a snippet of the original pattern illustration and instructions alongside the 21st-century version.   Construction is largely through full-size templates which can be found just after each block instructions so you do need to be happy to use this method to make the majority of the blocks. Many designs are 12" x 12" blocks. The sampler at the back of the book is made by changing the sizes of many of the blocks enlarging and reducing when you print off template copies.  


There are a few blocks which have rotary cutting instructions or combine templates and rotary cutting.  Only one block is foundation paper pieced (Carnival Time) and there were some other blocks that would've benefited from FPP rather than individual templates ( Crazy Anne #2 for example) but that's a subjective viewpoint!   The templates could also be traced without seam allowances for English Paper Piecing.  There's one appliqued block (1955 Rose Cross) and one other block with an appliqued element (1936 White Lily).


I chose a couple of blocks, starting with 1941 Radio Windmill.  I still have a stack of 1920s Farmer's Wife 6" blocks from 2011 and want to add these together to make a small quilt so I opted for similar colours.  I used a scanner to copy the templates and then printed at 50% to produce a 6" x 6" finished block.   I made templates from plastic, drew on the reverse of the fabric and add seam allowances when I cut the fabric pieces. 


This block uses partial seams and brief instructions are given.  All the book instructions assume prior quilting knowledge.  You can find a beginner tutorial for partial seams here.  This block needs careful seam point alignment so I use vertical pinning to match the points and then just a single pin at the end of each seam. 


 I did make a slight error not realising that there were two mini block layouts needed to create the final layout so my food fussy cutting which was all in one direction has had a bit of spin but I love the final 6" block.  Japanese prints throughout and the strips and the food print were from Rosegarden Patchwork.


The second block is 1953 Eight-Point Snowflake and I have sewn this design before but many years ago and in a bigger size.  Again, I reduced the templates by 50% for a 6" finished block.  This block is all about the Y seams which is a technical challenge I really enjoy!  The instructions show the direction of each seam but otherwise, you need to be familiar with inset seams (I wrote a blog post on Y seams here) and these could also be hand sewn which is a great way to familiarise yourself with this sort of precision sewing.  A couple of the fabrics I used were from a few years ago when I started to my original 1920s blocks- the garden print, Denyse Schmidt floral and centre line print.  The gingham is from Rosegarden Patchwork. 

Here are the Kansas City Star blocks mixed in with my other blocks.  I do feel like adding to this so I think I will keep dipping into the book and sew up some other designs from across the decades.


 Thank you to Search Press UK for sending me a free copy to review.  This is definitely my kind of quilting book.  I love the history additions and there are some quirky block choices in with the more familiar selections.