Showing posts with label Farmer's Wife 1930s. Show all posts

Monday, 25 February 2019

Kansas City Star Sampler Book Review

As a fan of 1930s quilt blocks, I've been tracking the publication date of The Kansas City Star Quilts Sampler and jumped at the chance to review it!  It's a mix of archive patterns from the Kansas City Star newspaper with modernised instructions and a history lesson.  In the 1920s American newspapers started to regularly feature quilt patterns.  This was popular with readers and the Kansas Star column started in 1928 and lasted until 1961 when they were replaced with TV listings- a sign of changing times.  The blocks featured in this book are a range of sizes just like the originals, although the sizes have been standardised a little, and there's an option in the last few pages to combine them all in a sampler.


The blocks are presented in decade order from a few 1920s blocks, a large selection of 1930s and 40s blocks during the height of the quilt revival, a smaller range from the 1950s and three blocks from the 1960s.  It's a detailed book with 64 blocks and 263 pages in all.


Throughout the book, there are regular profile pages compiled by quilt historian, Barbara Brackman and these are a fascinating read.   They are largely stories of the women, like Edna Marie Dunn, who helped to shape the quilting industry as we know it today: developing illustration aesthetics and quilt block design, creating businesses and methods of producing patterns like mail order and syndicating content to reach more customers.


Each block includes a snippet of the original pattern illustration and instructions alongside the 21st-century version.   Construction is largely through full-size templates which can be found just after each block instructions so you do need to be happy to use this method to make the majority of the blocks. Many designs are 12" x 12" blocks. The sampler at the back of the book is made by changing the sizes of many of the blocks enlarging and reducing when you print off template copies.  


There are a few blocks which have rotary cutting instructions or combine templates and rotary cutting.  Only one block is foundation paper pieced (Carnival Time) and there were some other blocks that would've benefited from FPP rather than individual templates ( Crazy Anne #2 for example) but that's a subjective viewpoint!   The templates could also be traced without seam allowances for English Paper Piecing.  There's one appliqued block (1955 Rose Cross) and one other block with an appliqued element (1936 White Lily).


I chose a couple of blocks, starting with 1941 Radio Windmill.  I still have a stack of 1920s Farmer's Wife 6" blocks from 2011 and want to add these together to make a small quilt so I opted for similar colours.  I used a scanner to copy the templates and then printed at 50% to produce a 6" x 6" finished block.   I made templates from plastic, drew on the reverse of the fabric and add seam allowances when I cut the fabric pieces. 


This block uses partial seams and brief instructions are given.  All the book instructions assume prior quilting knowledge.  You can find a beginner tutorial for partial seams here.  This block needs careful seam point alignment so I use vertical pinning to match the points and then just a single pin at the end of each seam. 


 I did make a slight error not realising that there were two mini block layouts needed to create the final layout so my food fussy cutting which was all in one direction has had a bit of spin but I love the final 6" block.  Japanese prints throughout and the strips and the food print were from Rosegarden Patchwork.


The second block is 1953 Eight-Point Snowflake and I have sewn this design before but many years ago and in a bigger size.  Again, I reduced the templates by 50% for a 6" finished block.  This block is all about the Y seams which is a technical challenge I really enjoy!  The instructions show the direction of each seam but otherwise, you need to be familiar with inset seams (I wrote a blog post on Y seams here) and these could also be hand sewn which is a great way to familiarise yourself with this sort of precision sewing.  A couple of the fabrics I used were from a few years ago when I started to my original 1920s blocks- the garden print, Denyse Schmidt floral and centre line print.  The gingham is from Rosegarden Patchwork

Here are the Kansas City Star blocks mixed in with my other blocks.  I do feel like adding to this so I think I will keep dipping into the book and sew up some other designs from across the decades.


 Thank you to Search Press UK for sending me a free copy to review.  This is definitely my kind of quilting book.  I love the history additions and there are some quirky block choices in with the more familiar selections.

Monday, 29 August 2016

Farmer's Wife Quilt Along, Blocks 97 and 98, Tracy and Viola

Welcome to the penultimate blocks in the Farmer's Wife 1930s QAL.  This week, we are making blocks 97 and 98 and the first is Tracy (p.256, letter p.68).


Fabric Credits
Kona Candy Green
Moda Garden Project, Vintage Floral Pear Yellow
Penny Rose Fabrics Hope Chest 2 Hearts Purple
Robert Kaufman Fabrics, Penny and Friends, Square Dance Camelia

I thought I'd share a little about how I choose fabrics for blocks.  For this one I followed the suggestions in the book photo and used four different fabrics.  I thought one solid would be sufficient: it gives some definition and contrast to the prints and more than one can have an overly strong effect and dominate the ditsy prints so I didn't add another.  The medium floral has a scattered spaced out print and a textured background and this contrasted with both the other geometric prints.  The v.small geometric  provides lightness without the starker/flatter effect of a solid and the small all-over geometric is a middle point between the two prints in terms of scale and the pattern is directional.

As usual, I pre-cut my pieces and foundation pieced my block.  There are two shapes with two sizes for each, just multiply each shape for the number of pieces you are cutting in each colour:

Rotary Cutting 
These are for foundation piecing so are cut larger than needed.  
  • Small square: 1 ½" square
  • Larges quare: 1 ¾" square
  • Small half-square triangles:  cut  2 ¼" squares; subcut each square in half along the diagonal to yield 2 HSTs from each square
  • Large half-square triangles:  cut  2 ¾" squares; subcut each square in half along the diagonal to yield 2 HSTs from each square
The centre section of this block should nest together when you join the seams - I must've been day dreaming  when I was piecing because mine didn't!   For this block, some of the large half square triangles are added as oversized triangles and trimmed back using the quilt ruler's 45 degree line.


Top Tips for Foundation Piecing this Block
  • Pre cut all pieces
  • Use a water based glue stick e.g. Sewline, to stick the first piece of fabric on each section
  • Chain piece where possible
  • Use an index card or a Dritz seam guide to fold the paper back when trimming excess
  • Nest seams where possible
  • Press central section seams open and corner section seams to one side

Viola is a straightforward block and quick to foundation piece.  Jo from A Life in Lists is guest posting on this one- she'll get the post up later today then you can pop over and read her thoughts on it.


Windham Playdate in Ditsy Blue
{For both blocks, I link to sponsor shops for fabric bought from them and elsewhere for other fabrics}

Don't forget to share your blocks or leave me a link in the comments so I can see where you are.  I know the QAL is coming to an end but you may be working on a block from earlier on and I'd love to see.
I'll be back with the last block next week.  A huge thank you to all my guest bloggers who did an amazing job sharing their skills, tips and knowledge, their successes and failures and their beautiful blocks.   You can find all the posts here.
SaveSave
SaveSave
SaveSaveSaveSaveSaveSave
SaveSave
SaveSave
SaveSaveSaveSave
SaveSave
SaveSave
SaveSaveSaveSaveSaveSaveSaveSave
SaveSave
SaveSave

Monday, 22 August 2016

Farmer's Wife Quilt-Along blocks 95 and 96, Sylvia and Tirzah

Almost complete with the Farmer's Wife 1930s QAL and time for blocks 95 and 96.    Block 95 is Sylvia (p.254, letter p.18)  and Charise  from Charise Creates has written her final guest post for this one.  Here's my version:


Fabric Credits
Kona Corn
Penny Rose Fabrics Hope Chest 2 Floral Blooms
Ayumi Takahashi for Kokka, Kitchen print floral from Lighthearted

Tirzah, Block 96 ( p. 255, letter p.86) looked a little tight or dense from the block photo in the book so I used a pattern rather than a solid colour to break it up a little and added a bit of fussy cutting so it now looks like cats in various playpens.  I didn't know Tirzah as a name so I looked it up and Wiki informed me it is a Hebrew word and meaning, "she is my delight".


Pink floral- gift from a friend

{For both blocks, I link to sponsor shops for fabric bought from them and elsewhere for other fabrics}

The letter is worth a read.  It starts with a familiar description of a less than immaculate house but the reason for a little untidiness goes beyond a desire to sew or even help on the farm.  It's a touching read and a timeless message to enjoy home and family above all else.

Rotary Cutting 
These are for foundation piecing so are cut larger than needed.  
  • Green centre square: cut (1) 2 ¾" square
  • Green rectangles: cut (4) 1 ⅝" x 2 ¾"  rectangles 
  • Green half-square triangles:  cut (8) 2" squares; subcut each square in half along the diagonal to yield 16 HSTs in total
  • Narrow pink rectangles for A1,2,5,7, F1,3, G1,3 : cut (8) 1 ¼" x 2 ¾"  rectangles  
  • Pink rectangles for B4, C4, D4, E4:  cut (4) 1 ⅜" x 4" rectangles 
  • Small pink rectangles for B2, C2, D2, E2 H2, I2, J2, K: cut (8) 1 ⅜" x 2" rectangles

Top Tips for Foundation Piecing this Block
  • Pre cut all pieces
  • Use a water based glue stick e.g. Sewline, to stick the first piece of fabric on each section
  • Chain piece where possible
  • Use an index card or a Dritz seam guide to fold the paper back when trimming excess
  • Nest Seams where possible
  • Press final section seams open
No nine-patch blocks this week.  I need some time to check how many I need and how big the final quilt will be so I'll leave that until the Farmer's Wife 1930s QAL blocks are complete.  Meanwhile, 
Don't forget to share your blocks or leave me a link in the comments so I can see where you are.  I know the QAL is coming to an end but you may be working on a block from earlier on and I'd love to see.
Jo from A Life in Lists returns for the last guest blogger post next Monday.   
SaveSave
SaveSave
SaveSaveSaveSaveSaveSave
SaveSave
SaveSave
SaveSaveSaveSave
SaveSave
SaveSave
SaveSaveSaveSaveSaveSaveSaveSave
SaveSave

Monday, 13 June 2016

Farmer's Wife Quilt Along: Blocks 75 & 76, Nan and Nancy

Welcome back to the Farmer's Wife quilt-along, I hope you are all feeling refreshed after our little break and ready for more blocks!   The blocks that we have remaining feel like such a small part of the total book, completion does not feel far away!   Block 75, Nan (p.234  letter p.154) is an easy block to get back into the book although the accompanying farmer's wife letter is heartbreaking.


Fabric Credits
Suzoki Koseki for Yuwa red Paris daisy (Out of print)
Marcus Brothers 1930s repro school house print (OOP, gift from Chase!)

I'm not religious so I'm not sure if I will include this block in the final quilt- I may substitute with something more personal.  I did enjoy picking the fabrics though, I felt these two really went together!    If you would like an alternative block for any of your blocks, there's a great selection in The Splendid Sampler project by Jane Davidson and Pat Sloan.  I'm contributing a block in mid October and I might sneak that into my Farmer's Wife quilt

Rotary Cutting dimensions
These dimensions are slightly bigger than you need so they are ready for foundation paper piecing.  They are not actual size.  If you are a beginner, you can cut them even larger to give you more wiggle room!  Some squares are cut on point to make triangles and avoid bias edges in troublesome places like the outer edges of the block.

Cross
A1: Cut (1) 2 x 3 ½" rectangle
A5: Cut (1) 2 ½" x 6 ¼" rectangle
B1: Cut (1) 2 x 4" rectangle

Background
A2, A3: cut (1) 3 ¼" square on point, sub-cut along diagonal to yield 2 half-square triangles
B2, B3: cut (1) 4 ¼" square on point, sub-cut along diagonal to yield 2 half-square triangles
A4, B4: cut (1) 2 ¼" square, sub-cut along diagonal to yield 2 half-square triangles
A6, A7: cut (1) 3 ¼" square, sub-cut along diagonal to yield 2 half-square triangles

Top Tips for Foundation Piecing this Block
  • Pre cut all pieces
  • Use a water based glue stick e.g. Sweden, to stick the first piece of fabric on each section
  • When adding A6 and A7, align the right angle corner of the fabric triangle so it is inline with the right angle corner of the paper

  • When joining sections A to B, first find the centre point on the long diagonal line on A and B, pinch to make a temporary fold.  Use a water based glue stick to hold this in place.  You could also glue the rest of the seam
  • For perfect alignment of sections A and B, mark the seam allowances at the end of the seam on each section- this will create precise seam points for you to start and end the seam
  • Press section seam to one side
For block 76, Nancy (p. 235  letter p. 42) Jo from A Life in Lists is guest posting, see what colours she's chosen in her hand pieced block here.   I knew I wanted to add an extra colour so I picked a background fabric with two colours running through it as well as the main and used those as solids to accent the triangle and rectangles.    


Fabric Credits
Kona Carnation
Kona Sour Apple
Gracie's School House Classic Dottie Blossoms
{Please note that on both blocks, I link to sponsor shops for fabric bought from then and elsewhere for other fabrics}

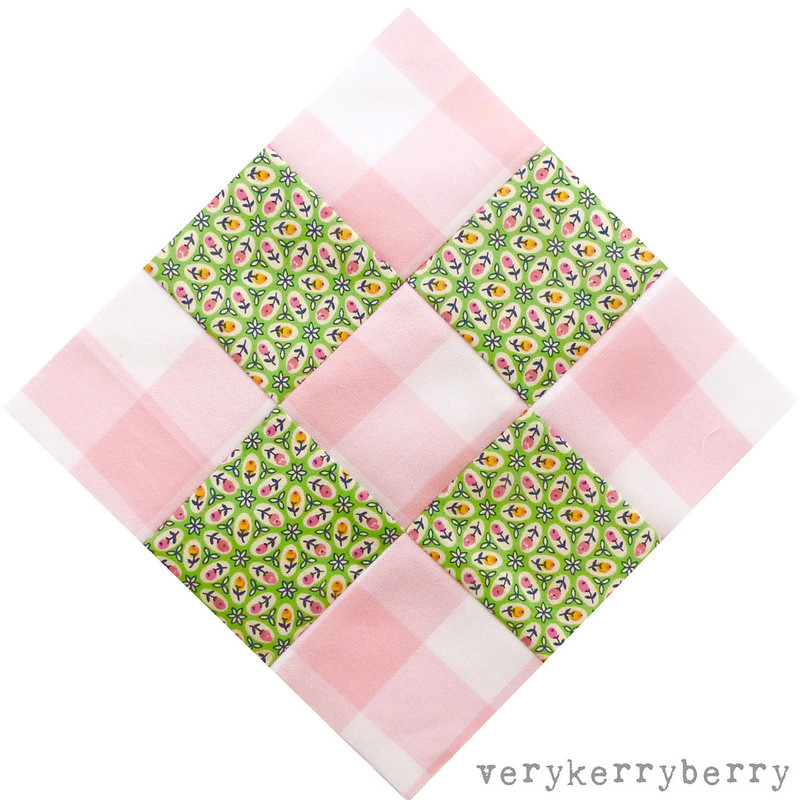
I stitched up a couple of nine-patch blocks to add to my collection.  I pick the fabrics for these very quickly and enjoy the changes in scale with some of the smaller ditsy repro prints against the 1" gingham squares.


  • You can share your farmer's wife quilt blocks with the hashtags #fw1930sqal and for these blocks either #nanblock or #nancyblock as well as #fw75Nan, #fw76Nancy
  • If you want me to take a look at your blocks, tag me on Instagram, I'm @verykerryberry or comment here and paste in a link to your blog
  • There's a Flickr group you can add to here.  All my Farmer's Wife 1930s blocks can be seen in this album and my 9-patch blocks in this album. 
Next Monday Justine will be returning as a guest blogger!  See you then x


SaveSave

Monday, 16 May 2016

Farmer's Wife QAL blocks 69 and 70: Mrs Keller and Mrs Lloyd


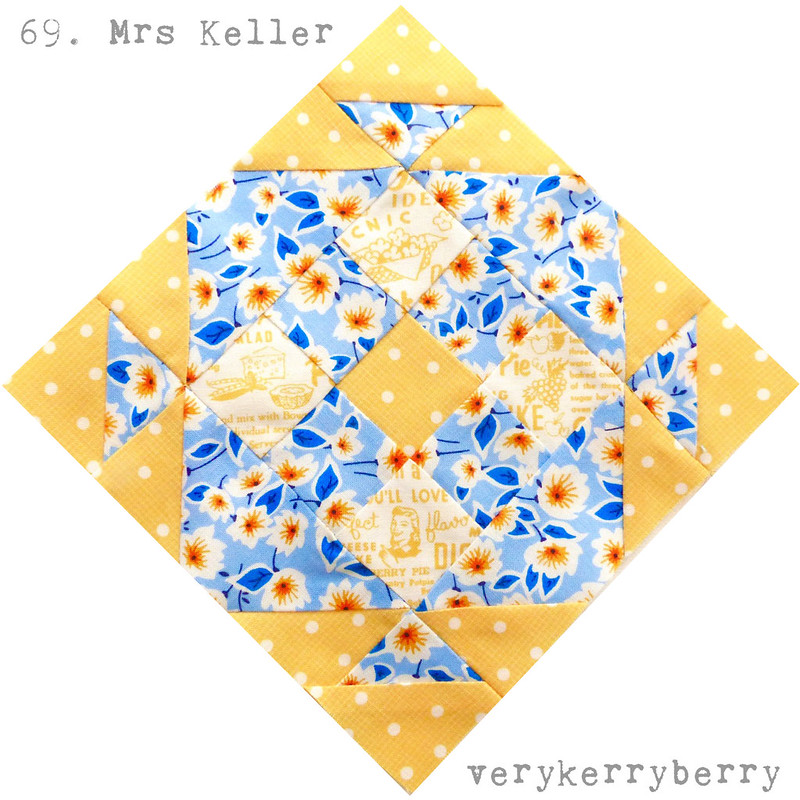
Welcome back to another Monday at the  Farmer's Wife 1930s QAL.   I am having problems loading pictures to blogger so apologies if you couldn't see pics, if anyone has any idea on what the problem might be, please let me know!  I've had to load photos to Flickr first and embed as a way round it.  This weeks blocks take a little while but are nowhere near as tricky as last weeks!  First up is block 69, Mrs Keller (p. 228, letter p.92).   I played around very slightly on the colour plan for this one.

69 Mrs Keller

Fabric credits:
Pam Kitty Ping Pong 2 in yellow, Holly Holderman, Lakehouse DryGoods (gift from friend)
Pam Kitty Recipe Text fabric, Holly Holderman, Lakehouse DryGoods (gift from friend)
{Please note:  On both blocks I have linked to my sponsors for fabric bought through them and elsewhere for anything that has come from other shops}

The only thing to note on this block is if you choose to foundation  piece, section C can be pieced in a different order to allow the seams to nest.  Change C1 to C3, C2 stays the same and C3 becomes C1.  It only makes a small difference  but it's makes the construction of the middle nine-patch section a little easier.

Rotary Cutting Measurements
Squares: cut (4) 2" squares in blue, (4) in yellow
Half-square Triangles: cut (2) 2 ½" squares in blue and (6) in yellow; sub-cut each square in half  diagonally to yield 2 half-square square triangles. (Total yield= 16 QSTs)
A4, B4, C4, D4: either use a freezer paper template and this method, or cut (4) 2 ½" x 4 ½" rectangles in blue.

Top tips for foundation piecing this block
  • Pre-cut all pieces
  • Use a water based glue stick. I use Sewline, to stick the first piece of each section
  • Chain piece where possible 
  • Mark in seam allowance around edge of each section before joining together to improve accuracy  
  • Flatten seams with Flatter or similar light starch spray

Block 70, Mrs Lloyd (p. 229, letter 76) has a lot of pieces but fits together neatly.  Melinda is guest posting on this block so hop on over to her blog to read her thoughts about colour palettes; it's a very interesting read and your can see how she's experimented with different colour combinations.

70 Mrs Lloyd

Fabric credits:
Kona Candy Pink
Judie Rothermel, Aunt Grace Sampler for Marcus Fabrics
Summertime by hemmer design for Red Rooster Fabrics

As a side line, I'm doing an extra easy quilt using the 1930s fabrics from this project and some beautiful candy coloured 1" Carolina Gingham fabrics.   I have only found limited colour ways in the UK so I bought a selection from an Aussie shop, Ministry of Fabric.

ninepatch1

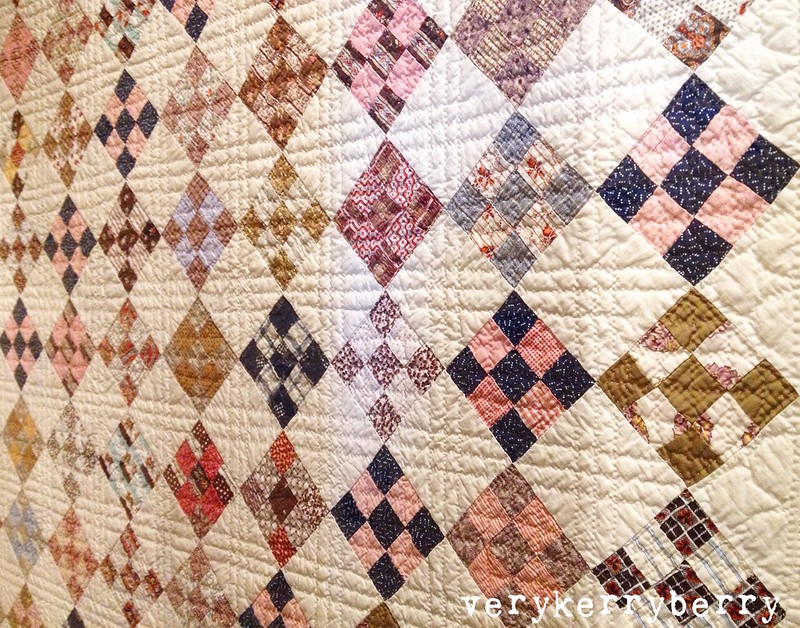
It is a simple nine-patch on-point style quilt inspired by this quilt in the American Museum in Bath and my desire to have a keepsake of all the wonderful colours and prints from the quilt along.

Nine Patch- 19th C- Bath

My daughter will have the Farmer's Wife quilt so I 'need' something of my own.  I have no particular plan for size or material requirements, instead it will grow as the blocks are sewn.  The individual squares are cut at 2 ½" and each block is 6 ½" unfinished.  Quick to do in comparison to the Farmer's Wife blocks!

Remember you can:
  • Hashtag  #fw1930sqal on Instagram and add photos to the Flickr group if you like to share there.  
  • For individual blocks, you can use #MrsKellerblock and #MrsLloydblock on Instagram, Fat Quarter Shop and Angie are using these hash tags, #fw69MrsKeller,  #fw70MrsLloyd - I'm using both hashtag systems.
  • You can also copy and paste links to any blog posts you do on these blocks in the comments and I'd love to visit and take a look. 
Hannah returns with a guest blog post next week.


Monday, 9 May 2016

Farmer's Wife QAL Blocks 67 and 68: Mrs Brown and Mrs Fay

Over two thirds of the way in now and here are the next two blocks in the Farmer's Wife 1930s QAL.  Block 67, Mrs Brown (p. 226, letter 103) is a nine-patch style block with economy squares and half square triangles.  Charise is guest posting for this one so click on over to Charise Creates to see what she's done with this block- it's a great candidate for fussy cutting!   Here's my version:


Fabric credits:

{Please note:  On both blocks I have linked to my sponsors for fabric bought through them and elsewhere for anything that has come from other shops}

One of my cats ended up wandering in a different direction, my daughter has already called it 'spider cat'. 

Block 68, Mrs Fay (p. 227, letter 124) is a challenging block to sew by machine.  There are Y seams galore and you will definitely need a seam ripper as a constant companion.  Hand piecing the block is easier than machine piecing.


Fabric credits:

How to sew a block with Y seams: Step-by-step
Y seams are inset seams that are used when a section or shape needs to be set into a quilt block.    They occur at a place where three seams and three fabric pieces come together at a single point creating a Y shape.   At the point where there is a Y seam, instead of a continuous seam that extends into the seam allowance,  a Y seam instead requires the seams to be sewn precisely on the seam line and not in the seam allowance.   In English paper piecing or when hand piecing, it is standard practice to sew only the seam lines, leaving the seam allowances mobile/floating so they aren't stitched down and can be pressed in any direction when the block is complete.  Before I started sewing this block, I identified the Y seams as they come in two stages of making the block.  This block is made of a central square and eight sections fit around the square. The sections are made of smaller sections (shown in yellow and blue below) and contain a Y seam where they are sewn together.

1.  To be aware where the Y seams were, when preparing the foundation paper piecing templates, circled each Y seam.  Remember other prep such as colour coding and pre creasing all the seam lines with a Hera marker and ruler.


2.  I recommend  pre-cutting all the pieces before starting sewing.  Rotary cutting instructions are given for the squares and the triangles.  Cut the centre square to the exact size, cut all the other shapes at least ¼" larger. For the diamond shape, I used a freezer paper template using this method.  


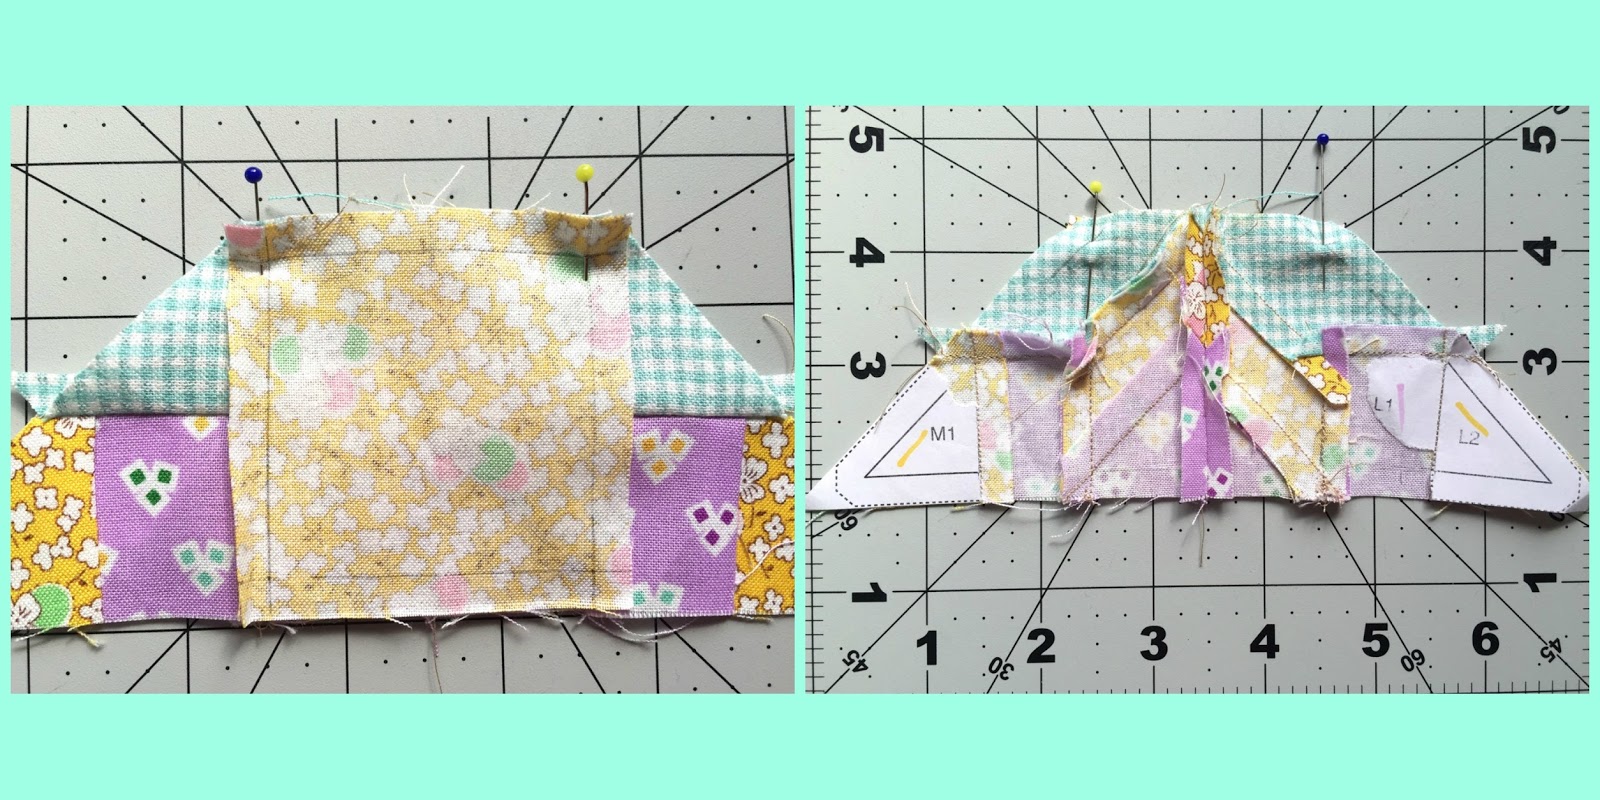
3.  The sections comprised of square/half square triangle can be sewn in the usual way.  The section with the Y seam needs to be sewn so that the seam stops securely where the Y seam will be and doesn't extend into the seam allowance.  This needs to be done very precisely:  I count three stitches forwards and backwards at this point,  it also helps to hand crank your machine needle where these precise seams start or finish.  


4.  Then trim all the sections, use scissors for the inward edges next to the Y seam.  On the reverse, peel back the paper and add ¼" seam allowances around all the edges with a soft pencil.  To sew the sections together, pin as shown in the pic below, matching seam points precisely.  Sew from the outside edge to the Y seam, stop and secure the seam. Again precision is key, one stitch over will mess up your Y seam.  A top tip to remember is that there should only ever be two layers of fabric being sewn at the seam point of a Y seam, so make sure that no extra layers get caught in the stitches. 


To sew the next seam, ensure A3 paper is torn off so the seam can flip over.  Adjust and pin your fabric edges checking that the penciled seam allowances meet exactly.  The Y seam starts and is secured precisely where the previous seam ended, and is then sewn to the end.   Press. 


Repeat until all the sections are joined in this way.  These are then paired together (the seams will nest) to make an isosceles trapezoid.   Make four of these in total.  Now for more Y seams, you can see them identified by stars in the diagram below. 

Sewing the trapezoid sections to the centre square is just like sewing a spool block.   To join the first trapezoid to the centre square check that both have seam allowances marked in pencil on the reverse. Match seam allowances precisely and pin together.   


With the square on top, sew along the seam line securing at the beginning and end and not letting any extra stitches go into the seam allowance.  Repeat with the opposite trapezoid.  I don't press at this point, I just smooth the fabric with my fingers.   Now sew the remaining trapezoids to the remaining outer edges of the square.  The square should end up with what looks like a continuous seam in a square shape but is instead four straight seams.  The diagonal edges are not yet sewn together at this point.


To join the diagonals, ensure that seam allowances are marked in pencil on the reverse.  Pin the centre point of the seam where the diamond points meed square shape is formed in the block and baste with a few machine stitches.  


With this point accurately basted, pin the top and bottom edges of the seam and starting at the centre square, ensure there are only two layers of fabric under the needle, start and secure the seam and sew to the outer corner.   Repeat this process on the remaining three diagonal seams.   Now press the diagonal seams open and press the rest of the block on the reverse and right side, using starch to help flatten bumpy seams.   When it comes to pressing seams,  I go with what feels right- whatever reduces bulk the best or doesn't show through.  It needs to be considered according to block and fabric, for me there are no hard and fast rules.


It is a punishing block and took me hours and a lot of unpicking to do as I aimed to get everything just right.  Y seams are tricky and this is a small block with little pieces so it is undeniably challenging even for an experienced Y seam piecer.  If you completed it, well done and if it beat you or you didn't dare start, it can be substituted with a block of your choice. 

Top tips for foundation piecing this block
  • Pre-cut all pieces
  • Mark Y seam points on paper pattern pieces.
  • Use a water based glue stick. I use Sewline, to stick the first piece of each section
  • Chain piece where possible 
  • Mark in seam allowance around edge of each section 
  • Flatten seams with Flatter or similar light starch spray
Remember you can:
  • Hashtag  #fw1930sqal on Instagram and add photos to the Flickr group if you like to share there.  
  • For individual blocks, you can use #MrsBrownblock and #MrsFayblock on Instagram, Fat Quarter Shop and Angie are using these hash tags, #fw67MrsBrown,  #fw68MrsFay - I'm using both hashtag systems.
  • You can also copy and paste links to any blog posts you do on these blocks in the comments and I'd love to visit and take a look. 
Melinda is back as a guest blogger next week and I'm looking forward to slightly easier blocks!

sib blog