Friday, 10 December 2010

P is for Procrastination, presents...

So much to do, this was the state of my sewing area- I have since tidied it.  When I do a new project I pull out all the possible fabrics I might use and then dip into the pile as I sew. As an approach it is ccreative but messy, putting back doesn't have the appeal of getting it all out.  I am procrastinating, I can't help it,  so I thought I might as well blog and share some stuff.
Vintage feed sack squares, loving these, just arrived from USA great value from this ebay seller Shabbyvintagelady
Essentials from M is for Make  I didn't mean to buy a set of co-ordinating prints but my head must have been heading that way.  The herringbone Joel Dewberry print is to sash my Ringo Pie blocks, I am aiming for a printer's block wooden drawer look.
These are from Amy's soon to close fabric shop, I have been thinking about buying this bundle for too long, bit the bullet and it was worth it
I have made some Chirstmas present things and now Damian has sworn not to look I can reveal what I made for him but first here he is with our dog Lottie
A mug rug for work.  There are a lot of in jokes here but a few other more obvious things like tea, chocolate, biscuits, love and kisses.  The D paper pieced pattern is from Kumiko Fujita 318 Patchwork. Man quilting is always a test of fabric selection, colour etc. 
The back of projects is always more revealing than you think it will be, especially with the applique lines.  Reminds me of an old exercise book.
And Lula has been busy, a scrappy hoop for baby cousin Sophie.  She procrastinated too but got there in the end.
Back to the sewing machine x have a great weekend x
And a hello to new followers, there has been a few lately :)
sib blog

Monday, 6 December 2010

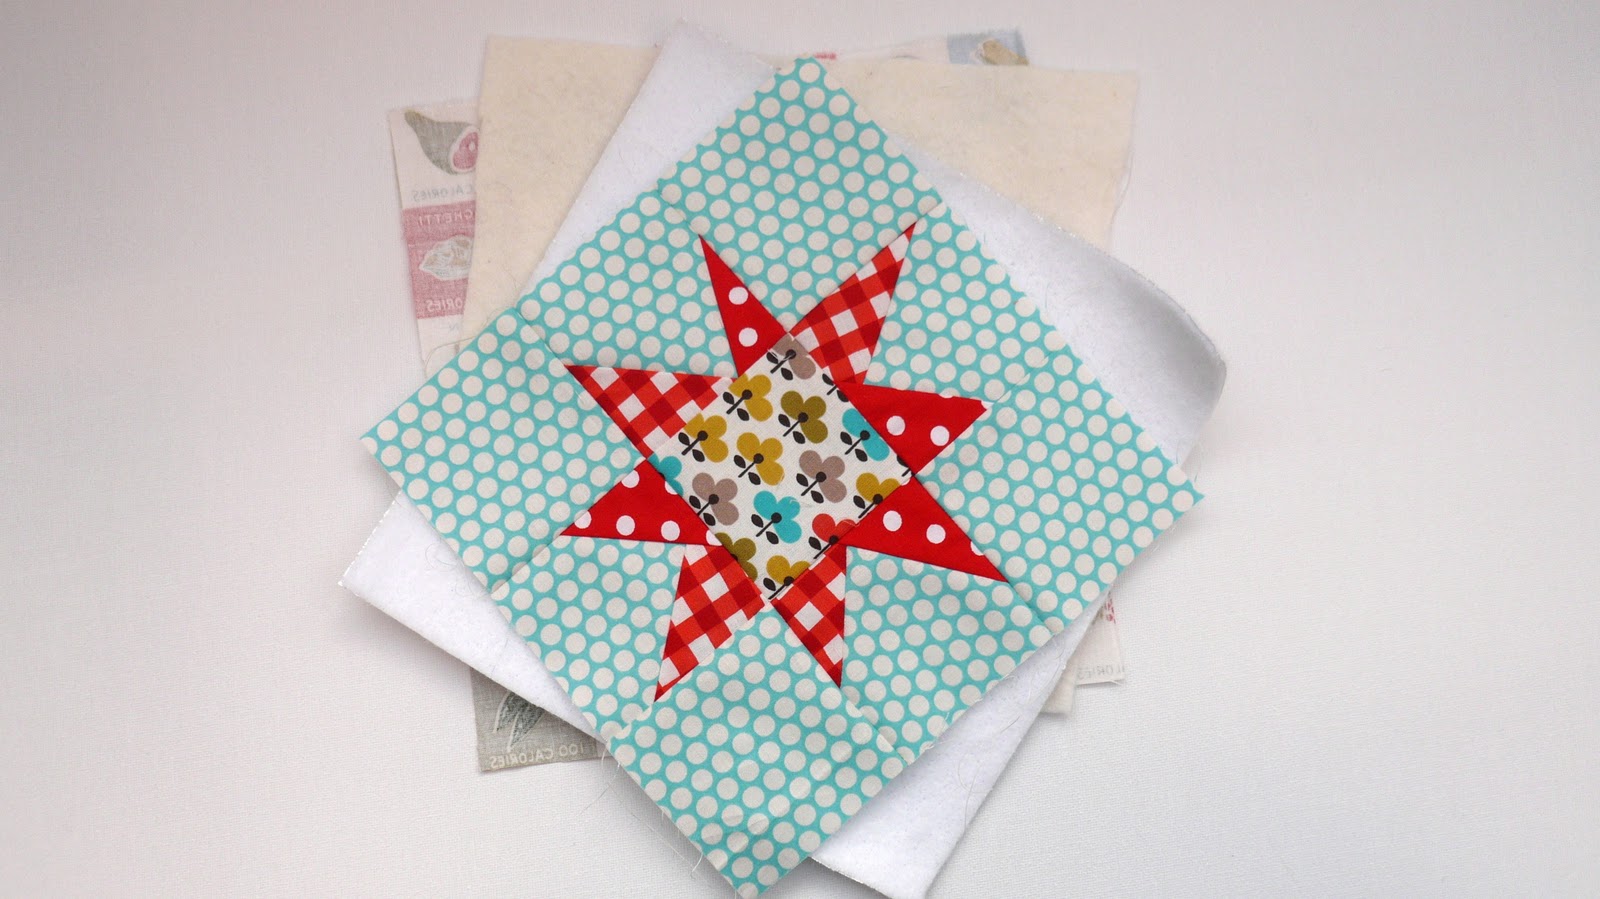
Starbright pot holder/mug rug

A big thank you to Mia for hosting her December Christmas making special at Handmade by Mia, if you haven't visited yet, take a look.  My make is today!  This post is extra exciting for me as it is a threeway post- here, linking to Mia and on Kate's blog M is for Make and involves contributions from other bloggers along the way so think of it as a collaborative effort! It is a quick and easy tutorial for a Starbright pot holder/mug rug- it could be either- and a quick gift for Christmas.  For the puzzled amongst you, a mug rug is just an oversized coaster, big enough for a cup of your favouite hot drink with room for a snack on the side.
  If you haven't made a wonky star before, it is much easier than you would think.  I went for Christmas colours rather than Christmas themed fabrics so it can be used all year round whilst giving a bit of festive cheer now.  You can easily make several of these out of the generous fabric quantities below.

To make your Star Pot holder/mug rug you will need:
1/4 yard fabric for background
1/4 yard contrasting fabric for triangles- or scraps
Contrasting scrap for centre square
1/4 Fabric for backing
1/4 yard of insulbrite thermal padding (Optional) 
1/4 yard cotton batting (or less if using insulbrite as well)
1/4 yard fabric for binding or  44" ready made bias tape
Ribbon or tape for a hanging loop, about 4" will be ample
(Finished holder/rug will be approx. 8" square)

Cut background fabric into 8 squares, each 3 1/2" square
Cut centre fabric into 1 square, 3 1/2" square
Cut triangle fabrics into 4 squares, 4 1/2 inches" and then stack the squares and cut along the diagonal to make 8 right angled triangles

To make the star follow Victoria's wonderful tutorial  or reference Gwen Marston's Liberated Quilting 2 
Place your completed star over your backing fabric as a guide and cut out a back piece slightly bigger that the top.  Repeat for the batting.  I used a layer of insulbrite and a layer of cotton batting. You could use 2 or 3 layers of cotton batting instead of a layer of insulbrite.  Make your quilt sandwich- backing fabric right side down, cotton batting, insulbrite shiny side up, star square right side up.  
As this is quite small I didn't spray baste, tack or pin but if you want to go ahead.
I used a Hera tool to make a crease corner to corner and then quilted from that point.  I used a stitch length of 3 and the walking foot as a line guide. 
I went for quite a dense textured pattern but do whatever you fancy.
Trim the edges making everything nice and square.  Before I add binding I always zig zag around the edges of any quilted project, mini size or full size.
Now is the time to add a hanging loop. Stitch in the 1/4" seam allowance and secure with straight  stitch and zig zag. Make sure the loop is pointing inwards out of the way of where the binding will go.
You could add a label or decorative tape as well- festive message maybe?
I use a single binding on small projects like this to.  Cut your binding strips 1 1/4 " wide.  Straight grain is fine, there are no curved edges so it doesn't need to be bias cut.   Trim the start of the binding at a 45 degree angle- it will make life easier later.
Make sure your hanging loop is pinned down and tucked out of the way.  A good finish to your binding  will lift the whole project,  so before you attach it, trim off all stray threads, cut the tips off the corners of the quilted square- just the tiniest amount, it will reduce the bulk on the binding corners.
I found a very helpful single binding tutorial here by Rachel at Contented.  She has gone a bit wider with the binding at 1 1/2".  I like mine tighter so I opted for 1 1/4".   Take your time, use your iron on the corners, keep your seam to 1/4" and look at my tutorial for mitred corners if you find these tricky.  Rachel is adding this to her binding tutorial as well.
You can stitch your hanging loop on to the finished binding or leave it as it is.  
 A useful little  present or something to hang up and keep for yourself!
Fabrics: Green dots (binding) and aqua dots- Kei Honeycomb
Centre Square- Ellie in Amber- Michael Miller- all available from Kate at M is for Make
Red gingham print- Farmers Market Sandi Henderson, Red/white dots- local fabric store and Kitchen print  Elsie's Pantry Windham Fabrics- from my stash
Who doesn't appreciate a little handmade, homemade love?
Keep checking Mia's blog for more December makes x And Kate's blog for fabric loveliness x
sib blog

Friday, 3 December 2010

Warm Hands, Warm Heart

Oh so cold at the moment.  My hands really suffer in the cold with chilblains and stiffness, as a result I have a large collection of gloves, fingerless, wristies, warmers etc.
Some of these have finger pads which have worn away but I can't bear to throw them away- the green and brown striped ones particularly- hopefully they will become wrist warmers.  Any other suggestions to repurpose worn out gloves are welcome- email me!    This year I have invested- they were so expensive- in sheepskin.   I was in a moral quandary buying them- I don't eat meat- but I took the cowardly standpoint and try not to think about it.   Result: toasty, flexible hands even in minus temperatures.  Warmer than cashmere and they won't wear out so fast.
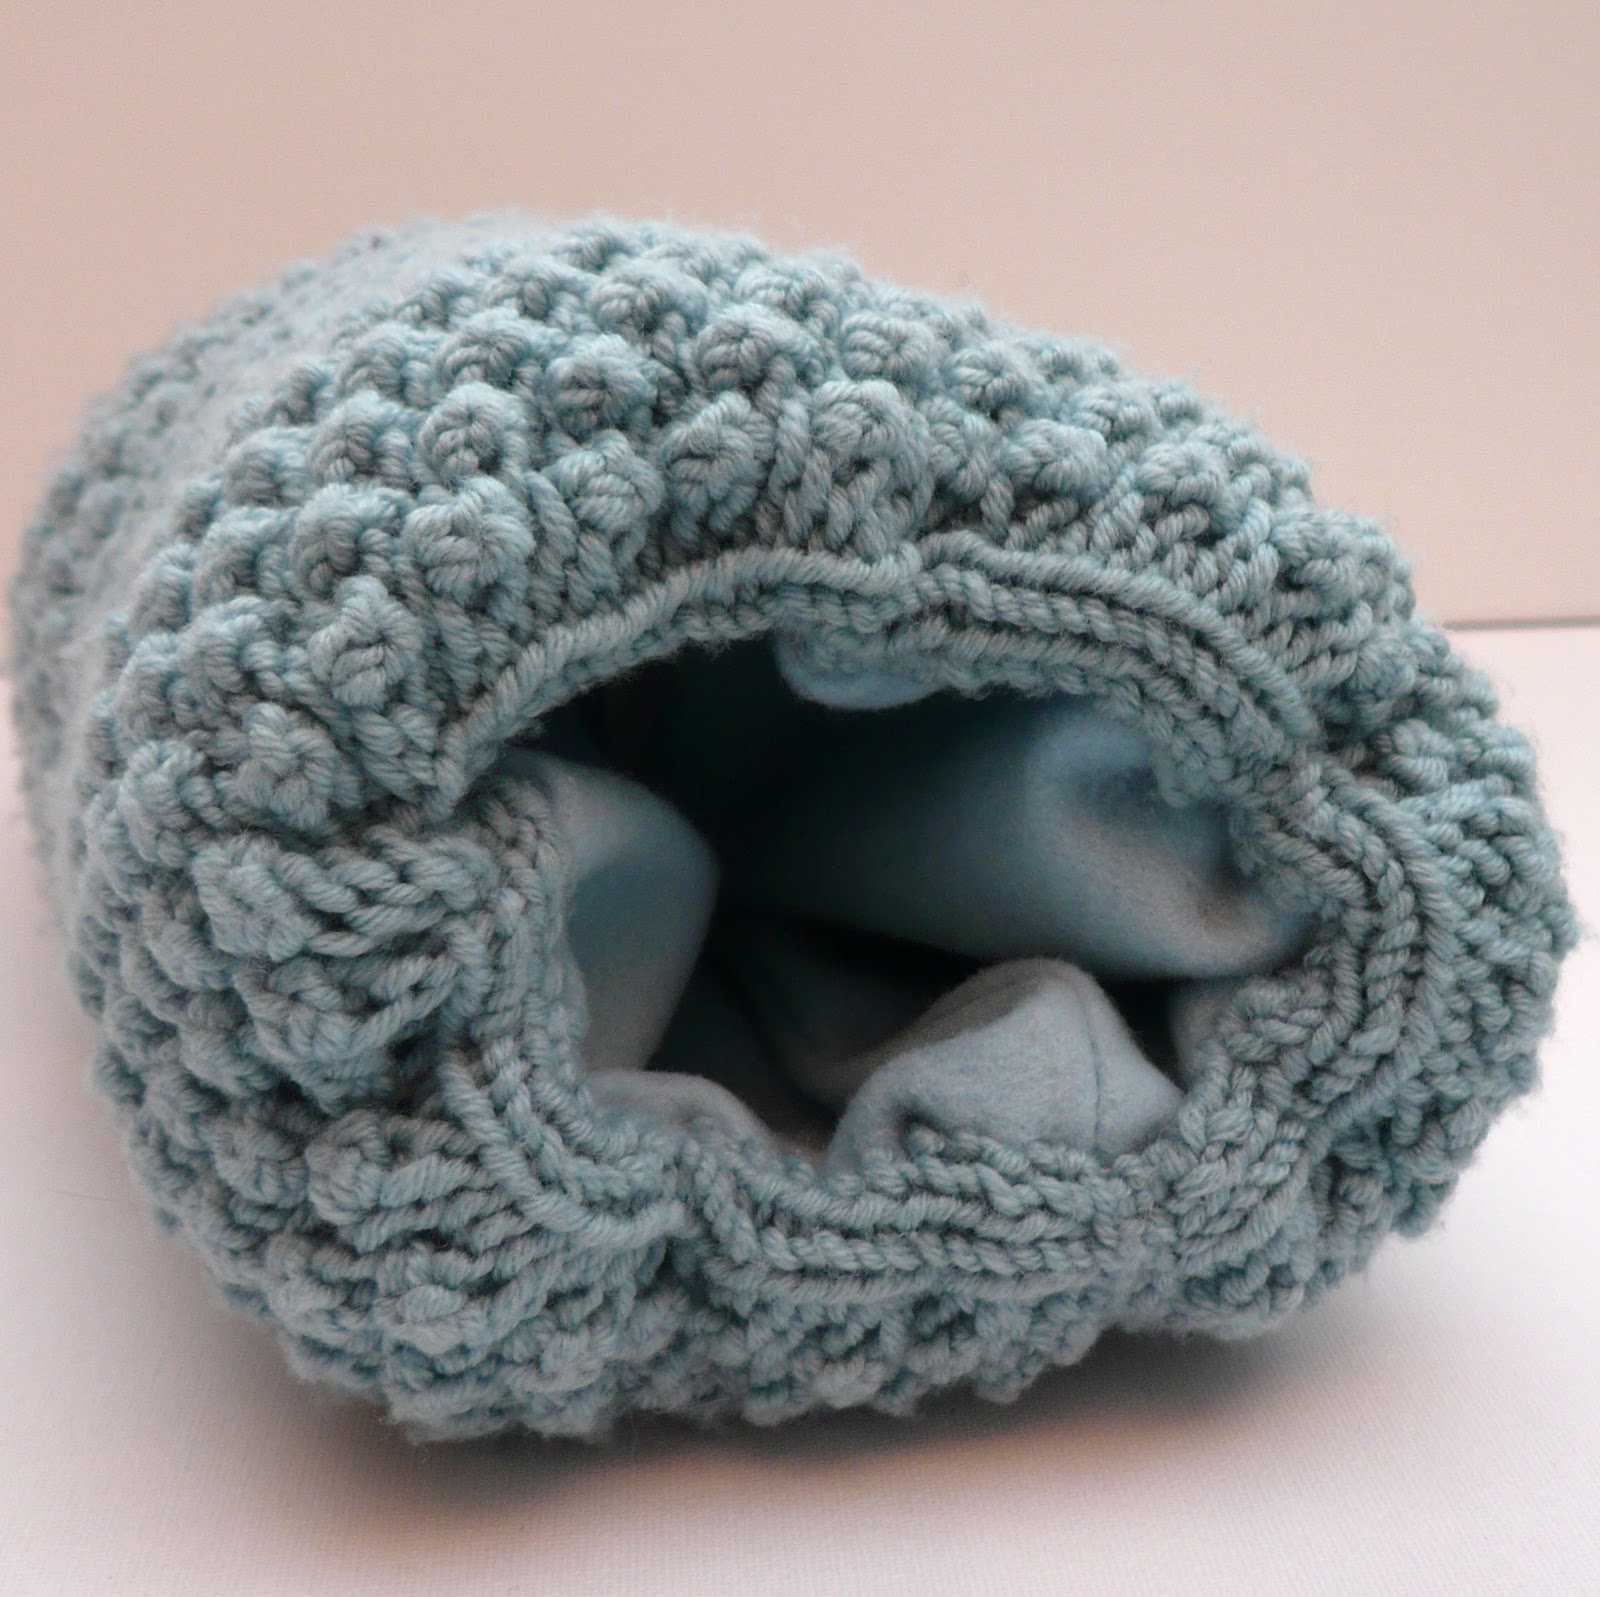
Indoors, I have been using a hand-knitted muff (the word always makes me laugh) if I am sitting watching tv.  My mum bought the pattern (it is from a Louisa Harding Rowan booklet) and the wool- Debbie Bliss merino aran- as a present, my aunt knitted it for me.   I lined it with puffy polyester batting and a wool cashmere felted weave that I picked up cheap in a local fabric shop. I ran a little shearing elastic along each side edge to gather them in a bit.   I like the joint effort in this project
I put a heated wheat bag inside and it is cold hand heaven!
I had an experiment with some cashmere wrist warmers.  These aren't the prettiest thing but they are so warm.  They were the sleeves of a  thrifted jumper given to me by friend Paula.  First, hot-washed to fuzz them up and discourage unravelling.  Then, machined in a tube with seams on the outside as inside seams tend to rub.  Then trimmed with pinking sheers and cross stitched with cream perle thread to flatten and decorate.  The top and bottoms are zig zag hemmed.  I am not good at sewing knits but with these it doesn't really matter, warmth over style.  The thumb holes are stitched around by hand, buttonhole stitch.  Take a look at Mia's blog for a lovely warm scarf at her Christmas Calendar makes.
Last night Damian and I braved the cold, ice and even the small covering of snow that came yesterday and went to see The Villagers.  They warmed my heart and my soul-intense, emotional and very beautiful x
Hope the linky works below- enjoy

sib blog

Wednesday, 1 December 2010

Advent

I love Advent, it is all about the build up.  Christmas day itself can be a bit overwhelming and the magic can wane, but now the preparation and excitement is building and I can start to get out a few decs.   I found this sheet of gift stamps on Etsy 1970 the year I was born so I couldn't resist a seasonal picture for the walls.
 Once you are properly grown up and have your own place it is fun establishing your own traditions.  I did some when we were a twosome and we added to them when Lula was born. When she was little and I was in creative baby frenzy I made these little advent stockings- they are easy to do but as there are obviously 24 I do remember them taking an age to complete.  First time round she was too young for sweet treats but now on their 10th outing chocolate is king and there is a pile of chocolate money to go inside them
Lilacs and pinks were her favourite colours back then.  She has 'matured' to purple.  We used to go to a parent/baby craft group where I made the stockings and the fairy below.  We shared a pattern, sorry  I cannot find it so I can't pass the reference on.  Happy times x  For more advent makes visit my blog friend Mia's Christmas Calendar blog for makes every day up to 25th Dec- I have one coming up for her  on 6th Dec
Couldn't resist making mince pies especially as it is so cold here.  I am not a big fan of pastry so I used just enough to contain the mincemeat and added flaked almonds instead- yummy- quick recipe below, borrowed largely from Nigella Lawson
60g Margarine or butter- depends on your preference
60g Trex/vegetable shortening
240g Plain flour
Juice of Orange
Half a jar of mincemeat (200g)
Flaked almonds to top

Rub in or cut in the fats with the flour.
Place in a fridge or outside covered up if it is really cold!- Leave for 20 mins.
Now add orange juice- you need just enough to bind the pastry, if you are short add very cold water.  You can do this in a processor or by hand- up to you, just go easy with your hands, minimal touching.
Divide the pastry in two, cover and chill 20 mins again.
Roll out one ball of pastry as this as you dare.
Cut out using circle cutters or a glass/cup- your circles should be a little wider than the pie pan they are going into.
Add a small amount of mincemeat  to each one and top with a few flake almonds- you don't need many as they burn easily.
You can repeat with the second ball of pastry or leave it in the freezer for another time.
Cook gas mark 7 220 c for 8-10 mins depending on size.  Keep an eye on them, they don't take long
In total I made 36 approx with a 2 1/4"/ 58mm cutter and this included some jam tarts too
If you are super organized, cook 18 as above and also cut out the next set of pastry circles and place the baking tray in the freezer, ready to be filled and cooked at short notice.  
Yeah right- like I do this but it sounds good!
sib blog

Saturday, 27 November 2010

Catch ups

As all the Flickr swaps and bees peak before the Decemeber break I have received and sent so many parcels so time to catch up. In the Scrappy Mug Rug group I sent a mug rug to Jan (isisjem)- she won my last giveaway, I know her blog and have seen her on flickr so it was fun that she was my partner.  She had lots of easy likes to follow
She's a tea drinker, loves Heather Ross Mendocino fabrics and wanted a rectangular mat.  The teapot came from Kumiko Fujita's 318 Patchwork, great fun to piece.  The design came from a series of doodlings- the ric rac I only added at the last minute, the line between the linen and the grey background seemed too harsh.  I am not always a pun type person, there are sew many sewing related ones ( see Florence's funny post on these but I couldn't resist this.  
The back was free cut- I am a recent convert to.  No rulers, just the rotary cutter, flat fabric and the non-cutting hand out of the way!  There is a great tutorial to break yourself into this gently here.  I also bought Gwen Marstons Liberated Quilt Making 2 for more free cutting ideas and it is a highly useful book.  Jan is happy with her mug rug and so I am happy too!  In all honesty, I can normally pass my makes on graciously but I wanted it too and might have to make myself one in compensation.
I received this adventure in log cabin mug rug from Tracey. I love log cabin and this is very carefully cut and sewn- it sits on my sewing desk as I write- nice tea and food goodies too, Reese peanut butter cups are my undoing, my slow road to ruin- sorry lost in Del Amitri lyrics  Thank you Tracey! 
More Ringo Pie blocks
Penny's fresh and vintage style selection of reused jars saved from recycling- amazing piecing on the strawberry jar especially- take a look in close up
Kerry's block
and Lisa's sweet stack of mugs, cups and saucers- love the variety and that little cup at the top with its chubby handle!  They are an amazingly talented bunch of sewers in this group.
ringo pie - for kerry
Plus blocks I sent to Rick in Bee (a little Bit) Japanese.  I was a bit short on fabric, but squeezed two wonky log cabin blocks from his fabrics and he is planning to add sashing to even all our blocks out.


And presents to myself- how decadent.  A lucky find of Kumiko Fajita's measuring fabric- in my top ten of favourite fabrics- now I might have to do a top ten, I'll give it some thought- and her inspirational and unfortunately out of print ABC Patchwork Lesson pattern book, I tracked it down at last.
Wrap up warm x It is chilly here x
sib blog

Thursday, 25 November 2010

Happy thanksgiving to all  American readers!
(Graphic from the wonderful Background fairy)

sib blog

Tuesday, 23 November 2010

Putting Away Childish Things

I am feeling much better, my head and neck have calmed down and although part of my forehead is a little frozen- lets say it is a little one sided too- this wears off quickly!  I am still recovering from the emotional fall out of watching Toy Story 3 on Sunday, Kids Club at the cinema.  Turned out the the whole front row in a small screen were all children I knew from school so I had to keep my not inconsiderable unemotional response watching Andy play with the gang just one more time stifled.  The children respond to different elements of the film but the adults want/need to watch the end credits and have time to hide their reddened eyes.  I am teary now- move on.

 I found these letter blocks at the carboot this week ( by the way,look at Badskirt Amy's uber cool very desirable blocks here)
And this great tray, wonderful colours and images- H is for Holiday maybe?
And a lucky ebay find- a pile of poodle hankies from USA which included Tammis Keefe- dogs.  It joins my collection.
 
There is a fabric line from Michael Miller inspired by Tammis Keefe coming up- see True Up for more info, I cannot wait for these!
And these cuties were in there too- not sure what I'm doing with these, maybe my shop?  We'll see.
Busy with Christmas sewing x
sib blog