Showing posts with label Heather Ross. Show all posts

Monday, 11 August 2014

'How to Catch a Frog,' Heather Ross : Review

I mentioned I started reading 'How to Catch a Frog' by Heather Ross a while back and in all honesty, I enjoyed it so much I stopped reading it so that I could save it up to take on a weekend away and to read on the way up to Fat Quarterly Retreat. Each time I opened this book, I was totally immersed in her stories and memories.


 She doesn't pull any punches. The memories are truthful so not always happy, sometimes challenging and an honest portrayal of an alternative family life, warts and all. Her tone is sage and funny. I am around the same age and I found a lot to identify with despite a childhood in Yorkshire and Devon rather thanVermont.  You can find a brief description of her background on her website to get an idea of where the stories are coming from.


I know Heather Ross through her fabric designs and reading this book gave me a hindsight understanding of her themes and ideas. The free flowing natural sketchy drawings  all have their origin from her formative experiences.  The horses, the frogs, the mermaids  come from a life of outdoors, freedom and a love of nature.


Her determined and tenacious personality comes through amidst the unstructured childhood and the adhoc experiences at college and work.  She is resilient through all her adventures practical and pragmatic about events, funny and forthright to those around her.  The 'makes' are diversions along the way, cul de sacs to turn off into whilst reading her story.  The drawings are occasional and there were times when I wished for a photograph, especially in the third chapter when a black and white picture of their school house is referenced- it seemed to communicate so much about the way in which they were living and her mother's attitude to parenting.  Ultimately my imagination filled in the gaps and I also wondered if seeing an actual photo would have been to invasive into another family's life.


I identified with a lot throughout  despite the obvious differences.  I was sad for the book to end: its an emotional journey, I cried reading it on the train and I finished it wanting to read the whole thing again. Recommended. 

sib blog

Friday, 13 June 2014

How to Catch a Frog and other stories...

I am in a month of deadlines at the moment so when this arrived yesterday I was pleased to stop and have a little read.
This is a review copy.  I don't review many books but this sounded a little different, not a sewing book and although there are 'makes' included in the text these are incidental, this is a memoir not a craft book.  As it says on the cover, stories of family, love, dysfunction, survival and DIY.  Beautifully presented, it's like an vintage illustrated hardback that reminds me of my old copies of Little Women, or What Katy Did with its mix of text and occasional sketchy drawing.  I sat and read the first three chapters late last night and I really loved it.  I was expecting whimsical, cutesy even but it's not that at all.  I wasn't sure if there would be enough for me to relate to- I grew up in a  small Yorkshire town not rural Vermont- but actually, I related to so many things. I am a child of the 1970s with some unconventional parenting mixed in with more standard teacher family life.  Heather Ross' voice quickly engages you  and leads you into her world.  I can't wait to read more.  I'll report back when I'm finished.  Meanwhile, any summer read recommendations out there?  I have been reading Longbourne by Jo Baker which takes you into Pride and Prejudice but this time from the perspective of the servants.  That sounds a bit naff but actually the Pride and Prejudice reference is just a hook, and the world and work of the servants is gripping in itself with twists and turns as the story develops.  The language is beautiful, with lengthy descriptions of laundry and domestic tasks and the sheer heaviness and boredom of the servant existence.  I am half way through and I am saving it for my next train journey to London for Saturday at Fat Quarterly Retreat.  If you can recommend something, please share in the comments x

sib blog

Monday, 22 April 2013

New arrivals at Eternal Maker: a Clover special

During my Aeroplane bag making I was extremely grateful for the Clover Wonder Clips that I bought a while back.  I love these, such grip and no pins- perfect!  Bag making, quilts, thick layers- denim etc and awkward things like darts- all are good for these.  I dpon't see why you couldn't use them with knitted items and I certainly use them with jersey knits especially with the overlocker where I really don't want to hit a pin!    So I was very pleased to see that Eternal Maker have these newly added to their shop!
I think I need another pack of these, 10 is good but 20 would be better.  Clover notions in general never disappoint so I though I would check out the other Clover items at Eternal Maker.
The Protect and Grip thimble is soft silicon in 3 sizes with a metal top for pushing a needle.  I have one of these in medium and it is a more wearable and comfortable  thimble than many others that I have tried over the years.
This is a cutie,  a Clover flower/yoyo maker .  Brioni recently sent me one of these and I can't wait to try it out.  Good for key fobs and as an addition to a bag maybe?  And there is a heart too!  Love that!

If you don't have  a Hera marker  and you are a quilter, please buy one!  I know it doesn't look very exciting but it is the best tool for marking straight lines for quilting and double up for putting creases in card.  The creases wash out and there are no worries about blue residue!  I also use it when making bias trim on clothing.  Creasing the bias fabric strip rather than pressing in 1/4" gives a much better result and less distortion.  
I haven't tried these Clover Chaco pens but they are on my wish list, especially for garment marking.  There are refills available too so they are a sustainable item (always as good thing).  If you have experience of these please let me know how you got on with them in a comment.
What no fabric?
Yeah right, just kidding.  Clover links nicely to the new Heather Ross fabric line for Windham, 'Briar Rose'.  Availble for pre-order now, you just know it is going to be incredibly popular.
This is my favourite print- pink and green is a top combo and I love berries obviously!   You can see all the prints that are going to be stocked here and they are ready to take your pre-order (fabric is due to arrive July /Aug).  I am pretty excited that is available in jersey as well as quilting cotton.
Not just for children right?  I would love a berry T- shirt and I have had some success with knits recently (will post some pics soon).
And to end with, a Clover print from the Heather Ross quilting cottons.
sib blog

Thursday, 30 December 2010

Pillow Presents

Now all the recipients have their presents I can show you what I made, starting with cushions/pillows.  This one is for my brother.  There are lots of little clues for him in the fabric . Iconic brands- he is a graphic designer, Peanuts Dr fabric- he has had a lot of  trips for allergies this year but is all sorted now
ironic references to coolness- he lives in London
random words and mispelt Japanese London fabric
Food and lego- a fine combination!

Something a bit calmer for my sister, she is a poor sleeper so this is a intended as an aid, a balm to sleepness nights.  The fabrics relate to the forest surrounding sleeping beauty so a bit of Joel Dewberry Herringbone  Modern Meadow , some dandelion clock seeds from V and A, a bit of vintage orange, some Lecien Folklore tucked away in the meadow and Suzuko Koseki at the very edge.
I stamped the linen and heat set it with an iron- the hush label came from a scarf.
 Sweet dreams...
And the tiniest was a little mini log cabin lavender bag for my swap with Ingrid, I thought she would like the little bird and its fruity garden.

sib blog

Saturday, 27 November 2010

Catch ups

As all the Flickr swaps and bees peak before the Decemeber break I have received and sent so many parcels so time to catch up. In the Scrappy Mug Rug group I sent a mug rug to Jan (isisjem)- she won my last giveaway, I know her blog and have seen her on flickr so it was fun that she was my partner.  She had lots of easy likes to follow
She's a tea drinker, loves Heather Ross Mendocino fabrics and wanted a rectangular mat.  The teapot came from Kumiko Fujita's 318 Patchwork, great fun to piece.  The design came from a series of doodlings- the ric rac I only added at the last minute, the line between the linen and the grey background seemed too harsh.  I am not always a pun type person, there are sew many sewing related ones ( see Florence's funny post on these but I couldn't resist this.  
The back was free cut- I am a recent convert to.  No rulers, just the rotary cutter, flat fabric and the non-cutting hand out of the way!  There is a great tutorial to break yourself into this gently here.  I also bought Gwen Marstons Liberated Quilt Making 2 for more free cutting ideas and it is a highly useful book.  Jan is happy with her mug rug and so I am happy too!  In all honesty, I can normally pass my makes on graciously but I wanted it too and might have to make myself one in compensation.
I received this adventure in log cabin mug rug from Tracey. I love log cabin and this is very carefully cut and sewn- it sits on my sewing desk as I write- nice tea and food goodies too, Reese peanut butter cups are my undoing, my slow road to ruin- sorry lost in Del Amitri lyrics  Thank you Tracey! 
More Ringo Pie blocks
Penny's fresh and vintage style selection of reused jars saved from recycling- amazing piecing on the strawberry jar especially- take a look in close up
Kerry's block
and Lisa's sweet stack of mugs, cups and saucers- love the variety and that little cup at the top with its chubby handle!  They are an amazingly talented bunch of sewers in this group.
ringo pie - for kerry
Plus blocks I sent to Rick in Bee (a little Bit) Japanese.  I was a bit short on fabric, but squeezed two wonky log cabin blocks from his fabrics and he is planning to add sashing to even all our blocks out.


And presents to myself- how decadent.  A lucky find of Kumiko Fajita's measuring fabric- in my top ten of favourite fabrics- now I might have to do a top ten, I'll give it some thought- and her inspirational and unfortunately out of print ABC Patchwork Lesson pattern book, I tracked it down at last.
Wrap up warm x It is chilly here x
sib blog

Thursday, 7 October 2010

I have heard the mermaids...

Looking for the giveaway?  Click here  A big thank you to all whom have entered so far and a welcome to so many followers- wasn't expecting so many, wow!  Hi to y'all

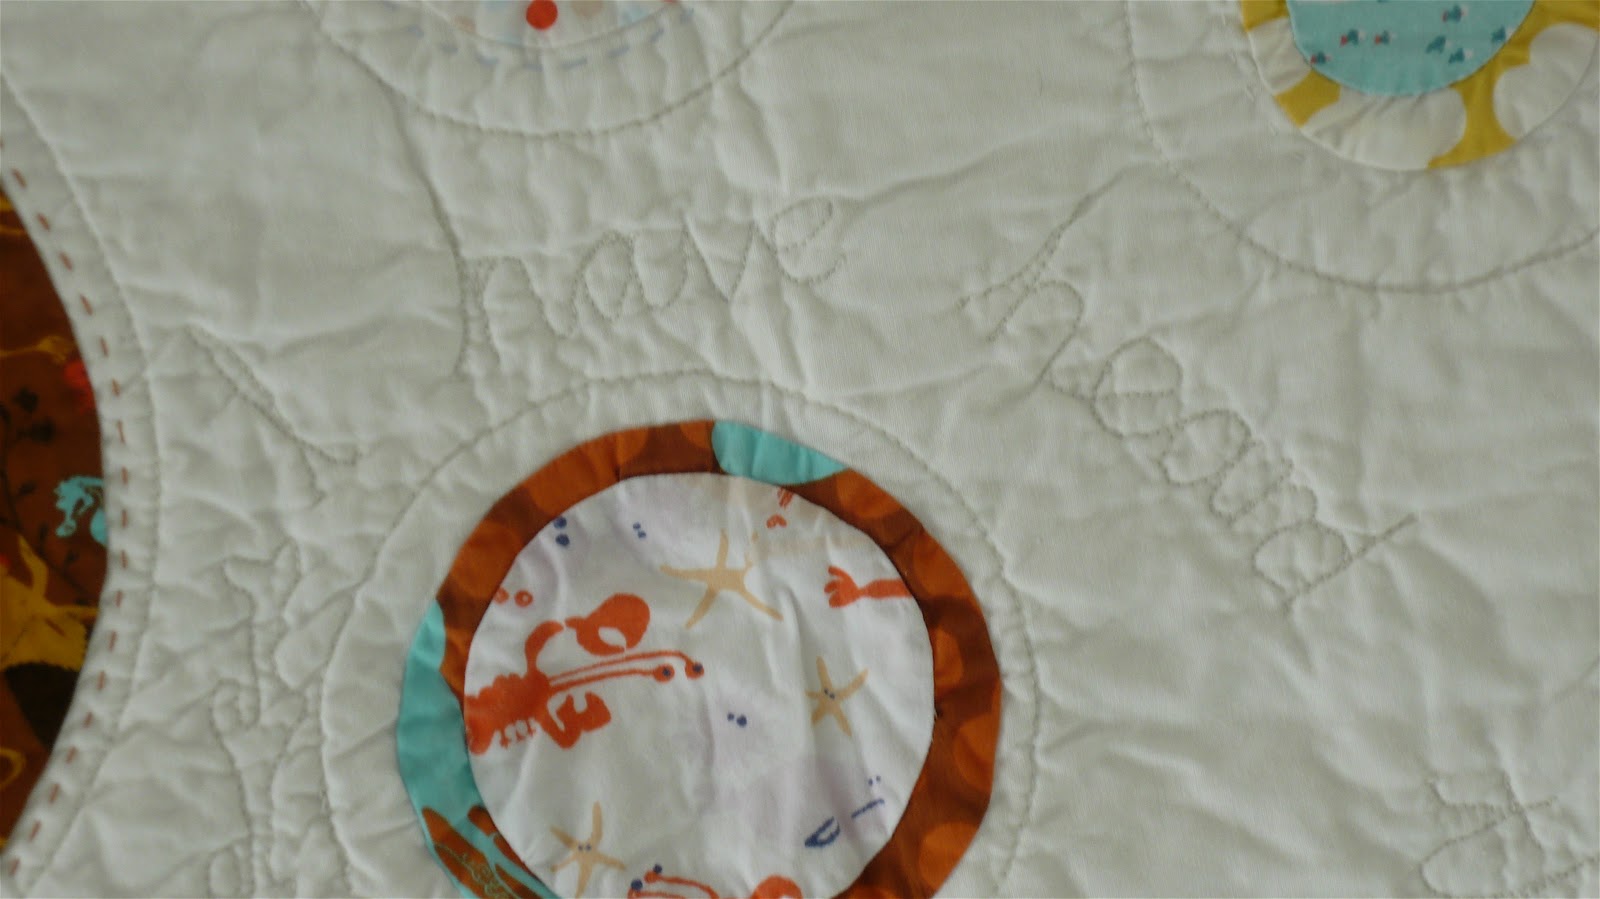
I finally finished the baby quilt I was working on for my new niece.  Baby Sophia was born 16th September and though this gift has been a little later than planned it should be with her today.  She was a water baby, delivered in a birthing pool which makes mermaids bubbles and fishes even more appropriate!  For a first time mummy that is quite a feat, well done to Gemma her lovely mummy.  When I started this project I didn't even know if she was going to be a boy or a girl so I was taking a bit of a gamble with this quilt.  Once she arrived, she inspired the quilting that followed.  This quilt started with a pattern by Deb of Make do and Mend Quilts (she sells v. nice quilt kits too) in Sewhip magazine and evolved.  I like to do things that way, a bit of structure with the freedom to go off at a tangent.  I used my pieced circles tutorial  but the tiniest circles within circles had to go in by hand not machine.


Initially I was going to hand quilt this with lots of circles and I did do some in blue, rust and cream.  I loved their soft running stitches look but it was too much of a strain and I opted for some machine circles as well.  Then a line T S Elliot's poem ,The Love Song of J Alfred Prufrock came to me- "I have heard the mermaid's singing, each to each..".  You can read it here it has to be one of my favourite poems.   British actor and comedian Robert Webb reads a bit here and expresses many people's connection with it.  It is a legacy poem, one to pass on and share.

 Free motions coral and seaweed shapes link the words and I also wrote Sophia's name and birthdate in the central circles too


Free motion letters do require a little care spelling wise, nearly wrote memaids then suddenly realised!


Sorry for so many pics but I won't get to see it very often and I want to remember what I've done!

 Binding was pieced using scraps I won a while ago in a Handmade by Alissa giveaway.  I have a love hate relationship with quilt making.  I love piecing, designing, tweaking but I hate the quilting process itself, yet it is worth it.  Nothing beats the satisfaction of a quilt finished.

I do love a folded quilt, it looks inviting and ready to snuggle.  For Sophia x
sib blog

Sunday, 15 August 2010

Pieced Circles Tutorial

I am making a baby quilt for a new niece/nephew due in September and this has involved circles, circles and more circles.  


Over this week I have - with a lot of unpicking and muttering under my breath- perfected a way of insetting a circle into  a fabric background.  The circle is pieced using a seam and sewn on the machine rather than appliques and sewn on top.  I have tried lots of different sizes- too small is too difficult and I ended up sewing these by hand, but from about 3 1/2 inch diameter upwards (the bigger they are, the easier it gets) I have taken a method briefly described in Compendium of Quilting and expanded it, done a few things differently and made it into a tutorial -  so here goes...

1. Draw a circle on your chosen fabric- at least 3.5" diameter/ 1.75", your finished circle diameter will be half an inch smaller than this because of seam allowances.   You will need to have the this circle matching the grain of the framing fabric so if you are fussy cutting bear this in mind.   Draw a circle the same size on a piece of paper.  The paper is to help put guide marks on the fabric- it is not a template.   On your framing fabric, draw a circle which has a finished diameter 1 inch smaller and do the same on the piece of paper.  

Cut  circle out of framing fabric, be as accurate as you can it makes a big difference when seaming the inner and outer together.  You need the frame, this circle is for scraps


Cut the other larger fabric circle.


2.  You can see faint marks on the pics above like compass points.  I use blue chalk pencil for North, East, South, West and Pink for NE, SE, SW, NW.  You need to mark these points on the right sides of the circle and the circle frame.  Using the paper as a guide for this is much easier.  Keep the marks small so they will disappear in the seam allowance.  You can see this best on this pic again.


3.  Place circle right side up and place  fabric frame on top, also right side up- the grain should match- it makes sewing much easier and gives a more even circle when finished.  


4.  Fold the wrong side of the backing fabric over at the top, North,- right sides will now be together and there should be a mark to match up- pin with the pin point facing outwards.  You will now see some different fabrics showing how to seam the circle, I hope it is not too confusing!


5. Repeat for South, then East and West.  


Then pin the points between- NE, SE, SW, NW.  Pins work best for me, I tried tacking and it was a disaster!


6.  You need a 1/4 foot or guide on your machine.  Place the fabric under the machine presser foot. so the frame fabric is on top (wrong side up) and the circle fabric is underneath.


and the circle fabric is underneath.


Using the slowest speed on your machine , 1/4 inch seam and a small stitch- 2mm, sew slowly around the edge of the circle- the smaller the circle the more you will need to stop and ease the fabrics to fit.  I take the pins out just before they go under the foot and use a seam ripper to hold the fabric together as they go under.  

7.  With smaller circles- e.g. under 4 inches- you may need to clip the circle frame- the top layer -as you sew to ease it in.  Only a tiny snip is needed!


I confess to unpicking and re-seaming where there were wrinkles and puckers that shouldn't have been there, but on bigger circles- e.g 6 inch diameter and larger, they can come out perfect first time!

8.  Press the reverse with the seam towards the centre of the circle, it should press nice and flat.
  You can press the other way(outwards) and the finished circle will appear to recede.


and when you turn over there should be a circle set into the fabric frame.  This one is 3.25 inches diameter.


Once you get the hang of the technique, you can do circles in circles.  I am setting a whole load of circles in to a big backing square of Kona snow- floating around like bubbles!

Here is a big one- over 9 inches diameter


I hope it works for you.  I tried freezer paper applique and Anna Maria Horner's excellent super circle foil method but I like crispness of this method, no stitching is visible on the right side- and the fact I can sew it all on the machine.  If you have any questions or problems do let me know!

Happy sewing x

sib blog