
The keen dressmakers amongst you may have seen the new pattern from Deer and Doe. The Safran is a high waisted skinny jean suitable for stretch fabrics like twill and denim. Camille, the development manager for D and D got in touch and asked if I'd like to review the pattern- it had already been through detailed testing. I'll confess, I don't usually wear jeans but I knew they would be very much my daughter's style so I leapt at the chance.

I knew I need to make a test version so when I went fabric shopping I bought 2 metres of 140cm stretch denim which was enough to make shorts and full length Safran jeans. The right fabric is key to this pattern. The fit is based on negative ease so the hips for example will be smaller than your actual hips. Camille sent me extra info about the degree of stretch- 20-30% is the optimum. This is tricky info to find out online, I feel most online shops have some way to go with the detail on their stretch fabrics- i.e. degree of stretch, direction, weight and detailed suitability rather than skirts, trousers, bags, dresses which feels too broad.

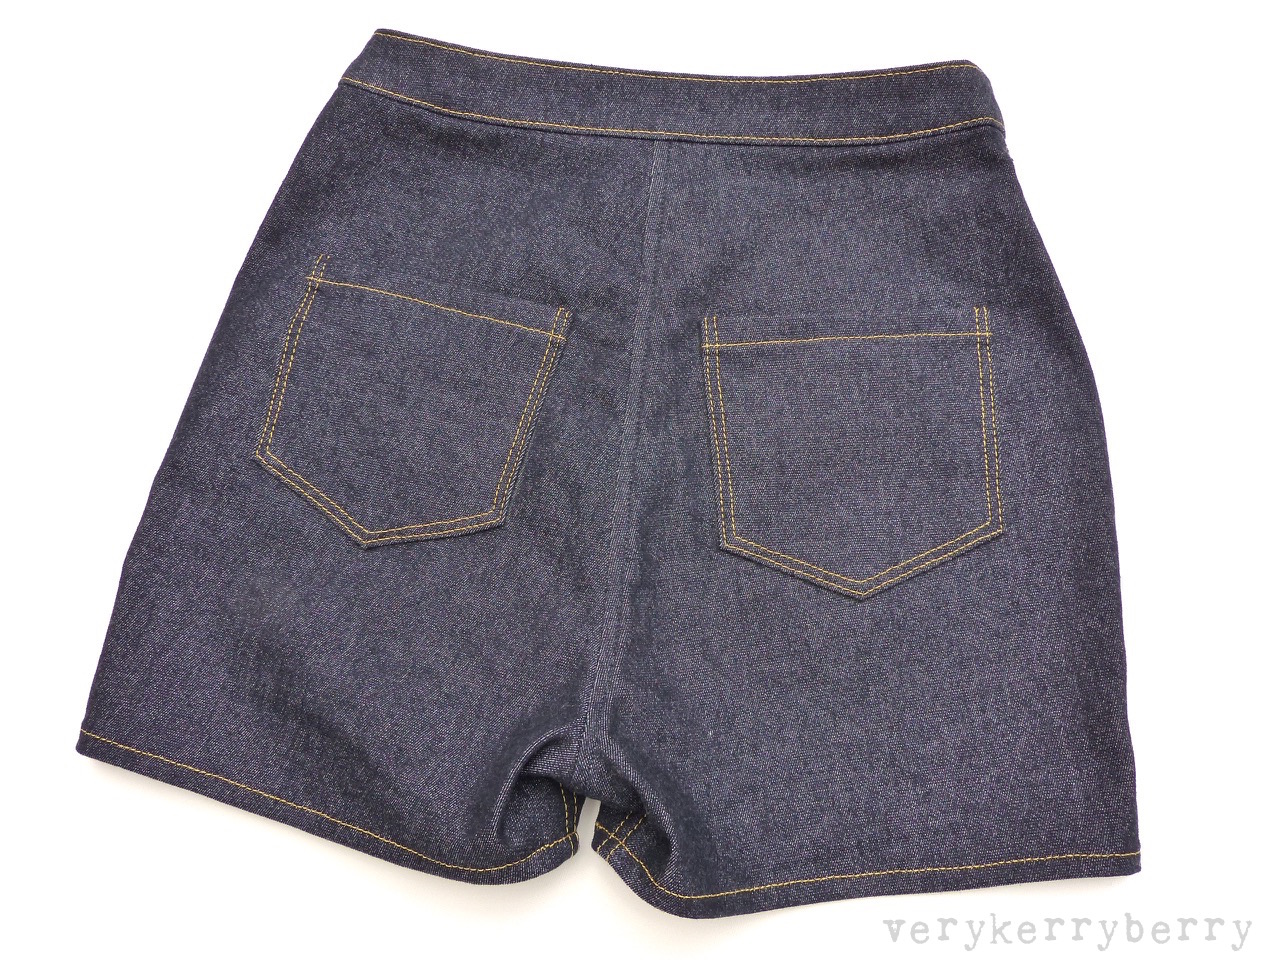
I found this locally, it was the only blue available and it's a blue black. It's a medium weight and 25% crossways stretch. This means that if i hold a 10" width of it between my hands, I can stretch it to 12.5" relatively easily and it will bounce back to 10" when released. I take a quilt ruler to fabric shops when buying fabric like this.
To help with the stretchiness of the fabric, I used a walking foot throughout for seams and topstitching and I also used three machines: one for seams, another for topstitching and an overlocker for finishing seams.

It's an intermediate pattern and definitely needs some sewing experience but the details are achievable and accuracy is the key. I use my old Bernina for topstitching and buttonholes as I find my stiching is a lot straighter with that. I used my Janome for seams because it had triple stretch stitch (used on the crotch and back seam) and I can lower the foot pressure to deal with the bulk. I also found my Clover chalk pencils invaluable for mark making e.g. pocket placement and top stitching.

Adjustments
Based on L's 25.25" waist and 37" hips and from the Deer and Doe measurements, I traced size 36 (UK size 8) waist, grading to size 38 (UK size 10) at the high hip and below. On the front piece you can't really grade on the seam which forms centre front and the fly so I traced a size 36 there as L is very flat over the belly and 38 elsewhere. On the first fitting, she needed more room at the side so I added a further ¼" at the widest parts adding 1" to the hip all round which on the front meant adjusting the pocket and all the corresponding pocket facings and linings to add width to match the back piece . The high waist fitted without adjustment. To get the shorts length, I used a pair of her favourites and added an extra inch to the length to allow for the hem when tracing the pattern. You could flare the short legs out at this point if you wanted. I omitted belt loops; L usually has to wear a belt with jeans as to get the hip size she needs, the waist is usually too big so with these I was aiming for a perfect fit at the waist. I repositioned the buttonhole slightly closer to the waist band side edge. On the pattern instructions there is a detailed fit section with lots of diagrams describing common issues and how to solve them.

My essential equipment included:
- Gütermann Sew-all polyester thread for seams and as a bobbin thread for topstitching and buttonhole
- Gütermann topstitch thread for contrast details
- Schmetz denim needles size 100
- Clover chalk fabric marking pencils for all the fold and seam lines including topstitching

With all the fitting adjustments for the hips sorted I made her a full length pair. I did need to fit the lower leg a little as the knees and calves were a little baggy. The back leg is cut wider than the front especially in the lower part. This works well if you have sizeable calves- I do and I tried these on and the calf area was fine for me- for my daughter's skinnier calves I reduced the back legs by ¼" on each seam from 3 .5" above the lengthen and shorten line to the hem. The front leg was not altered.

My other tips for sewing either shorts of full length version include:
- Practice on scrap fabric and make a note of your favourite top stitch length settings so you can repeat where needed to finish your jeans and make them look professional. I got the best top stitching tension using thick top stitch thread for the right side and standard sew all thread for the bobbin.
- Weave in your topstitch threads. Leave your thread ends long and then use a needle and weave these into seams on the wrong side by hand to avoid bits sticking out on the right side.
- I didn't finish the back pockets. Instead I trimmed with pinking shears after the first top stitching. They are secured with two rows of stitching so I thought that was enough.
- I used a pair of ready-to-wear jeans for some of my seam top stitching and kept it fairly minimal.

- Stay stitch the waist edge pieces ¼" from the edge. Denim frays easily and when it comes to fitting, pulling stretch jeans off and on before the waistband is added can be a bit of a strain, stay stitching helps keep everything from stretching out of shape.
- Trim and grade seams when adding the waistband. The inner waistband part of the seam is cut smaller than the outer to reduce bulk and lie flat.
- Practice on scrap fabric and make a note of your machine settings for a bar stitch so you can repeat it where needed. I used it were the pattern suggests for the fly but also for the side seams where the pockets start.
- For the buttonhole, most ready-to-wear jeans have a keyhole buttonhole to allow for the thick shank of a metal button and take the wear and tear of opening and closing. I don't have that setting on my Bernina so I sewed a standard buttonhole, applies fray stop before cutting the hole itself. I then resewed the buttonhole manually stitching around one end to create the curve. Fiddly but worth it.

I was thrilled with both versions of Safran. The shape really suits L and the fit is wonderful. Although I needed to fit them to her shape, it wasn't particularly hard to do so. The pattern instructions are comparable to other Deer and Doe patterns. They are to the point and accompanied by diagrams which inform the text. They are not hand-holding and at times I was finding my way a little, the fly always confuses me a little despite having made them many times for the Fumeterre skirt. I ended up with my crotch seam lying the wrong way in the shorts version and I found the second pair easier and everything is correct.

L is happy with these new additions to her wardrobe and at having jeans that fit exactly to her shape and I enjoyed the challenge of making jeans having not sewn any before. I've made a lot of Deer and Doe patterns and they always deliver a lovely garment. Thanks Camille for sending me the Safran pattern and asking me to review, it was a pleasure!
beautifully done, kerry! i am sure your daughter must love them!
ReplyDeletewow - you are GOOD!!! beautiful fit.
ReplyDeleteGreat review and fab jeans. I've just ordered this pattern - I'd love jeans that fit around the waist and hips!
ReplyDeleteThese are perfect!!! I totally agree about how difficult it is to determine recovery and drape and how a fabric feels online.
ReplyDeleteWOW what a perfect fit! The shorts and jeans suit your daughter to a tee and I bet she's thrilled with them...at her age it's such a luxury to have such perfectly fitting jeans! I would have given the moon for them at her age :) which was almost 50 years ago :) They scream, "Embroider me!" Maybe at some point she'll sit down and embroider some lovely flowers on them :)
ReplyDelete