Showing posts with label colette. Show all posts

Monday, 19 June 2017

Colette Seamwork Patsy Skirt in Anchor Printed Rayon

Seamwork digital magazine (run by Colette) come up with two new digital patterns for each issue but it's been a while since I've been tempted to subscribe. This month, I instantly loved 'Patsy', a modern take on a peasant style skirt with a yoke waistband, gently gathered A-line skirt, patch pockets and contrasting lower section.  Membership was also on offer at $3 so I bought, made and wore the skirt in less than a week!


We had a long weekend away booked at a local beach holiday park and the weather forecast was hot so I bought some very floaty lightweight rayon for a lightweight summer skirt that would protect my legs.


I made a straight size 4 and I would say the waist measurement comes up generous.  I printed sizes 4 and 6 on the pattern layers just in case but the 4 fitted with room and sits about 2.5" above the start of my hip bones. It's an easy style to work out your size as the low waist is the only fitted area and it's easy to print of a few waistbands and make them up in scraps to test before you start cutting the good stuff!  The fabric I chose is prone to creasing but it is such a cool breezy skirt to wear in some very hot weather for the UK so I can happily overlook that!


 The construction, as with all Seamwork projects,  is based on a quick result so I did depart from the instructions  and used slightly different methods for the waistband and pockets based on personal preference and a neater finish but all the basics are in the original pattern.  I especially liked the shaped waistband as it's such a comfortable fit on me an waist yoke is very forgiving and more flattering than a narrow, crosscut waistband.  The patch pockets are a good size and I liked the placement.  It also works really well as a  simple short skirt, just omit the bottom section.  I'd plan to lengthen the main piece by 2-3" so it's on the knee rather than above. 


Because the fabric was so light weight I did do a few extra things to compensate:
  1. Used Perfect Fuse sheer fusible interfacing on the waist band and doubled it up to create more body but without being too heavy for the outer waistband.
  2. Used a heavier chambray fabric for the waistband facing.
  3. Added 1" sheer fusible interfacing on the back seams to just beyond the end of the zipper placement.
  4. Used a lightweight concealed zip- the zipper teeth are attached to a mesh fabric rather than twill tape, less weight and stress on lightweight fabric.
  5. Used ¼" twill tape at the top waistband seam (see the Soho skirt pattern for this technique).
  6. Interlined the pocket with Liberty lawn so they didn't distort with use.


Pattern: Seamwork Patsy

Friday, 23 October 2015

Colette Patterns Wren Dress in Navy Dot: Reviews

I was lucky enough to receive a copy of Colette patterns new dress design 'Wren' a few days before the release date earlier this week.  It's the first time I've received anythin garment related in advance like this apart from a little proof reading and pattern testing for friends and the occasional indie designer so it felt like a total treat.  It was without obligation- no pressure to blog about it but as I sewed it up and I liked the result I thought I would share as I usually do.  


Colette describe it as a 'fitted surplice dress' which I think means that you pull it on over your head- it's a knit dress and there's no closures.  It has a wrap style bodice and there are sleeve/sleeveless options and two skirt variations- fitted and gathered a-line.   It's described as a beginner pattern, which I could agree with for version 1 but  I think version 2 requires more intermediate skills.   I was a little unsure when I saw the pattern cover, I liked the style but it seemed more suitable for summer weather here in the UK- I am currently planning lots of maxi length garments with long sleeves!  I was also a little wary of such a deep v- I find them a little revealing of a rather skinny area on me.  My daughter saw it and she was very taken with it so I made it for her.  I had some  good quality viscose elastane jersey from Plush Addict (this colour way is sold out but there's a black/white dot version.  It's quite lightweight, has good recovery and drape so is perfect for the full skirt style.  Fabric options  for the different styles are discussed in here at the Coletterie.


Before you sew any knit garment it helps to get organised.   I used my sewing machine and my overlocker.  For my sewing machine I needed:
  • Walking foot
  • double needle for stretch fabric
  • 75 needle for stretch fabric.  For any knit fabric with elastane, I find a stretch needle rather than a ball point needle gives me better stitching and is less likely to skip stitches.  Matching the size of needle to the weight of fabric makes a big  difference too. 
  • two spools of navy thread
  • one bobbin of YLI Lingerie nylon thread- this is not essential, I had it in my stash and it has a little more stretch than Guterman sew-all poly
I took a detailed set of measurements from my daughter to help with fitting.  I got mine from Fast Track fitting Joi Mahon on Craftsy but you can find similar here. Her key measurements for this pattern were bust 31.5", waist 25" and hip 35 ¾" which put her at a size XS (33/25/35) as the hips aren't relevant with a full style.  With 1.5" to lose in the bust, I made a test bodice in a viscose elastane jersey remnant that I picked up very cheaply at the carbon sale.

I usually end up making at least a bodice tester for all dress/top patterns as adjustment is usually needed for both of us.  This is the bodice , size XS without sleeves made exactly as described by the pattern.  On the left (as you look at the pic) you can see where I've pinched some of the fullness from the side of the bust and under the arm- the right side is unchanged and you can see the bagginess.


 The bodice design has a clever addition, a neck band which although it is placed diagonally on the bodice, the hemmed edge is cut along the straight grain of the fabric so it helps to give it some control.    it's also gathered at the top shoulder.  The pattern gives instructions to hem the V edges and this worked OK- the weight of the skirt will also give a little weight to these edges but they were a little insecure on a smaller bust so I remembered Sew U Home Stretch and a scoop neck dress I made with an elastic finish and stitched ¼" elastic to the right side of the neck band edge before turning over and hemming it with a double needle as before.    My top tip for this is to sew slowly- I have more details about this technique here and you can find out more tips here at Coletterie.

This is the same bodice with the sides narrowed- I removed ⅝" from the top of each bodice side edge and graded down to the bottom of the seam.  This removes 2 ½" from the total chest area and is a way of fitting a small bust in a jersey top without using darts or a small bust adjustment.  A similar thing is discussed at Colette here for armholes and bust adjustments.  I also removed the same about from the armhole end of the sleeve, grading into the usual seam at the sleeve hem.


The neck band edge lies flat when she stands straight but if she moves around, it wasn't really snug enough to feel secure as you can see on the pic below.


It's easy to add elastic to necklines and sleeveless armholes.  I control the fabric with my left hand and hold the elastic straight but not stretched with my right hand, the blade is not engaged.  Make sure you leave long tails of elastic at the beginning and end; it is much easier to control the fabric with them!


The  edge with the elastic  (left) is then turned pressed over to the wrong side, lightly pressed  on the right side and hemmed with the double needle (right).
Top Tip- sew the left neck band edge (as you wear the garment) first as the right neck band edge will be the more visible and your stitching will improve on the second edge!


The bodice is quite straight forward.  You need to sew slowly and handle the fabrics carefully so as not to overstretch the fabric and when you sew the sleeves into the armholes, be careful the fabric underneath the sleeve doesn't get trapped as you sew.  I love the fit of the bodice, it's very soft and feminine.


Adding elastic on the neck edge gives the V total security when worn and keeps the V from falling too low.   I used it on the back neck too, it wasn't totally necessary but I think it gives the dress more support if it is hung on a hanger.  The only other change I made was to add twill tape on the back bodice shoulder seams to keep everything stable.


The skirt section is a gentle A-line shape with a gathered waist.  The gathering is created by shirring- zig zag stitching ¼"clear elastic around the skirt waist.  I used clear elastic when I made the Skater dress.  It's great for stability but I find it a nightmare to sew.  I used a Sharpie marker instead of pins to mark it into quadrants following the pattern instructions and zig zagged it into place but it is very tricky to do evenly- as you can see below.


It doesn't seem to matter too much as the right side looked fine and once the skirt is joined to the bodice some of the elastic is sheared off by the overlocker blade.  If I make this again, I think I will gather the skirt in the usual way and join to the bodice without the clear elastic.  The finished waist seam was a little bumpy but pressing helped.  I'm not sure how I could make it totally smooth.


Here's some shoulder and neck edge detail pics-my favourite part of the dress.


My daughter is really happy with it.  Comfortable, easy to wear, casual enough to wear out with her friends- she wore it on a trip to see Suffragette with me last night- and dressy enough to wear for college interviews, to work etc so a useful addition to her wardrobe.  


This pattern is on offer for a short time at Colette and you can find it at the usual UK suppliers here and here.  There's a #wrenfaire competition at the Coletterie- the best part of this are the amazing tips people are passing on in the comments- my favourites are:
 1. Cut drapey knits on a pool table to stop them sliding about and 
2. Wine!  

Read more tips in the comments here. 

sib blog

Thursday, 23 October 2014

October at Village Haberdashery: It's all about the checks...

Time for my October visit to Village Haberdashery.  Annie is just on her way to Quilt Market trade show in Houston to plan for next year's fabric (you can see a preview peek of what she has in mind here) so I'll concentrate on what's going on now starting with check/plaid shirtings from Robert Kaufman


I haven't actually felt seen these in person, but I am imagining a soft, light weight Viyella style cotton like you see for men's country style shirts.  We have a local shop called, Farmer's Friend which is obviously aimed at the more rural community and there are check shirts a-plenty in the shop of this kind of fabric.  If you thoughts are turning to Christmas makes, plaid PJ pants would make a great male gift,although they do use a lot of fabric!   Boxer shorts are a more economic alternative.   If you fancy a male check shirt , Colette's classic  Waldon Negroni pattern and you can find a very detailed  men's shirt sew-along using Negroni with Peter Lapin's excellent Male Pattern Baldness blog.


Rather wear those checks yourself- I don't blame you! Annie has just received delivery of Grainline patterns including the classic Archer shirt pattern- very detailed sew along at Grainline.


And the Dahlia  dress pattern, released this week by Colette in return to what they do best, dresses with vintage styling and modern wearability, is a perfect candidate for a soft plaid shirting.  I am sure Annie will have this in the shop soon and if you are an ardent cutter/sticker type, the PDF download version can be bought here.  Otherwise, scarves, cushions, children's clothes- plaid/check shirting is a beautiful useable fabric.
Annie is something of an early adopter as she showed with her exclusive coup of been the first shop in the world to receive delivery of Caroline Friedlander's Doe collection


On of her new ideas really caught my eye, Baby Quilt club:
Sign ups are here and there is a multitude of options to tailor this club to your baby quilt needs.  Annie has put together some sample bundles to give you an idea of what to expect:


- you can choose monthly, every two months, boy or girl or a mix of selections, option to include co-ordinating Kona solids.  Great idea Annie!


A random insert here, I saw this during one of my frequent browses in the Chambray section (I've mentioned my love for Chambray so many times) and I chanced upon this beauty, Chambray jacquards in Indigo, which I have not seen anywhere else either as fabric or sewn up into a garment or quilt:


Jacquard means that the lighter colour weft threads float over the darker warp to produce the pattern.  A beautiful effect, delicate and a bit of a nightmare whilst cutting and handling- like the Chambray dot that I used for an Alder dress, but once it is sewn up and the seams are secure you are onto safe territory.  This jacquard chambray's just a little heavier than the dot and I will say, I hear it calling me!  Just not sure if it will survive contact with a cat!  Whilst I am netioning the Alder dress, that particular Grainline pattern is also currently in stock.  I reviewed it here and made a second version here.  The Grainline sew-along is here.


For Autumn/winter wear, I would make this as a dress to wear over a thin jersey top and stick a cardi over too!   Remember to keep your sizing on the more generous side if you are going to wear something underneath. I would do this by using the pattern I've already used but a less generous seam allowance on the side seams just for extra wiggle room.  Maybe in corduroy?


This is Sevenberry navy plaid, super soft and lovely for shirts, shirt dresses etc. 


This is Sevenberry blue and green check, a smaller scale pattern.
I've given myself ideas in this post, I feel like I can't get away from checks and shirts!  It's all about the bass  checks…  Enjoy x

sib blog

Friday, 26 July 2013

Colette Hawthorn: I am a lady

When I first saw the new Colette pattern, Hawthorn, I gave a little squeal, a semi circle flared skirt is very much my style, the neckline is modest for my rather bony décolletage and having had such a positive experience with my Bleuet shirt dresses (here and here) and with the further incentive of a sew-along it tipped me over the edge and I ordered it straightaway from Village Haberdashery.   There was a delay waiting for snaps to arrive but now I have finished it and felt very much like a lady when I pinned my hair up, put on my wedges and twirled in the sun.
The fabric choice for this dress is critical, it needs to be lightweight enough to swish and swirl, but not see through- I didn't want to line it- so I chose Liberty Lawn.  The tiny apple print is a one way pattern which is always an extra challenge with large half circle skirt pieces but I played around with the layout to make the best of the fabric.    The Coletterie sew-along fabric choice post is very helpful and I did order samples from Croft Mill, which has great dress making fabrics before settling on what was already in my stash.  My fabric has a frisson of transparency- just enough to make sure my underwear is a light and blending colour but not enough to make me fear standing in bright sunlight.
I added side seam pockets using the Burda Theresa dress pattern from last summer's dress making, I've got to have pockets whenever I can.  You can see how they disappear into the seam in the swirl shot below and also where the uppper back bodice could do with an extra press!
I have done a lot of dress making this summer so my skills have really sharpened up , there is nothing like lots of practice to make dusty techniques come back to life.  I started with a  bodice toile as I have a very small bust and Colette patterns are cut for a C cup.  I traced off a bodice in size 2 graduating to a 6 in the waist as I like a lot of ease there, especially in a shirt dress.  Swedish paper is the only thing that keeps my sanity when doing fittings as it is always a little leap in the dark when you start cutting and taping darts.  I did shrink the width of the waist dart and increase the length so it reached the nip (you know where I mean) as this works best for me.  The key factor for me is to measure the waist either side of the dart and make sure this stays the same after I have sliced the dart.  The bust adjustment post at Coletterie was very detailed and it was worth taking time on this even if it was over 30 degrees C as the end fit was excellent on the front bust and I didn't need to change the back darts.
When I added the side pockets I consulted the trusty Readers Digest Guide to Sewing which always has some nifty tricks- although they tend to be time consuming ones.  When I sewed the pocket facing/linings onto the side seams I used a scant 5/8" seam allowance, almost a 1/2" just to give a little room for the seams to roll back and hide the pockets completely in the dress.  It worked  treat!
There was a heatwave in the UK whilst I was making this so I knew long sleeves were out of the question- although I want to try a plaid version for winter complete with plackets and cuffs.  I had tried the short sleeve in the toile and it fitted well but wasn't quite ladylike enough and sleeveless leaves me feeling a little too exposed so I opted for a cap sleeve following the superb drafting instructions from Jenny Gordy which gives it additional fullness and a neat bias binding finish around the lower armhole and the sleeve edge.  I added gathers to make a gentle puff effect and so the sleeve would hug the upper arm for wearing a cardy (lets be realistic, in Britain a cardigan is never far away), and I was very happy with the finished effect.
One of the biggest pleasures of dress making is adding the little touches that would never be in a shop bought dress, seam tape on the inside waist edges, adding a french tack to hold the facing gently to the shoulders, french seams at the shoulders and sides- it all makes for a very neat inner and a more durable garment as ultimately my dresses ends up in the washing machine frequently over the summer.
I did have a few glitches and struggles, mainly with the collar and this was noted by other sew-alongers in the flickr group.  The collar facing along the front neck was 1/4" longer than the collar/dress it is attached to.  I didn't notice this in the toile as I hadn't stay stitched or interfaced so there was more give in the fabric but I did have to get creative and notch the short section to trim.  I think I would do the collar in a single section next time too.  It uses the fabric more efficiently  in 3 sections but I think it would lie a little better if made in 1 piece.  I took a lot of time with interfacing, (so tedious, but worth it) and used a lawn cotton fusible.  I also used a narrow double turn hem following Gertie's method which is always my preference for a swirly skirt and I allowed time for the hem to drop because of the bias before I  trimmed it level.
And a few more realistic photos: our garden is really a tiny yard so there was a little shifting around in the photo session (ably lead by my daughter) so you can see the dress moves around easily in more every day activities!
The up do was lovely for the photo shoot and a out on a 13th birthday meal with my daughter and her girlfriends  but the daily styling is more like this...


Details:
  • Colette Hawthorn pattern- size 2 bodice, SBA, graded to Size 6 waist/skirt
  • Additions: side seam pockets, cap sleeves with bias trim
  • Replaced buttons with lightweight pearl snaps bought here ( I will do a separate post on these)
  • Removed a 1/4" from inside front bodice shoulder seam to stop gaping at the front
  • Eliminated the seam on the back skirt as the fabric was wide, so cut as 1 piece
  • Narrow turned hem
  • Liberty Lawn fabric
  • Gutermann sew-all poly thread


You can see other Hawthorn's here, are you tempted to make one?
sib blog

Monday, 15 July 2013

FQ Retreat

Less than a week away, a weather forecast which is hot, hot, hot and there is still prep to do- but I am getting very excited about this again.  I will be teaching PJ pants on Friday afternoon...
I am bringing 3 pairs with me if anyone needs to try some on for sizing (I have XS and S).  On Saturday morning it is all about colour and fabrics with a couple of Fantasy Fabric Shop table top sessions- all about value, contrast, colour and different techniques to combine fabrics- all hands on for this class.   Pictured are Liberty lawns from Jo who is offering orders without postage to those coming to retreat code FQR13 and Oakshott impressions- Oakshott can also bring orders made by Wednesday to retreat with the code FQRLONDON.  For both these shops, orders must be made by Wednesday.
For more fabric Fat Quarterly fabric offers check this discussion for shops/codes/discounts..

And then my teaching is done and I am looking forward to Mandy's needleturn and Trudi's quilt doodle sessions.  My handmade wardrobe is nearly ready- the very hot weather is leading me to make my Colette Hawthorn dress early leading to a lot of sewing in a vest and little else- I was testing the bodice yesterday , first with Swedish tracing paper which is soft and easy to manipulate and washi tape to make a small bust adjustment using the Colette sew along...tutorial.
then a test run using some rather loud fabric which photographs much better than it appears in reality!
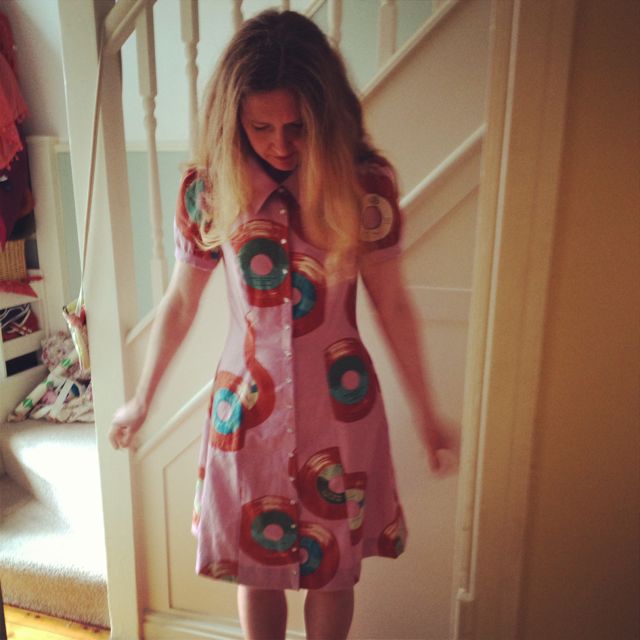
 My plan is to wear this on Friday- Deer and Doe Bleuet (Melody Miller  fabric) as it is cool for travelling on the train and easy to recognise.
And this one will be worn at some point...
But more than anything, I am looking forward to meeting fabric and sewing obsessives and having a weekend of chat and stitching.   Some of you are travelling from so far (Krista, I am thinking specifically of you) and I can't wait to see you all!  If you haven't met me before I am fairly shy and quiet but chatty once I get going, serious but also silly, and the usual mix of contradictions- my wardrobe is more confident than I am.   I am hoping to pace myself a little better next year so that I can socialise in the evening at least a little- last year my eyes were drooping by early evening!  I can't wait to see you all!  To see who else is going click here.
sib blog