Sunday, 13 February 2011

Sharing the love

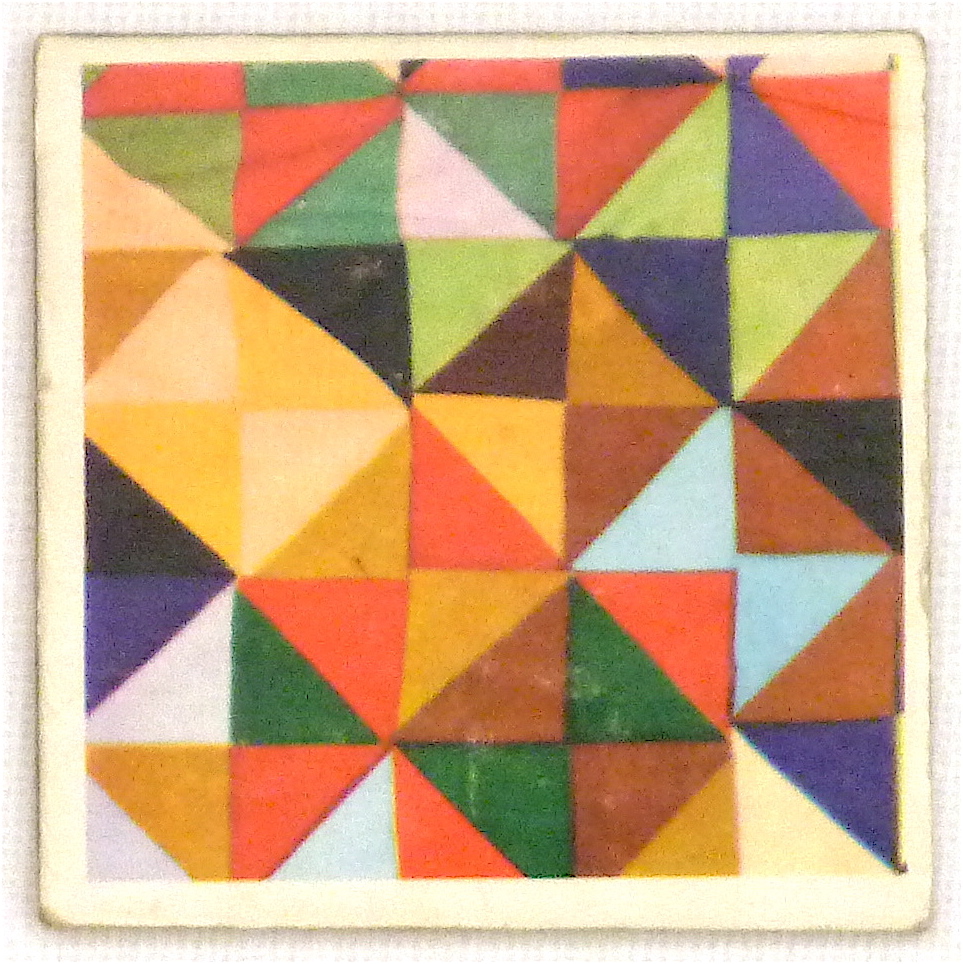
Vintage love, Happy Valentines for you and whomever you love x
I always appreciate you dropping in here
The mosaic is a tribute to the sharing of inspiration and ideas in the online world of blogs and Flickr.  In the spirit of sharing, Kat has a series of posts on Blogging Etiquette here.   Angela (Twee cut to pieces) kicks off today and I have written Tuesday's post (15th Feb).  
And finally, celebrate the best of British quilting and fabric design talent  and visit Lynne's quilt at Moda Bake Shop with fabric designed by Aneela
sib blog

Saturday, 12 February 2011

Memory Game

I do love vintage memory games cards and I found another set at the carboot last Sunday- Waddingtons, dating from late 1960s.  They are illustrated by Alain Gree.
 I thought these looked familiar and then I had seen them on ingthings.  Ingrid always has a clever, simple and creative blog header.  It features a 'little family'- check it out now before it changes, she likes to refresh it frequently.  I remember at least one image on hers that I don't have and yet there are over 120 in the box.
The patterns look textured, not just blocks of colour.  And you can see the fabric weave on the black/white dotties
A weird selection of still life images
Joyful illustrations

My favourite, it is giving my ideas...
Happy weekend x
sib blog

Friday, 11 February 2011

Quilt-a-long, Top Row Centre, Bottom Row Centre Blocks

We are now making the centre blocks for the top and bottom rows.  Place your 2 solid squares exactly on top of each other,  grain  running down the fabric.  If your fabric is not a solid and therefore not the same on both sides you will need to put the right sides together, as you cut it you will be looking at the wrong side of the fabric on the top square.  The first cut will be horizontal and 3.5 inches down from the top of the square (see pic)
Cutting lines- top centre and bottom centre blocks
The second cut is also horizontal, this time 4 inches down from the last cut- or if you prefer  5.5 inches from the bottom of the square.  The 3rd cut is vertical, 4.25 inches from the right edge and the 4th cut, vertical again and 4.25 inches from the left edge.  The square in the centre should measure 4 inches on each side-have a check! 
You should now be able to peel off the top layer of each piece and lay it out in a vertical mirror image so you have 2 blocks cut, one for each of the top corners.   Fix your block labels on with a pin.

Take the centre square of the left block and use it as the template to fussy cut the centre triangle fabric.  Repeat for the right block.  Assemble your blocks using the same tutorial as before, courtesy of Victoria. Your end quilt will look better and wonky stars more like a circle if you keep the triangle points of the stars on the smallish side.  Here are my bottom two corner blocks to give you an idea of the sizes. 

Now you can join the blocks.  First join top left corner to the left side of the top centre block using a quarter inch seam.  I pin at each end of the seam and I also pin all the star point seams down. 
Press along the sewing line and then I press my seam open to reduce bulk in the quilt but you can press to one side if you prefer.  Repeat for top right corner adding it to the right side edge of the centre top row block.  Do the same for the bottom three blocks
Top row finished
Bottom row finished
You can start to see the ring effect now!
Check out my new Flickr group to see what everyone else is making.  Madame Parfait is making two; one girl- sweetie style, one boy- Dr Seuss. Amelie has chosen the cutest selection of fabrics for her blocks and Cassie has made beautiful fussy cut centres!  Only one more pair of blocks to go.
sib blog

Wednesday, 9 February 2011

Block Party

Fresh Poppy Design
Quick, entries finish today!  I just saw this earlier at Lilys Quilts and thought I'd better get a shift on!  
If you are visiting from Quilt Story Block Party, hi, I'm Kerry, I live in a little city near the sea in the UK and this blog is my sewing and vintage life.  I've pulled out blocks for each category, traditional, modern and creative and they all started from Ringo Pie Flickr bee

Traditional- Vintage Union Jack
This is as traditional as I have gone in a block and the tradition is more to do with the iconography of the Union Jack than being a traditional quilt block.  I used Lynne's Union Jacks as a start to get my shapes and drew it onto A4 paper.   I don't like stitching through paper so I strip pieced the red and yellow and used paper templates for the triangles.  The red is vintage Liberty- very British!  The white donkeys are vintage fabric and the yellow colour is Kona banana.  It was a fiddly block to get right, accuracy counted for a lot otherwise it would be a wonky UJ!  This was for Erica.
 Modern-Yellow Door
Mid century modern doors was Lisa's January theme and I just loved making this.  It started off with a great pic found on flickr.  I drew it onto graph paper and then traced onto freezer paper. The panes of glass were a bit tricky with their borders.  Five is to represent Lisa's birthday- I wanted a significant number for her.  The fabrics were chosen to fit the mid century modern theme.  It was the best themes and all the blocks were so ingenious and clever and communicated the house and the inhabitants behind the door.
 Creative-Vintage Spools
Vintage spool- I made this for myself to kick off the first month of Ringo Pie.  I chose collections as a theme and this represented one of my many pies of spools and reels.  I designed the block, drew it on to freezer paper  and pieced each spool separately.  The fabrics are a mix of vintage, new and gifts from bloggy friends.  I hadn't really tried anything like this before- all the Y seams  were new to me and they took a bit of mastering but I still like this and I got to keep it!  This is me in fabric form!
If you haven't already take a visit to Quilt Story  and take a look at the amazing blocks and give some comment love!
sib blog

Monday, 7 February 2011

Domestic Goddess

This perpetual calendar was a great little carboot sale find.  It needed Milton bleach it was so dirty but cost only pennies and so appealing.  I had a black one too, gave it too Lula who set the date at Sun 35th Jan- just because she could!  No fabric finds this week but other treasures instead.
This is unbelievably good. My friend Kathy is from Michigan and this was her mom's cooking bible when she was growing up and she has her own later edition of this.  It has fabulous imagery and the recipes, especially the sweet stuff, are going to be good to dip into,  This Christmassy sweets pic is so vivid and complex, can't imagine making that ribbony stuff!
The importance of canning.   Always a priority, ha!   Have you seen the waist pleats this poor woman has to try and carry off?
Cookys (I'm just quoting Homes and Gardens spelling, new to me!)
And my favourite, the multi tasking Ganesh like domestic goddess proffering food for every occasion.  Get a good look at that wall clock, love it!
Reading through, the recipes contrast strongly to UK equivalents of the time.  They are much richer, more luxurious and there are ingredients reflecting a more diverse society that Britain had mid 1960s- I noticed the use of cardamon pods in something sweet and I have only noticed that in popular cookbooks here in the last 10 years. Good Housekeeping is the UK equivalent to Homes and Gardens and this is a funny little mid 1960s cook book, sponsored by Smiths crisps.
The presentation is mainly black and white and a bit stark.  Crisps feature heavily in the ingredients throughout, even in sweet things e.g. adding an extra texture to an Orange Crunch Gateau base! Yum potato creamy sweet citrus dessert...All the photos look fussy and unappetising
 Kathy and her partner James came round after the car boot sale and we had a good laugh at these books over cake, cookies and coffee.  The art of managing group dining is covered in both books.  The Good House keeping book has this handy flow chart- my fav pic in the book.  This is the plan for a 'relaxed' help yourself sort of affair.   Follow the arrows, only the hostess is allowed in the kitchen from an internal door, keep out guests!
Home and garden have a lighter touch on such rules, only one arrow to follow.
James, a scientist by profession, reminded us that it was part 'domestic science', hence such diagrams.  Kathy and I have a long way to go on the science route to domestic goddess status.  The Good House Keeping book also covers the dilemmas of what to wear and beauty routine for you and for your house.  If we could only follow this closely maybe we could be good housewives and hostesses?
These are the cool hip British types picnicking with their Smiths crisps.  Funny how they all look so middle aged but I guess they are early 20s.
More pics to come of other good vintage finds.
Have a happy Monday :)
sib blog

Saturday, 5 February 2011

Quilt-a-long Making the corner blocks 2

Ready to make the next corner blocks?  They are a reverse of the other corners.  Place your 2 solid squares exactly on top of each other, you can see my pins at the bottom so I know the fabric grain is running the same way.  If your fabric is not a solid and therefore not the same on both sides you will need to put the right sides together, as you cut it you will be looking at the wrong side of the fabric on the top square.  The first cut will be horizontal and 3.5 inches down from the top of the square (see pic)
cutting lines bottom corner blocks

The second cut is also horizontal, this time 3.5 inches down from the last cut- or if you prefer  5.5 inches from the bottom of the square.  The 3rd cut is vertical, 5.5 inches from the right edge and the 4th cut, vertical again and 3.5 inches from the left edge.  The square in the centre should measure 3.5 inches on each side-have a check! 
You should now be able to peel off the top layer of each piece and lay it out in a horizontal mirror image so you have 2 blocks cut, one for each of the top corners.   Fix your block labels on with a pin.
Take the centre square of the left block and use it as the template to fussy cut the centre triangle fabric.  Repeat for the right block.  Assemble your blocks using the same tutorial as before, courtesy of Victoria. Your end quilt will look better and wonky stars more like a circle if you keep the triangle points of the stars on the small side.  Here are my bottom two corner blocks to give you an idea of the sizes. 

Check out my new Flickr group to see what everyone else is making.  If you've made a block add it to the group to inspire others. Five blocks done, over half way!

sib blog

Tuesday, 1 February 2011

Eye candy

A little eye candy to start... my favourite little corner of our house at the moment
Lamp/shade Habitat sale, everything else car boot finds.  Tan and teal, nice.
Buttonberry closing down bargains, Lecien lovelies, even better close up.
Selection for a Union Jack block for Erica, Ringo Pie Bee.  Kona banana, vintage Liberty Tana Lawn and vintage strawberry donkey print, yum.

Erica made this beauty, a fabric hoarding block.
Hoarding Block for Kerry
 The last of my collectables blocks from Ringo pie.  She made great fabric choices and the tomato pin cushion is perfect.  Once I have it, I'll be working out how to put them together.  In the meantime, I have over 200 followers, can't believe it, Damian has been checking each day- he was more excited than me.  Welcome to you all!  
Some food for thought, take a read of this post on Free online crafty stuff, found it on Anna's Noodlehead blog and it is a thoughtful read.  
And if you are quilting-a-long (you can join in at any time) there is now a Flickr group with some beautiful blocks completed by Madame Parfait and Julia.  You are welcome to add anything that you make from my tutorials.  I found it hard to have the guts to make a Flickr group for this purpose:  it seemed a bit presumptuous, I think it's a confidence thing, anyway I can see it will be useful and I need to get over myself!
sib blog