Showing posts with label tea cozy. Show all posts

Thursday, 18 September 2014

Time for Tea Teaset Trio : Love Patchwork and Quilting

Self promotion is not my favourite thing but I am really proud of this project so I want to share here  A few months back I had a commission email from Jenny Fox-Proverbs, editor at Love Patchwork and Quilting and this project was the result, 'Time for Tea' trio of tea cosy, coasters and a divided teabag caddy. The instructions to make it are in Issue 13, out now. 


This project combines foundation paper piecing, appliqué and a little hand quilting and is a great skills builder if you want to try any of these techniques for the first time.  Everything has been beautifully photographed and the instructions are attractively laid out.  The templates are included at actual size in the magazine and are also available to download.   I love my tea so this project was a pleasure to make from beginning to end.  My daughter has already bagged the caddy for her own tea selection.


There are lots of familiar faces sharing techniques, advice and projects large and small- Lynne Goldworthy, Karen Lewis, Jeni Baker, Manda McGory, Lisa Lam, Sarah Fielke, and many more familiar blog names.   You can see the projects on Pinterest here.  The team at Love Patchwork and Quilting are a delight to deal with, helpful, efficient, friendly and enthusiastic.  I met Jenny, the editor at Fat Quarterly retreat- she is such a bright happy and involved person and it comes through in the tone of the magazine.  This is issue thirteen- you can find it in WHSmiths, supermarkets etc and there is more info about buying a copy here.

All photos from Love Patchwork and Quilting Issue 13
sib blog

Friday, 14 June 2013

Time for Tea

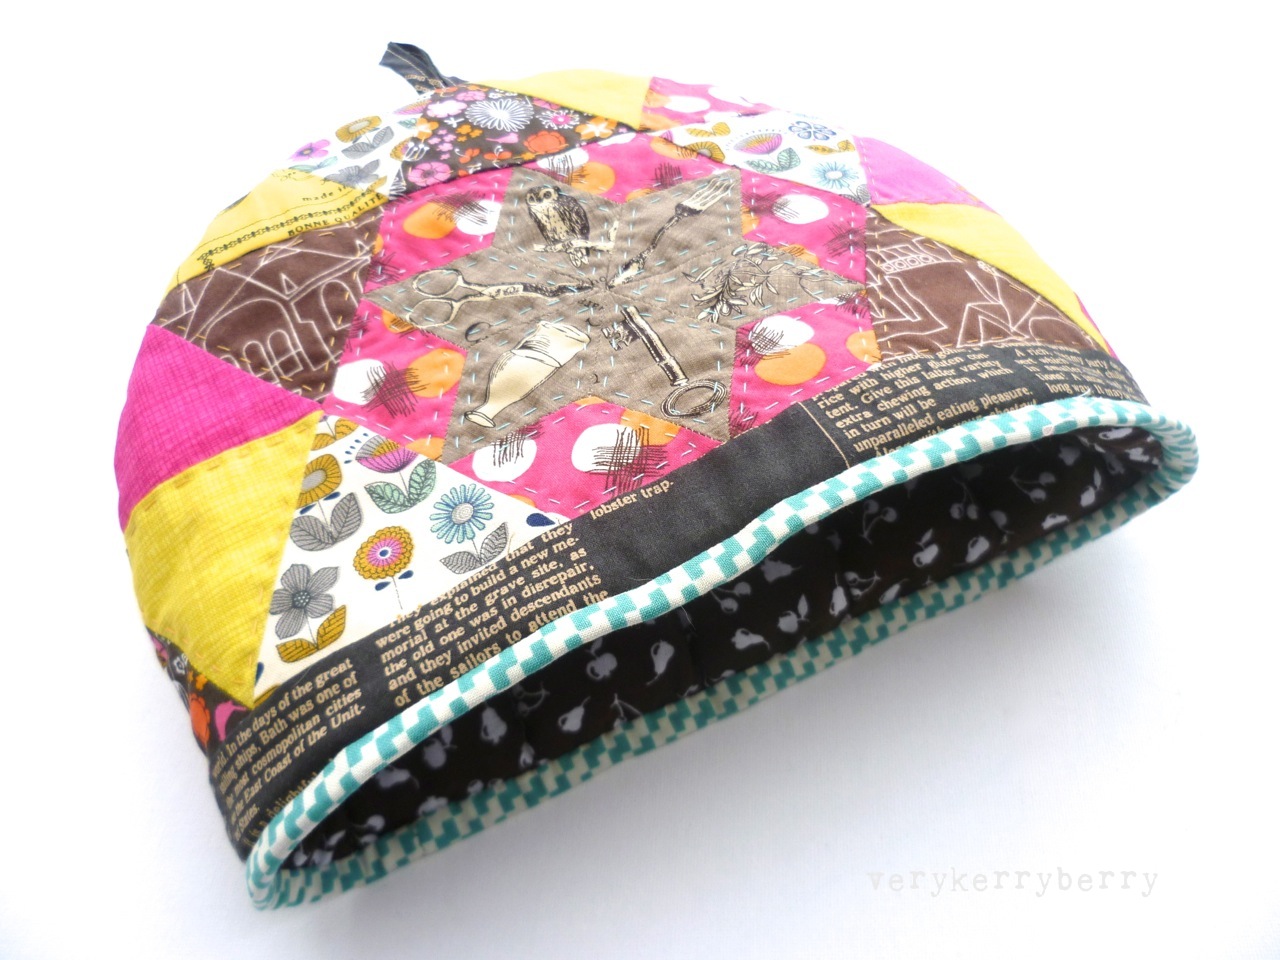
I remember last year, shortly after making a tea cozy for Fat Quarterly hearing a story on the radio about teapot usage being in decline.  Do bear in mind it was early in 2012 and there appeared to be no other news.  That's not to say these things aren't important.  I start each day with a teapot (filter built in),  a cozy and loose Earl Grey tea.  Now Penny is more likely to have a coffee first thing but I know she is partial to tea as well so I made her a tea cozy for her birthday a few weeks back.
The centre was made up of english paper pieced diamonds which I had sewn for the first Sewing Directory Exeter Meet up, (there is a second in September).
Aurifil had kindly sent me some 28wt thread which was perfect for hand quilting.  I used the template from my Fat Quarterly cozy and added the 60 degree triangle with Y seams on the machine.

I love the colours, rich and vibrant with a little lightness mixed in too.


And I included my favroutie tea, Waitrose Loose Leaf Earl Grey.  I have tried a lot of Earl Grey teas and this is my very favourite.  The spoon is an old fruit sugar spoon, much tarnished which belonged to my Grandma, much loved.
The irony of that news story is another similar one only a month before showing the rise in teapot sales following a rather beautiful example which featured on Sherlock. My day is based around my tea consumption, definitely my favourite drink, followed by a really good bitter, though probably not for breakfast.
sib blog

Friday, 29 June 2012

This little tea kettle went to Liberty

You already know that we all got a great preview and hands on experience of Liberty's new quilting range, Liberty Lifestyle and you may well have read about the desgin process behind its first collection, 'Bloomsbury Gardens' on Katy's blog.  The fabric has started to arrive in USA stores and I know Annie at Village Haberdashery is stocking some of the 55 variations- that's 5 colourways and 11 prints!  
IMG_0254
Michelle, otherwise known as Liberty Lifestyle lady, asked me to make a Lifestyle teacup just like the Liberty Lawn version I made testing Laurraine's Quilted Teacup pattern.
IMG_0255
I was more than happy to oblige.
IMG_0267

I love the mix in this collection, it is not matchy matchy- some prints look like they will never work with each other but they do and with a kick!  I added a label for Laurraine- her cute and easy label tutorial is here.
IMG_0266
The linen is the same as the previous cup, Robert Kaufman's Essex linen/cotton blend in 'Unbleached'.
IMG_0269

These pics remind me of vintage tea china sold in pairs and trios in antique shops!
IMG_0270
And as the teacup was going to live a new and glamourous life in Cafe Liberty, I thought a little tea cozy would be a suitable traveling companion.
IMG_0260
I was drawn to this print, Copeland, for the main body of the tea kettle.  Bold, dramatic and with a hint of bygone age.
tea cozy in Liberty Lifestyle
Next to the teacup, it looks just about the right size to fill the cup!
P1030346
I used some Lecien Cosmo embroidery floss for steam and a little Liberty pun on the cozy reverse.  you can find Cosmo at Eternal maker
P1030344

The selvedges gave me just enough text for the handle and knob.
P1030351
A bit of vintage Liberty lawn for the lining and a little label using Laurraine's tutorial inside.
P1030341

You can find the tea kettle pattern on individual sale here and as a set here.  The tea cozy tutorial is in my free patterns and tutorials here.
sib blog

Friday, 27 January 2012

Teapot Fancy Cozy Tutorial

*25TH OCT 2020 EDITED TO ADD: My Teapot Fancy foundation paper piecing pattern will soon be available in my Payhip shop.  Once it's ready, I'll add the link here!  Meanwhile, the cozy template is available for free at Payhip and you can make it with a block of your choice or a favourite cotton fabric.

 This is a very exciting week, I have a pattern published in Fat Quarterly Magazine.  This issue is all about piecing and there is a huge range of piecing patterns from simple to advanced.  My pattern is for a teapot block and I have written two ways to piece it- freezer paper template style and foundation.  It is a great pattern if you are new to piecing as I take you through both methods step by step.  I have designed a simple tea cozy for the finished blocks but you could make it with a different block or just out of patchwork fabrics.  This cozy should be big enough for a 4 cup teapot. 
Finished size 9" tall, 12" wide.  
You will need:
2 blocks/fabric pieces  14" x 10" wide for back and front.  If you use the FQ teapot blocks you will need to add sashing to make your block up to this size
Fabric for lining- 2 pieces each measuring 14" x 10" wide
Batting/Wadding 4 pieces  each measuring 14" x 10" wide
Fabric scrap for hanging loop
Binding strip 1.25" x 26" wide cut across width of fabric
Basting Spray- I use 505
Usual Sewing Supplies
Pattern template (free) here

1. Making the  Cozy Front and Back
 Make your quilt sandwich with 1 piece of batting and your quilt block.  Spray the batting and lay your quilt block on top, repeat for the other block.  Quilt blocks as desired. Find centre point along the top and bottom edge of each block and mark with pins.  Place pattern on the centre pins and using a pencil or erasable marker, draw round pattern piece, flip over the centre and draw round again. You should have a semi-circle type shape.
I added a little had hand sewn detail around the spout for steam after I had drawn round the template to make sure it would fit.  Cut out the semi circle and zig zag round the edge of front and back.

2. Making the Cozy Lining
Repeat the process in step one for the lining.  I kept my quilting simple and wide so there would be lots of space in the batting to trap heat and keep the tea warm!  Use the template, cut out and zig-zag as in step 1.  You should now have a front and back outer and front and back lining pieces, 4 pieces in all.
3. Making the Hanging Loop
From a scrap cut a bias strip 1.25"x4".  Fold in half lengthways so the long edges meet, press.  Open out, bring the long raw edges into the centre and press along the folds so your strip looks like the picture below.
Bring the folded edges together, press again and stitch along the edge.
On one of the outer cozy pieces, find the top centre point, loop the bias strip and place either side of the centre point with the loop facing inwards.  You can adjust the size of the loop to whatever works for you!  Stitch the loop to the top of the cozy stitching within the quarter inch seam allowance.  

4.  Completing the Cozy
Taking the two cozy outer pieces, place right sides together, pin around the edge and sew using a quarter inch seam all around.  Repeat with the lining but sew a scant 3/8"seam.  This will make the lining a little smaller so it fits nicely inside the cozy.  Clip curves on the outer and lining seam.  If you are nervous about cutting into your seam, place a pin just in front of the stitches to stop your scissors snipping your stitches.  Press open the last 2 inches of the seam at the bottom edge of the cozy on the outer and on the lining (see picture below).    Turn outer cozy the right way out and lining so the wrong side is out.
Place the lining inside the cozy outer, wrong sides together.  Pin at the pressed open side seams.  Stitch all around the bottom edge within the quarter inch seam allowance, about eight-inch from the bottom.  
5. Adding the Binding
Follow my Single Binding Tutorial to add binding around the bottom edge and to complete your cozy!
The teapot beside my cozy was my original inspiration for the teapot block!