Showing posts with label miniature patchwork. Show all posts

Thursday, 8 July 2010

Teeny Pincushion Tutorial- Method 2 easier!

How to make a strip pieced tiny pincushion 2" by 2"- Method Two (this is the easier method) 

PDF Download of instructions here

You will need:
Fabric pieces with images for fussy cutting
Scraps of fabric for strips
Water based glue stick
Paper- light weight
Pencil
Disappearing Fabric marker or pencil
Quilting ruler
1/4 rule- optional
Stuffing- I use brown rice for weight and polyester fibre fill
Needle, pins, thread, scissors, rotary cutter/mat

1. (a)  Choose two images to fussy cut.  You will need two squares the same size as your central image.  Mine were around 1 1/2 inches.  Lightly mark the square actual size on the fabric in pencil/disappearing fabric marker.  Now pencil 1/4 inch seam allowances around the squares on the fabric.  Cut your squares out along the outer line.


2.  Using a small stroke of water based glue stick, stick both squares on to the paper.  Allow plenty of space around each square


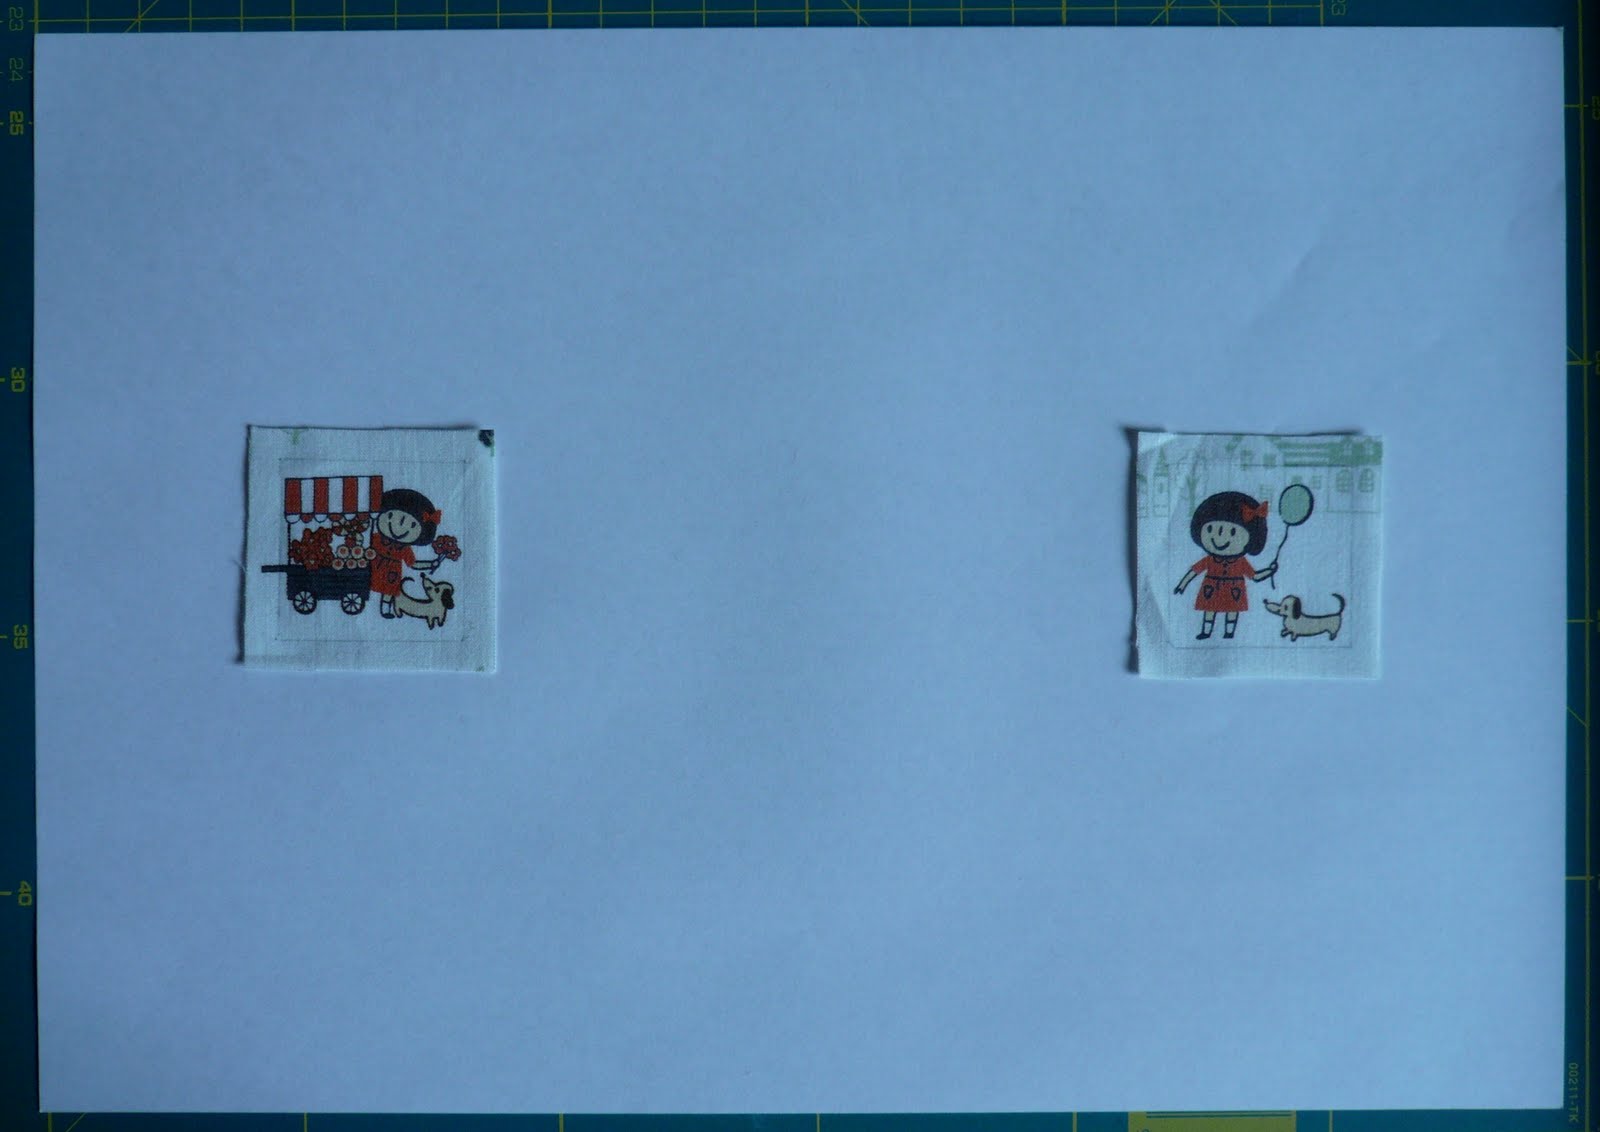
3. Find the centre of each square edge and make a small mark on the paper.  Draw a + over the fabric square on the paper (not on the fabric!).  My lines were approx 1 3/4".  Now join the lines to make a square which is at a 90 degree angle to the fabric square.


4.  Prep done, ready to sew! Lay first strip over the edge of one side of the fabric square.  You will be stitching through 2 layers of fabric and a layer of paper.  Using a 1/4 foot guide will ensure your fabric lines up and just covers the pencil lines on the square.  You could use an old needle just for this stage. Repeat on opposite corner and then do the same for the other fabric square.  You should have a strip on the opposite corners of both fabric squares!


5. Now fold the paper triangles  back on the 2 opposite corners which you have sewn fabric strips.  Keep adding strips until both triangles on each of the squares will cover the triangles when the paper is folded back.


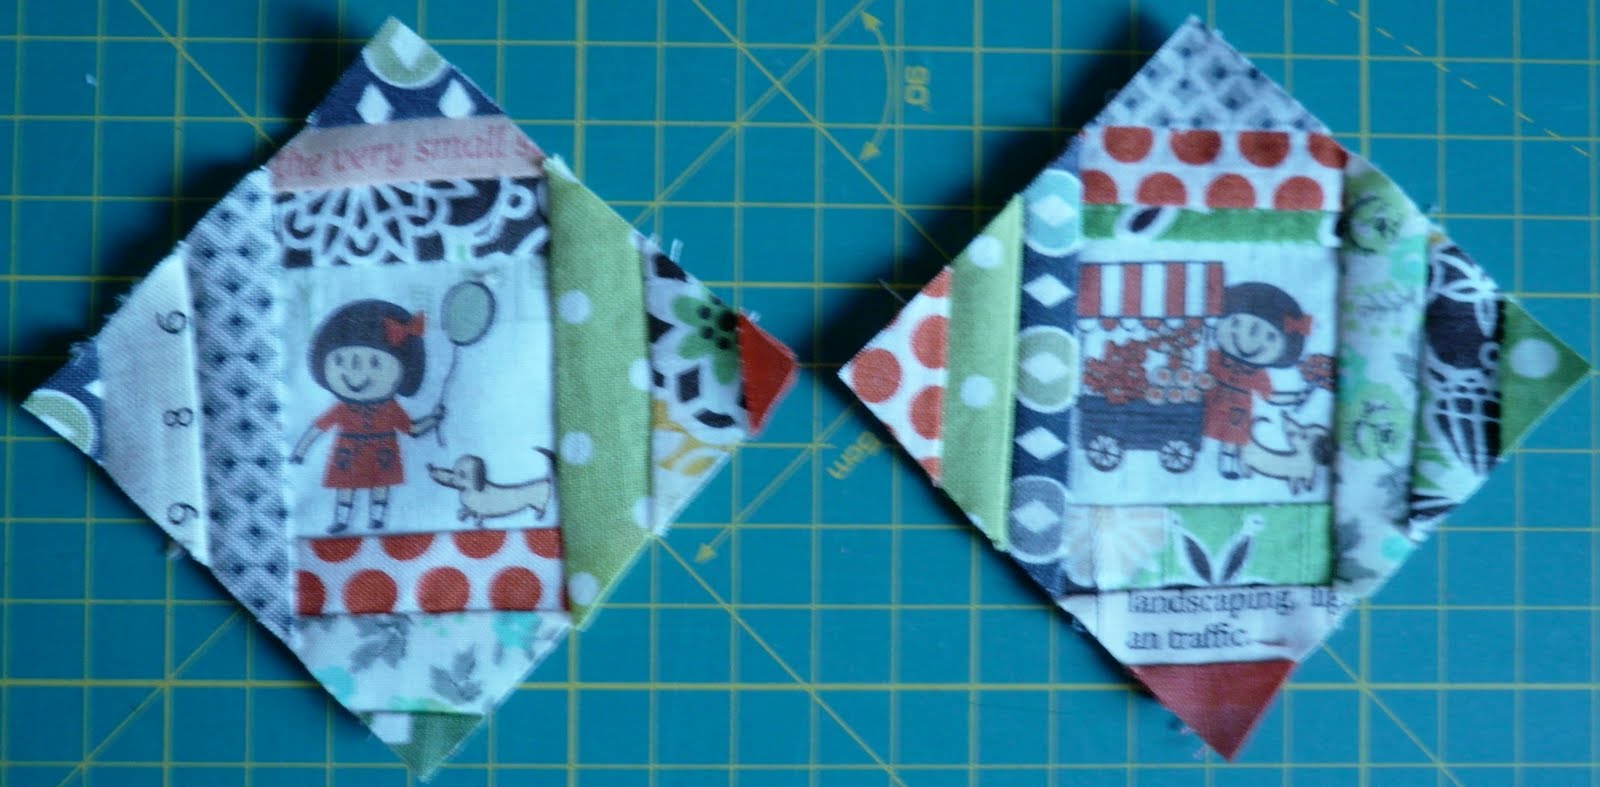
6.  Give the triangles a press  to make a hexagon sort of shape.  Now add fabric strips in the same way to cover the other 2 opposite corners.  Open out these triangles and press the square flat.


7.  Place the squares paper side up on a cutting mat and trim using the paper as a guide.  You should end up with 2 squares the same size.


8.  It also does no harm to zig zag around the edges- it makes the fabric a bit more resillient when you turn out.  If you want a hanging loop, now is the time to add it to one square.

9.  Place right sides together, leaving a gap for turning through, sew around the edge 1/4 inch allowance.  Press, open out the turn out part of the seam and give that a good press on both sides too- makes it easier for stitching it up in a minute.  Turn through and stuff.  I used a mix of uncooked brown rice for weight and polyester fibre fill for softness.  Ladder stitch the opening closed, you could use double thread here for strength.


10.  Stand back and admire your tiny pincushion! 

If you have any questions or problem with this pattern please email me (see 'about me' for my details) and I will try my best to help

(Please make for yourselves, as presents for your friends/family, for charity fundraising but not to sell commercially)

TUTORIAL CELEBRATION GIVEAWAY COMING UP! 


Sunday, 4 July 2010

Tiny Tutorial- Method One

How to make a strip pieced tiny pincushion 2" by 2"- Method One (this is the fussiest method but I preferred this technique) 


PDF Download of instructions here

You will need:
Fabric pieces with images for fussy cutting
Scraps of fabric for strips
Paper- light weight
Pencil
Disappearing Fabric marker or pencil
Quilting ruler
1/4 rule- optional
Stuffing- I use brown rice for weight and polyester fibre fill
Needle, pins, thread, scissors, rotary cutter/mat

1. (a)  Choose two images to fussy cut.  You will need two squares the same size as your central image.  Mine were around 1 1/2 inches.  Lightly mark the square actual size on the fabric in pencil/disappearing fabric marker.  Now pencil 1/4 inch seam allowances around the squares on the fabric.  Cut your squares out along the outer line.  Mark the seam allowances on the back too- it makes life easier when you add the triangles.


1. (b) I fancied a ric rac border on my square so this needs adding now- it is a bit fiddly so you may want to skip this.  I sewed it so that the bumps would just show when completes and I attached the ric rac in the seam allowance so all the stitches were hidden.  That teacup puppy is so cute!


2.  On the paper, draw a line the length of the finished square (without seam allowance).  Thus will be the long edge/hypoteneuse of the triangle.  Find centre of the line and mark this point.  Take your quilt ruler, turn it so the corner of the ruler makes the right angle of the triangle, match up the corners with ends of the  pencil line and use the  centre point for accuracy.  Draw along ruler edges to complete your first triangle.  Now add seam allowances around all the edges of the triangle and repeat all of step 2 to make 4 paper triangles.  Cut them out- I used a craft knife.


3.  Prep done, ready to sew!  With your triangle right side up (pencil marks on top) place the long edge on your first fabric strip.   You will be sewing through the paper and fabric so a larger needle and small stitches- size 2 or smaller-make paper removal easier at the end.  I use a fabric leader (a little bit of scrap fabric) at the beginning to stop the machine choking at the first stitch.


  You could use an old needle just for this stage.  If you have all your triangles and first strips ready you can chain piece for speed.  You will have a chain of 8 triangles each with 1 fabric strip.  Cut threads between and change needle to your usual - I use size 80 - sewing through paper is finished!


4. Fold the paper back along the seam.  The remaining strips will be joined to the fabric only so keep the paper well folded and out of the way whilst you add 2-3 strips.  

  
The strips should cover the paper triangle when folded back.  Keep adding strips, chain piecing if you like to until the fabric covers the paper triangle when folded back.  Press the seams forward to the fight angle triangle corner.

5.  With the paper triangle face up, trim the triangles using the paper edges to guide you.  


Carefully remove  the first line of stitching which held the paper and the paper itself.  You will now have  2 centre squares and 8 triangles.  Arrange them how you would like each side to look.

6.  Join the first 2 triangles to opposite sides to the centre square.  I had the centre square on the top and used the seam allowances pencilled on the back to make sure I was sewing the right distance and covering up the right amount of ric rac.   Repeat for the other side.

 
Press the triangles out to make a hexagon sort of shape.  Then add the other 2 triangles on each side.  You can see the last one to be added here


7. Trim off the little triangles in the middle of each edge.  It also does no harm to zig zag around the edges- it makes the fabric a bit more resillient when you turn out.  If you want a hanging loop, now is the time to add it to one square.


8.  Place right sides together, leaving a gap for turning through, sew around the edge 1/4 inch allowance.  Press, open out the turn out part of the seam and give that a good press on both sides too- makes it easier for stitching it up in a minute.  Turn through and stuff.  I used a mix of uncooked brown rice for weight and polyester fibre fill for softness.  Ladder stitch the opening closed, you could use double thread here for strength.


9.  Stand back and admire your tiny pincushion! 

Can you bear to put a pin in, I think I will have to avoid the dogs and put them in the corners!

I hope you enjoyed this tutorial and make a timy pincushion, send me a pic if you do.  Amy problems or questions, please email me, my address is in my profile in the about me bit.  You are welcome and I would be honoured if you want to link to this on your own blog.  

(Please make for yourselves, as presents for your friends/family, for charity fundraising but not to sell commercially)

I will post method 2 up as soon as I am able and a downloadable pdf when I can work out how to do it!   
I worked this out!

Yay, my first tutorial when you can make something.  I think I will have to make another so I can do a giveaway to celebrate!

Saturday, 3 July 2010

Teeny and Tiny

I love sewing teeny tiny patchwork and I have been inspired by some pincushions on Flickr- Susan,  aka Chickenfoot who makes great miniature patchwork.  This caught my eye first and as I had tried paper as a foundation for the spiderweb block I had an idea.  These are the result...


I have been busy today!  They are each 2 inches by 2 inches.  I recorded the process and tried two different methods so I will add a couple of tutorials as soon as I can so if you want to try making one you will have instructions.