Showing posts with label bra making. Show all posts

Thursday, 30 June 2016

Bra Making Success, plus Storing and Sourcing Supplies

Like many of you, sewing is my therapy.  I've made a conscious decision not to pursue it as my main income for fear of losing my love of the thing I most like to do,  Instead, I earn some money through it but most of my sewing is for fun.  But I am a greedy sewer. I want to sew it all.  Quilts, bags, clothes and now lingerie.  I wind myself up with the sheer amount of things I plan to sew- far more than is possible in the time available - and I often need to remind myself to slow down, finish what I am sewing now and worry less.  Since my 'Bra Making with Madalynne day', I've been sewing more undies.  Starting with an everyday bra, using the same pattern (I think this is being released by Simplicity some time in August) and a few tweaks on the class bra I made.


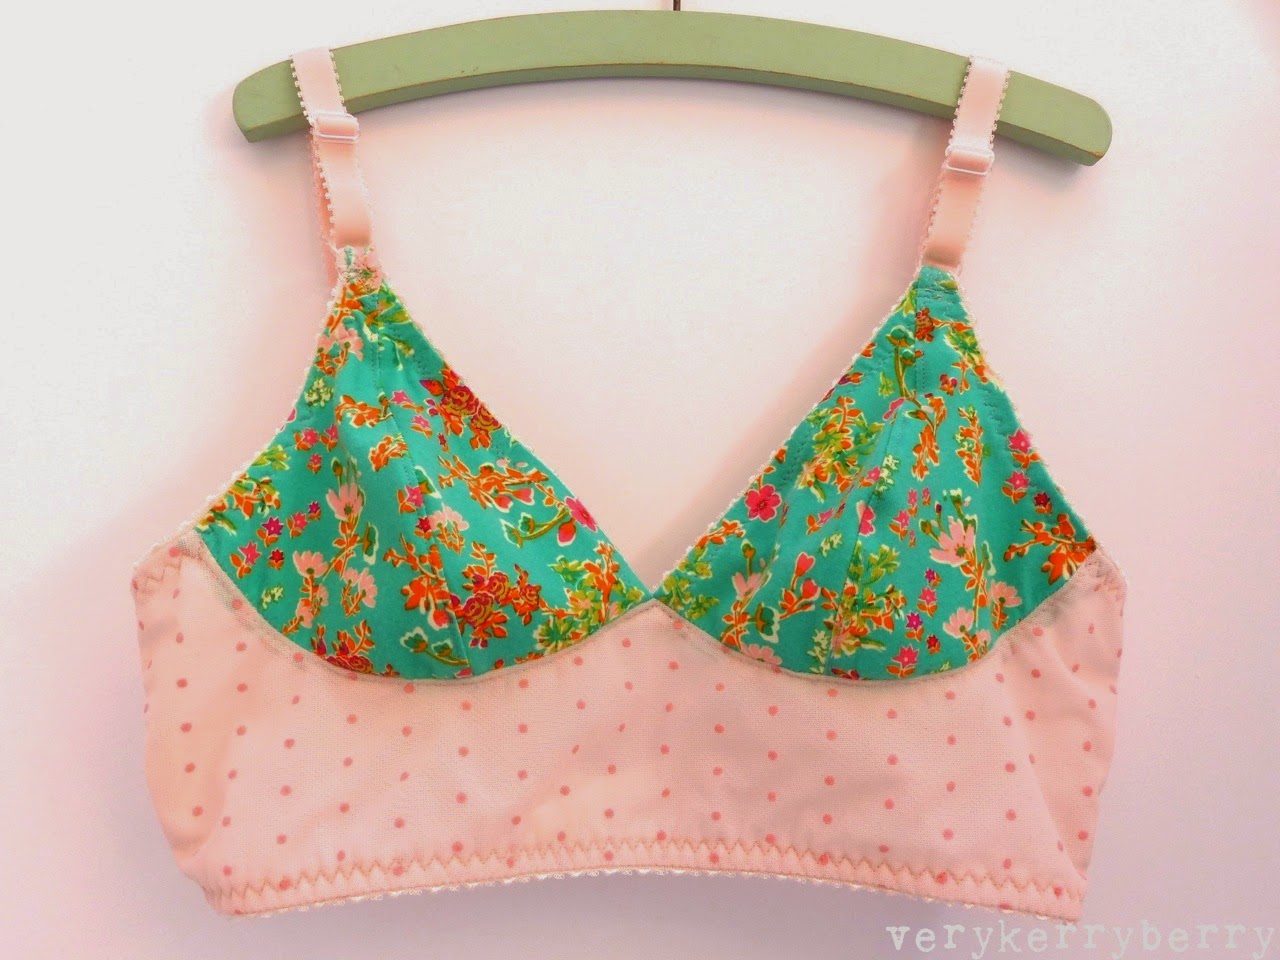
On this one, I narrowed the bridge- the gap between the two cups.  I also shortened the distance at the bottom of the band so the elastic and underwires are closer.  


This one isn't perfect, the underarm area still waved a little as I sewed it and probably needs a slight reduction towards the top of the seam- my sides are quite straight rather than tapering in at that point. It does fit better than any shop-bought bra that I own.  I literally cannot find a bra without padding to fit me.  My high bust is flat and bony and any bras without padding tend to gape forwards on me. The combination of stretch lace and power mesh - a supportive net that is on the inside of the cups and front band and is the sole fabric for the back band - is perfect for my small bust.   It goes against some bra maker's recommendations to use fabrics with little or no stretch I guess but this level of stretch helps my fit issues and still provides sufficient support.  It's not a good combo for a heavier/fuller bust but for mine it works well.  


This is the Sierra, a free pattern from Maddie Flanagan.  I made this for my daughter.  The support is light and is based on compression - squeezing  and flattening basically!  The front is stretch lace and the lining is a very firm power mesh, comparable to a control fabric.  There is no 3D shaping in the front cup area, instead the combination of cross-over and pressure holds everything in place.  This is an XS- too small even for me.  It's the sort of bra to wear for a sleep over, or a day at home.


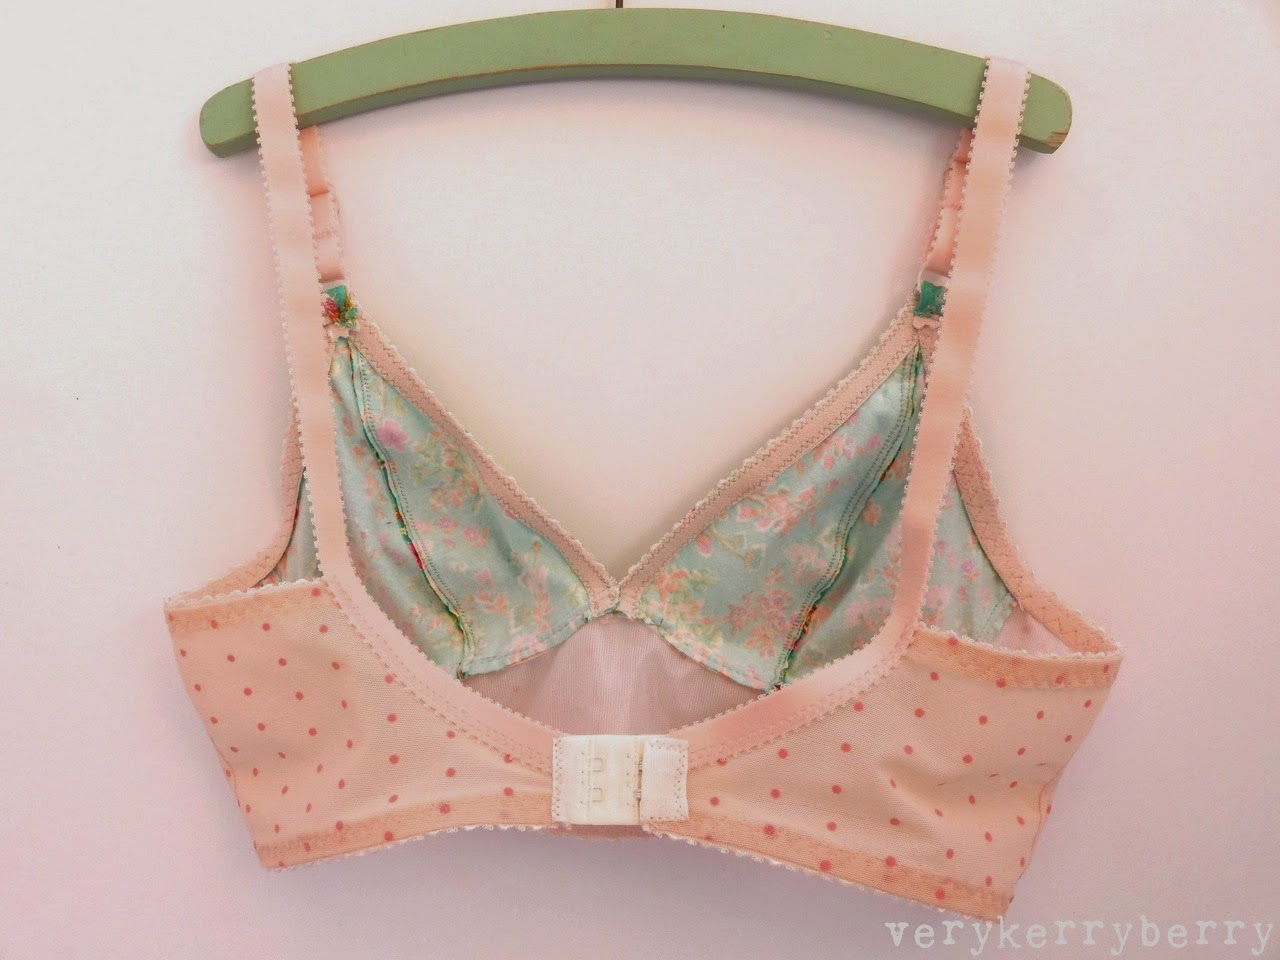
Construction was straightforward apart from the edging around the band which involved zig zags following the scallops. that was tricky.   I do recommend adding an extra inch to the end of each side- the part where the hook and eye will go.  It just gives you a little extra room for fitting to the right level of constriction. 


This is Noelle, another Maddie free pattern which came out this week.  I made this last week during a shout out for testers.  I made a small as the sizing matched my measurements but I needed to size down and next time I'll make an XS but with the S darts as they are spot on.  I used a shape wear cotton/nylon blend for the main fabric and elastic lace for the bottom band.  The final crop top is a gentle relaxed fit, good for bed or hot days.  I'll use a power mesh to line the next one and aim for a more supportive feel.   There's a matching high waist panty with the pattern download too. 


Although I've had more success with bra making recently, I still feel very much the beginner.  It is a fascinating world.  I am in the Bra Making Forum Facebook group which is a supportive global network of  bra makers and shows just how many potential fit issues there are for all our differently sized busts.  Supplies are still an issue.  I buy kits here and there, I also buy supplies on eBay but it is hit and miss.  The Shapewear fabric I used for Noelle is wonderful quality but a random find.  I found ¼" elastic (needed for the straps) hard to come by.   I've also bought elastic or lace which is weak and will not survive the most careful hand washing and wearing.  Terminology is mixed and inconsistent - Power mesh and power net are used interchangeably but the density and tightness of them varies from flimsy net (often used for pretty knickers ),  to extra firm (sometimes used in control garments).  Power mesh can be double layered to strengthen it's compression effects.


It is an expensive business too.  I find I have a big draw full of supplies and yet if I want to make something I am always short of something.  Every bra or pair of knickers takes more elastic than you first imagine and a fair amount of thread.  It helps to have everything sorted into labelled zip loc bags and I recommend recycling your worn out bras- great for the strap sliders, wires and little bows or roses that all seem to last a lot longer than the rest of the bra.    These bits are also good for making a test bra when trying a new pattern.  For kits, I've recently bought from Natasha of Arte Crafts- although the $/£ exchange rate has changed rather dramatically since then- her pink Duoplex kit kit was lovely quality and I am looking forward to sewing it up. I also bought this kit from Freya of Elise Patterns a UK supplies seller.  I assume she is hand dying her kits  to create the different colour options  I ordered a yellow kit, it looks more orange/apricot that I was expecting  but it was good value and I think it will combine with blue nicely.


For UK and European bra makers, I have a list of suppliers here.  It is hard to always find exactly what you want in the right place, but things are improving.   I think the best piece of advice I can think of when it comes to bra making is to look at what you currently wear- check the lines of what fits you well- what style cup?  How does the back look?  Then look for a pattern which is similar.  I would also recommend looking at what other bra makers have made- look for someone with similar fitting issues.   I found a list of bra making blogs here at Sewsnbows  No bra pattern works for everyone,  I see lots of styles that will never work on me and I doubt that something like the Sierra would work on a large cup size.  Big or small busted, we all have issues and expecting one pattern to address everything is expecting a miracle from the pattern maker.   For bra making supplies in other parts of the world, check out Amy's guide on Cloth Habit.   There's a fascinating listen on Sandi Hazlewood's Crafty Planner podcast where she interviews Norma Loehr of Orange Lingerie.

On a side note. I've had a huge spike recently in viewing numbers - I don't know why but if you are new to this blog, Hi there!  And you are welcome to introduce yourself too...and if you came here via somewhere else, let me know, I'm curious!


SaveSaveSaveSaveSaveSaveSaveSaveSaveSave

Thursday, 26 May 2016

Bra Making with Madalynne: An investment class

I first started bra making when the Watson pattern was released and had an initial success.  I got the bug after that, had a January blues splurge on supplies- I find these still rather patchy in the UK and the choice is limited- and made a few more with a mixed results.   By the way, if you're looking for UK supplies, I have a list here.    I made a white, everyday Watson for my daughter - perfect fit.  I made another for myself and it was hopelessly large.  Bras are a balance of compression and stretch and changing any of the variables- different fabrics, elastic - can make a huge difference.  After that, my interest and confidence waned and with the exception of a few pairs of knickers I concentrated on clothes and quilt blocks... 


Fast forward to April.  I ended up cancelling my trip to USA and selling my Glamp ticket.  I sold it at a loss for a quick sale but I had a goal for the money, Madalynne's UK Bra Making Workshop at The New Craft House.  I had seen the dates months back but dismissed it as too close to Glamp, now that was no longer happening I needed a pick me up and I had a feeling this would be just the ticket.  It was a 'splash the cash' sort of spend but I had a feeling it would be worth it and as it turned out, it was, with bells on.


 It's the perfect sewing workshop for experienced sewists and as the group came in and I clocked a Kielo Wrap dress and a Hawthorne frock looking very lovely on their respective wearers, it was clear that everyone came with skills.   Maddie, Hannah and Rosie had prettified our workspace, there was coffee, tea,  fruit and yoghurt to start the day and machines were supplied and ready at no extra cost for those of us who required them.  After the initial chat we each opened our named parcel to find a personalised bespoke bra pattern traced out  plus the good quality materials to make it.


The goal was to complete a bra and learn along the way with the aim that it should be close to your desired fit and a detailed trial bra for you to perfect further bras at your leisure.  I think there were twelve of us and Madalynne kept the pace up so that we all systematically sewed the same section at the same time.    There were breaks for lunch and afternoon tea and the food and drinks were thoughtfully chosen and fuelled us nicely.


We all experienced the wonder of using Odif 505 temporary adhesive spray; more commonly used as a basting method for quilters, as an ingenious method of holding double layers of fabric together, stopping elastic from slipping as it's sewn and as a temporary measure for sticking the hook and eye sandwich in place before sewing.  Hannah and Rosie supplied us all with Microtex 70 needles, thread and extra elastic when needed and everyone had an individual cutting mat and rotary cutter to use.     You can get an idea of helpful tools and resources below.  The oddly shaped scissors are Appliqué duck bill scissors, great for trimming layers safely. 


Maddie shared her considerable expertise and answered our many questions.  By 4pm, we all had a completed bra and rushed to the nearby ladies room to try them on.  Most people ended up with a pretty good fit.  Mine fitted perfectly on the cups, even the upper cup which is the area I have the most problem getting a snug coverage.  There was room for improvement but all minor.  My underarm area had stretched out whilst sewing so the fabric was probably a bit too stretchy and I will use a less stretchy fabric for this or line it with something non stretch..  The bridge could be a smidge smaller- maybe ⅛" reduction in width and the back band could be tighter- I think I will reduce this by ⅛" on each side for the next one but to have a well fitting underwired cup without padding is a first for me in either home made or ready-to-wear.  The cups are made from lace and a firm, good quality powernet.  This provides a little bit of give which works brilliantly for a small bust.  Not sure how it would work in a E cup or bigger but I saw another participant with a D cup and her fit looked great.  


 There were three people who needed extra fitting but Maddie did take the time to work out what the issue was and describe how it could be rectified on the next bra.  In the break times, all the sewists sat and chatted and we all commented how impressed we were with the class.  Many people commented how good it was to do a class with advanced skills.


 I came home encouraged and full of fresh knowledge, skills and understanding.  Maddie, Hannah and Rosie help make the day a total pleasure so the class felt like an investment for my future lingerie sewing.  Bra making is a very specific skill and I certainly know a lot more than when I made that first Watson.   In hindsight, I needed a bit of time to pass to understand how the different fabrics worked together, my sizing and it helped that I acquired a vintage Bernina or two- both of which I find sew very stretchy things like elastic more easily than my Janomes.    But I was still a little stuck especially with the idea of ever getting an unpadded, underwired bra to fit.   Maddie had a liberating approach, not too many rules but enough to feel secure.   The mix of powernet and lace seems like the perfect combo for support and adequate coverage- you know what I am saying ladies.  The whole day was packed full of activity and the company was lovely.  If any of you want to learn more about sewing lingerie and get the chance for a Bra Making with Madalynne workshop,  I recommend it.  It was a lot of money well spent.  I can't wait to make another, this weekend is already pencilled in...

sib blog

Wednesday, 21 January 2015

The Watson Priory Peach Bra

Lingerie making has long been a sewing specialism I have wanted to explore.  After some tentative attempts at knickers I made a cami slip and briefs following Gertie's sew-along last year, I made test garments and altered the fit and the resulting undies have been worn many times.  When I saw Amy Chapman's Watson Bra on instagram last December, I knew this style was for me.


It is the perfect pattern to dip your toe into bra making without yet entering the world of the underwire. There is a sew-along just starting now but you don't necessarily need it.  The pattern was quite detailed and there is lots of info at Clothhabit.


You do need a machine that is happy sewing stretch materials and elastic- happy in terms of tension; the stitches are straight, zig-zag and three step zig-zag so suitable for a standard domestic machine.  I did not use an overlocker/serger.  A multitude of stretch needles is a must.  I always break a minimum of two  when sewing anything with elastic or lycra.


These came in handy: duckbill appliqué scissors.  This pair were a Christmas gift from my brother so I asked for Ginghers!  You can see a more cost conscious pair at Plush Addict awaiting restocking. 


The joy of these scissors is that you can trim away a layer of fabric without harming the layer beneath. I usually do this turning a small pair of scissors on their side which works but is not without hazard. This is a luxury method and makes trimming and grading seams a lot easier and safer for me.


You can see how the duck billed side slides underneath the seam being trimmed and shields the lower layer, allowing you to trim closely. Nice!


This area is the back upper elastic which leads into the bra strap as seen from the wrong side (above) and the right side (below).


Sewing this bra was a teeth clenched experience.  I measured myself as the pattern instructions stated but there is no fitting during construction.  Instead you have to wait for the end product and cross your fingers!  I was lucky, for a first attempt the fit is good, very wearable and I love the longline feeling- it seems to provide the feeling of security of an underwire bra with a lighter weight coverage. None of my shop bought bras fit well- they fit on the band around my ribs but tend to be big at the top of the cup and I worked out with this bra that my cup size is 34A at the lower part of the cup and 34AA at the top part so that will inform the next Watson and the underwired bras that are next on my list.


Stats:
Size made: 34A
Fabrics: Bra Cups from Priory Square cotton spandex knit (also available here
Bra cradle: lightweight powernet with a light weight non stretch tricot lining
Bra Band: Very firm power net
Elastics: ½" plush back throughout- fancy edged for back, front and sides, satin finish for straps
Alterations: I removed a little fabric at the back to accommodate a 2-hook width fastening rather than a 3-hook.  This is covered in the pattern.
Top Tip: Print the patterns pieces on to card.  It makes drawing round them and cutting out a lot easier.


For more detail about the fabrics involved, look here at Clothhabit. I bought the Craftsy bra making class with Beverly Johnson and found her fabric information invaluable and the whole class is a joy to watch.   Sewing Bras: Construction & Fit (w/ Beverly Johnson) (affiliate link).

Thankyou to Sonia who shared some tips on Instagram (@fabricandflowersuk) and stressed the importance of sewing as close to the edge of the elastic as possible so the edging just peeps through.

This bra seems to work in a huge range of sizes. Look at #watsonbra on Instagram to see the variety.  Obviously the support and coverage is much lighter than foam cups and underwires but I was very happy with the result.  It is the sort of bra I would wear under a shirt or jumper but not under a tighter fitting jersey top-I still prefer foam cups for those!  My daughter has requested one and I definitely want more of these in my undie wardrobe.

A note on supplies: frankly, it is very hard work and a total PITA in the UK to find your supplies in one place.  You can either go to Bramaker.co.uk, Vena Cava Designs or English Couture.  Selection varies and postage adds up.  What you really want is a kit to make a Watson bra with the correct fabrics and findings but you may struggle to find that.  I have bought kits from Merckwaerdigh, they tend to be quite brightly coloured but they do include all you need and even with postage from Holland, they work out cheaper than many UK options. You can find a good range of elastics and associated notions at The Bra Shop on Etsy- UK based.  It does make me want to set up my own UK bra hobbyists supply shop but a small house, no spare storage and pets does not seem like a suitable environment!

sib blog