This weekend I got started on
Sara's Aeroplane bag patten. I have picked a range of textures with a vintage flowery Jonelle curtain for the lining, a Japanese corduroy for the main body, a denim (not pictured) that I got from the car boot sale and some leather that was once a couple of Marks and Spencers cushions (lucky charity shop find). The cushions also yielded two lovely brass zippers and I had a navy zipper that I didn't use on another project. The cotton webbing was from an ebay seller- I tend to choose webbing rather than making my own straps; saves time and I prefer the finish. I Instagram the process (verykerryberry) as I go as it is such a great way of photographing the process and having a little company.

Sara was kind enough to send me some
'Soft and Stable' to try out and it is great stuff. Foam construction with a fine knitted layer on both sides and very to cut and sew through. I can see why she recommended it as it gives instant structure but its buly is quite manageable and it is sew in so no worrries about wrinkles. I skipped the lightweight (
Shape Flex/Vilene G700) interfacing for the lining and body of the bag as my fabrics were thicker than quilting cotton.
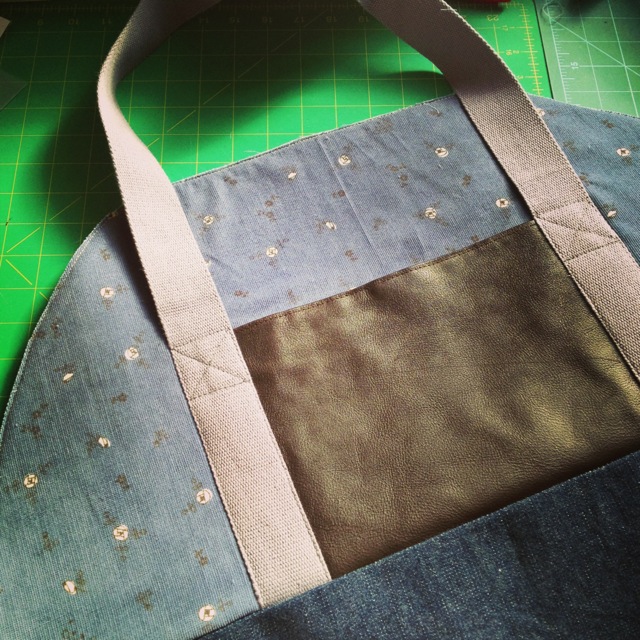
I was planning to have a leather base to the bag but I didn't have enough so I went for a front pocket instead and that was probably a good thing as leather is tricky to sew and I didn't want to invest in a specialist needle as I don't plan much leather sewing! I used Superior 100 titanium needle (
Justine stocks these in UK) on everything so far which with a Horizon
AccuFeed Dual foot did power through.
Clover Wonder Clips are the best invention ever.
Eternal Maker have just started
stocking them. They are great for for bags . Useful for binding too- I used them for my
glue binding tutorial- but outstanding for holding all those layers when making a bag and leather cannot be pinned. You can also see
washi tape holding the straps onto the pocket ready for top stitching down- washi tape is aonther sewing room essential-for those that don't know, it is decorative paper tape like masking tape and peels off easily, great stuff!
You can see how the clips hold the multiple layers in place. I used a dab of
Copydex on the heavy interfacing to keep that lightly attached to the denim layer before top stitching on the seam at the front held it in place.
The front so far,(and the other finished without pocket).
This has been my friend: the pressure dial on
my machine. It adjust the pressure from the presser foot. The default is 7 but for thicker layers I reduce this to 5 and 4 for the thickest and it works brilliantly. I also do this when hemming knits with a twin needle and it stops them stretching out of shape.

One inside pocket made, the other to follow. So far an excellent pattern. The insructions are clear and well paced. I am not surprised! Sara really does know what she is talking about when it comes to interfacing and structure of bags! Another Aeroplane bag maker
(Elizabeth (
Don't Call Me Betsy) described this as like making a zippered pouch and it is exactly that but as it is on a much bigger scale it is a lot less fiddly! There aren't many pattern pieces as some pieces are rotary cut and the lining is cut using the front and back sections that you have sewn as templates for a perfect fit. Now to sew pocket two, darts and the external zipper (that is the bit I am slightly apprehensive about)! My K charm was from
Ayumi but there are lots of brass charms available on
Etsy and
ebay.
Giveaway time!
Wanna make
one of your own? Or maybe another of
Sara's bags? Leave a comment and I will pick 3 random lucky winners. You have until my next bag post to get your entries in. If there is no email in your contact details you will not be able to win so check before you comment or leave a recognisable address in the comment kerrykit (at) yahoo (dot) com- you know the sort of thing.
Each winner will receive 3 PDF bag patterns of their choice-
go look, drool at what you can pick and marvel how Sara can design in 3D!