Friday, 9 December 2011

WInner for Nova's pattern

And the winner for Nova's Petal Pocket cushion pattern is...
Hadley!  Sending you an email right now.
Thankyou to all those who entered, Nova's pattern is available here.
sib blog

Wednesday, 7 December 2011

Catch up

A few quick things to do!  Will from Abakhans asked me to do a little post for their website nes sections so I chose a quick round up of tutorials and makes suitable for Christmas and gift giving- take a look here, you may see a few contributors you recognise.  Maybe you fancy a bit of paper piecing with your gifts?  Candy Cane pattern on sale here
Candy Cane Love Paper Pieced Pattern
Winter woolies pattern on sale here- this is the easiest of the two!
Winter Woolies PDF Pattern
A thankyou to Nova who sent me the most lovely pinnie for testing her pattern.  She really didn't need to but I am very glad she did.  All the textural detail makes it very Nova and very nice.  You can still win her pattern, click here and enter before Friday 9th Dec

And a thankyou to Tanya who blogs at  Craft Couture.  She makes some very cute things over there and nominated me for a Versatile blogger award.  So my way of passing this on is to take you to some websites you may not have seen x
sib blog

Monday, 5 December 2011

Petal Pillow with a Pocket Pattern Giveaway

Thankyou for the well wishes, it is working, nearly better.  Meanwhile a giveaway...  Nova asked me to pattern test her first commercial pattern and knowing her style I said yes straightaway!  A great concept, Dresden style pillow/cushion with a pocket.
My version is for my granny.  I am on pretty safe territory when I say she won't be online so I can show her Christmas present without a spoiler alert.  A back view, shame I got the Alexander Henry Orchard print apples were upside down but the zip was well and truly in by the time I realised.  The pattern gives instructions for an easier envelope back.
All the fabrics are chosen with her in mind.  She loves gardening and flowers and birds and still tends her garden.  Lecien Grandmother's flower garden print with the green background and the pink version for the pocket.  The petals are a mix from my stash, new and vintage.  The Annie's seed catalogue print was especially good, Green is our family name, so that petal couldn't be more appropriate.
This is my Leila style pose- Hi Leila!
I added some hand stitches to random petals and echo quilted around the edge of the petals.  It is such a pretty result, I would be very happy with this myself but I know that Mabel will really enjoy this.  I doubt the is going to be putting quilting booklets in the pockets- I was thinking Mills and Boon, tissues and a pop sock.   It is a lovely pattern with clear instructions, plenty of tips, photos and lots of detail for making two versions- pointy petals and round petals.   I made my pillow a little smaller than the 20 inches suggested as I had a 18 inch pillow ready and it all worked beautifully.  There is room for playing around a little- I made my pocket a bit smaller too so I could show off more of the petals.  Nova is selling the pattern here but, one lucky reader here gets to win a freebie.
To enter the giveaway, please tell me what would you put in the pocket, 
Extra entry if you follow me
Extra entry if you follow Nova
I need your email either in your profile or in your entry- this style is good 
kerrykit at yahoo dot co dot uk
 or check if you are a no reply blogger with no visible email here
I won't be replying to these as technically it is a competition and I guess I shouldn't.  I will draw a winner Friday morning so entries in by 6am GMT Friday 9th Dec, random number  choses the winner.
Good luck x
Edited to add- a winner has been drawn, comments are now closed
sib blog

Sunday, 4 December 2011

To build a house you need good tools

This little house block is from the Kumiko Fujita Bonjour quilt- you can see her videos for it here.  The images come from a Japanese magazine, Patchwork Tsushin (sorry not easily available though I have seen copies on ebay) but you can get the idea from the youtube clip.
I wanted to try the hand piecing that Kumiko shows in one of the blocks.  I bought a few tools to test- a clover finger presser and clover black gold needles.  Do you notice the big reel of Aurifil?  Sometimes you need to splash out on the apparently humdrum- good thread is worth the spend- ask any sewing engineer and Alice at  Eternal Maker is stocking a huge range of colours in the mako 50wt.  I bought 2310 neutral cream and 2615 grey- each have 1300 metres on so they will keep me going.  I might have talked my local machine and sewing shop into stocking it.  As they service and mend machines they are interested in its non lint making properties.  Mr Aurifil has sent them some testers, I hope they buy it in.
Do those things make a difference- boy yes!  The needles are very fine and sharp, they are going to make the next binding I finish a lot easier.  The finger presser is fantastic, there are many times when I piece when a little marker of where the seam is would just help and this gives the perfect line without burning my fingers handling a tiny piece of fabric and an iron.  It also means you can hand piece without an iron so piecing work could be portable, nice to know for the future.  The reverse shows the inset seam where the background joins the roof, all hand sewn.  I am not up to Kumiko's standard but it was an interesting exercise.
It does take ages though so I machined the rest of the house
This is a slow burn project which I return to once a month or so and it is always a pleasure.  I have a loose red, white and blue theme going on but otherwise I just go where the fabric mood takes me.
It has been a messy weekend- we have no cooker due to problems connecting a new one (my new kitchen is nearly all done), so toast based meals and a camping gas ring have featured heavily this weekend.  I have a heavy cold, being self employed I am grateful for this coming at the weekend but it does make me feel crappy and Damian is going under too so we have been taking it in turns to go back to bed.  Better now then in the Christmas holiday but achey heads, bodies and sore noses are never good.  Cooker comes Tuesday so I hope to show you my revitalised kitchen- you know how I love kitchens.  Back tommorow witha little giveaway courtesy of Nova
sib blog

Thursday, 1 December 2011

Ginger

My wardrobe is looking a little sad, things that don't fit, I don't like or just tend to hide me when I wear them so I have been making skirts.  The Cynthia Rowley skirt is great to wear- it's all about the pockets and the fullness.  Next I fancied a Colette pattern. 
I have been intrigued by Colette.  I love the details and the styling.  The new book has been requested for Christmas.  The patterns are more expensive than a Simplcity or McCalls- although they aren't cheap in the UK.  But you do get a bit more for your buck.  The pattern instructions are in booklet form with stitches down the spine- nice touch- and the pattern pieces at the back.
The pages are thick with very clear diagrams and online links for tricky bits- very good invisible zip tutorial here.   The pages are a pleasure to touch- unlike the usual oversized folded crappy instruction leaflet.   The pattern pieces are still on the tissue stuff that everyone hates but I traced them onto thicker paper so I can reuse them.  Ultimately this pattern excels on fit.
It looks like a simple A line but there are a few shaping details that made it hug all round.  The back and front seams are not straight, they tilt inwards at all the right places to give a snug, smooth fit.
I used some light stretch denim, cheapo stuff from local fabric shop and a bit of Liberty bias binding for the flat waist binding trim- instructions for adding this are on the Colette site.
I adapted the waist band shaping to a smoother curve than the pattern.  I like the way it looks but when I am sitting I realise my trunk is not that long and it cuts into my diaphragm- next time a shorter waistband.  I lengthened the skirt considerably too- I am very cautious on length.  Looking at that pic, it would look better shorter and perhaps if I'd spent a bit more time ironing it too.   You can't see the hem- blind hem on my new machine, worked like a dream.  That is the first time I have had a machine where the blind hem was successful!
I won't pretend the sipper was plain sailing.  I put it perfectly first time on one side and then the wrong way round on the other side.  It needed another go and then there is a tendency to stick around the facing and binding area.   A bit of gentle stretching (read pulling and close to tears)  some silicon on the zipper and some hand stitching to get the facing out of the way on the inside- now it works.  It is a beautiful pattern for a beginner.  I made a test waist band before I embarked on the whole thing to check the sizing.  I always get in a state about sizing... even after making my test band I can't trust myself or the tape measure, first too big, then too small.  This is a fit with no room for cake, even with 
the stretch.
I would've liked pockets but this fabric isn't up to it.  It is probably a work skirt rather than an everyday sling it on and let the dog and kitties sleep on me,  but a very pleasurable project non the less.  
And now I return to Christmas sewing...
sib blog

Saturday, 26 November 2011

A Walk in the Woods- Mini Tote Tutorial

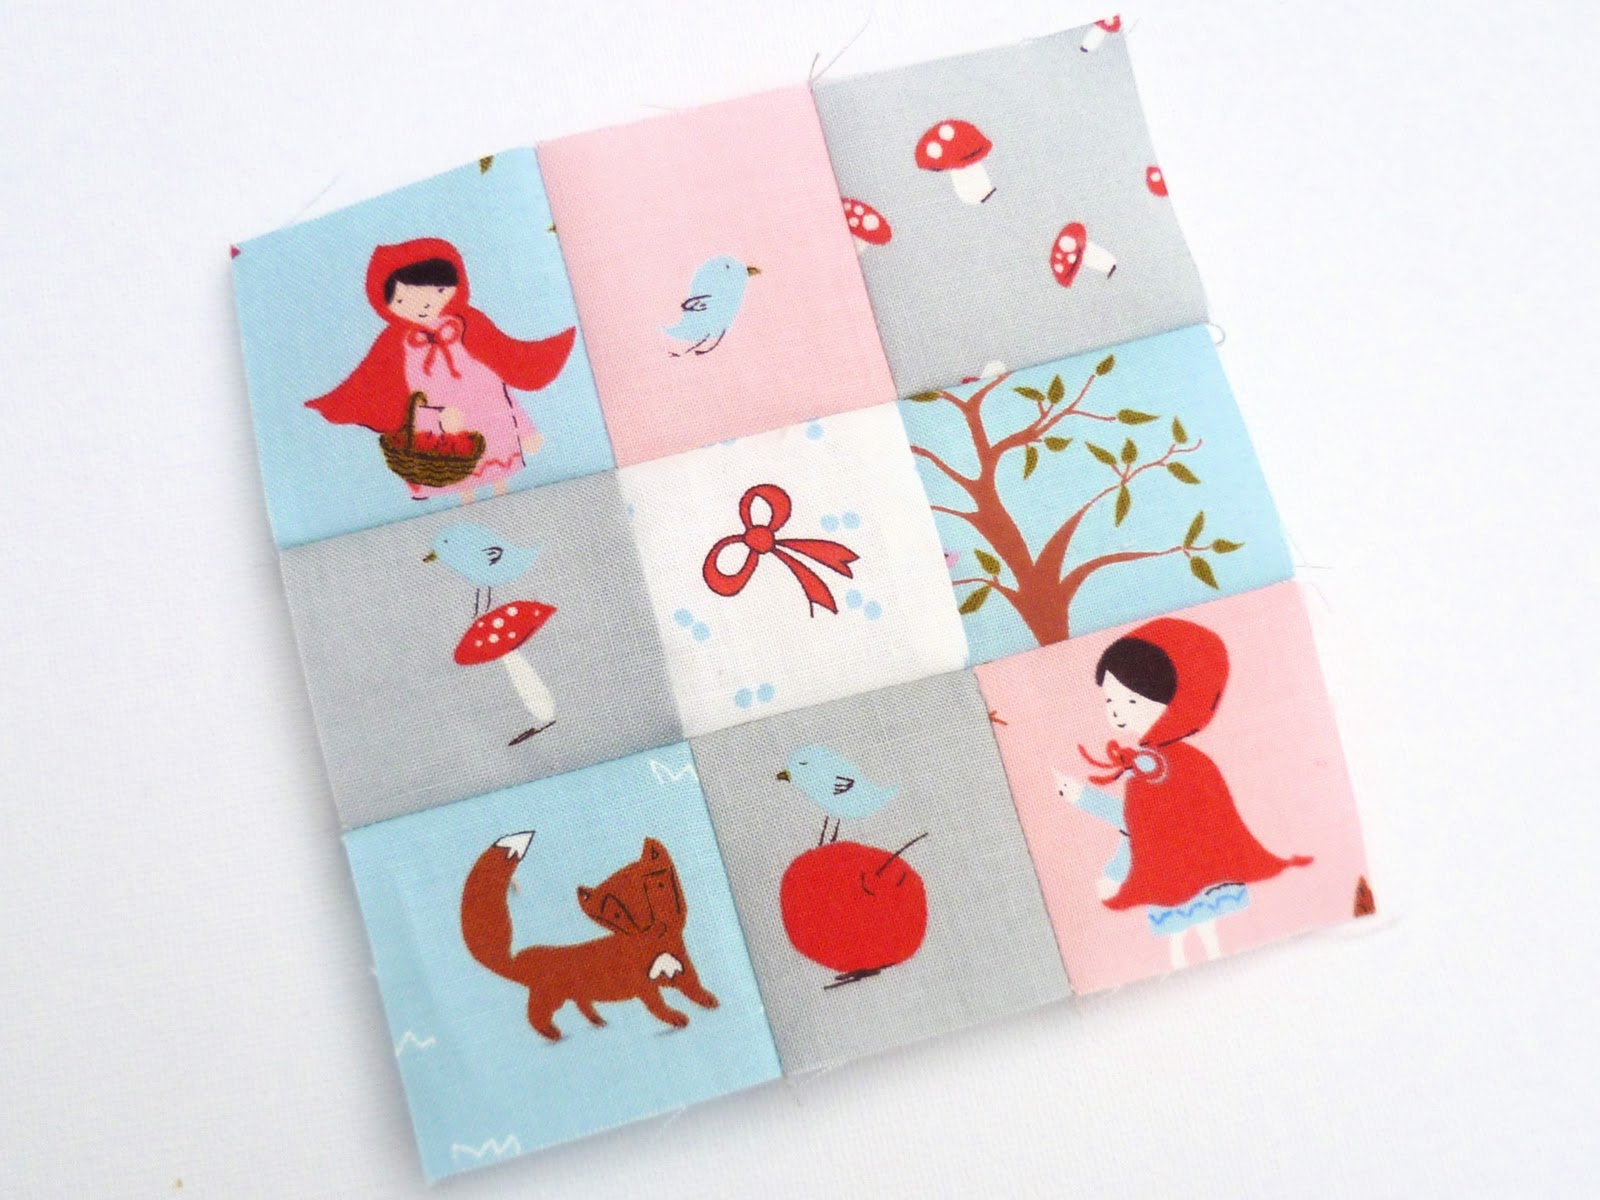
Aneela, Moda fabric designer extraordinaire kindly sent me and some other UK bloggers generously filled parcels full of scraps from her forth coming line A Walk in the Woods, released Spring 2012, what a treat!  I knew the first thing I was going to make, and here it is.
This is an easy adaptation of my mini tote tutorial.  I made this one for my niece's Christmas present, you know how young children love bags for carrying their treasures and the fabric is perfect for fussy cuts. A multi-functional gift ready for a game of eye spy as well as filling with goodies.   This bag is 7" square finished size not including the handles.  Wanna make one? read on.
You will need:
For the front and back- Fussycut eighteen 2" Squares 
Sashing strips for the front blocks- Cut two strips 1 3/4" x 5" and two strips 1 3/4"x 7 ½  from a light solid e.g. Essex linen
For the Straps- Cut two strip 3"x 8" from co-ordinating fabric
Lining-Cut two 7 1/2" squares from co-ordinating fabric
Fusible Fleece- Cut two 7 1/2"squares  e.g. Vilene 630 fleece interlining (supplied by Julia at Gone to Earth).  You could also use cotton batting or interfacing.
Letter stamps and Versa craft ink pad
Embroidery thread for the running stitch detail- I used Sashiko thread
Sewing supplies

Seams are 1/4" throughout.


Step 1: Making the Front and Back
Stitch your squares together in rows of 3. On the top and bottom row press the seams to the left and on  the centre row press seams to the right.


Join your  3 rows of squares matching up the points at the seams.

I stamp my sashing before I stitch it on.  I use Hero Arts Clear design rubber stamps and Versacraft ink.  This is heat set with an iron. Let the stamps dry for a few minutes, cover with a bit of scrap cotton and press for 15 seconds with a medium hot iron.  Remove the scrap cotton and repeat two more times and press on the reverse as well.  Then, add your sashing.


The rest of the bag follows the tutorial here from Step 2.   The only addition you will need to make is to add the running stitch detail.  I add this at the beginning of step 3, after I have added the fusible fleece but before I add the handles.  


Hadley did a lovely version of Ayumi's wristlet pattern with the same fabric and more fussy cut squares see here


 Thankyou Aneela, I think everyone was thrilled with their fabric parcel x

sib blog