
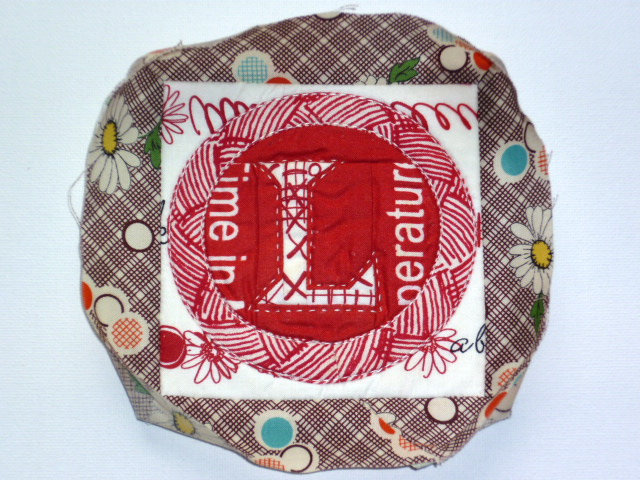
Quilting those smaller items- mini quilts, mug rugs, coasters, placemats etc is tricky. Double bindings are too chunky and sewing them on by machine l doesn't seem to work out the same on these little things. A good binding lifts your creation and a bad binding can detract from all your hard work. I am sharing all my best tips in a picture-packed tutorial The pics show a coaster but I call it a mini quilt throughout for ease.
1. Trim your item with a rotary cutter and rule, then zigzag round the edge. Don't zig zag into the corners as they tend to distort- I pivot around them. This stage is optional but it does keep the edges nice and neat.

2. Cut your binding a scant 1 1/4" wide using a rotary cutter and rule. Cut across the grain; selvedge to selvedge. Unsure what scant looks like? That's my scant 1 1/4" inch version below. This is going to create a narrow close-fitting binding. If this is your first time with this technique, you can cut your binding 1 1/4" wide for a big of wiggle room and not worry about the scant option.
If you want to use bias binding (cut on the bias diagonal of the fabric rather than across the grain) for round mats or rounded corners, cut a little wider, 1 1/2"

3. At one end of your binding, turn over the corner to make a right angle triangle and press.

4. I normally start binding at the mid-bottom edge of the project. Remember the join between the start and end of your binding will be here. I don't use pins when machining small items, but if you would rather go ahead!

5. You have to allow for joining your binding so on a really small piece like a coaster although the binding lies halfway across the bottom, I am only going to sew the last inch towards the corner, the first bit of binding will therefore not be attached yet, just lying ready. Use a 1/4 inch seam allowance- I use my 1/4 foot to guarantee it, accuracy on this makes a big difference. Secure at the beginning and end an stop and secure 1/4 inch before the end of the mini quilt corner.

6. You will need to mitre the corners. Not sure how? See my mitred corner's tutorial here! I attach the binding all the way round until I am within 3-6 inches of the where the binding began depending on the size of the object. Secure your last bit of stitching at this point.

7. Line the edges of binding up diagonally, you will need to turn the end of the binding away from the mini quilt. You need to make sure that the unattached binding is not too slack here or it will be too loose when you come to machine sew it. Press the diagonal folds.

8. Take a small needle and co-ordinating thread with a knot at the bottom and push between the diagonal folds- see how the needle is going through at a 45 degree angle?

9. I folded back the left hand binding fabric here so you could see how the needle tip angled through.

10. Push the needle back through angling the opposite way and keep this going until you have line of little hand stitches joining the binding. You can always put in the odd back stitch for security. I have found hand stitching more accurate for joining binding especially when there is so little room to join the two edges by machine.

Just showing you the other side of the join here.

11. Trim the edges to 1/4 inch and press open. Now you can machine stitch across the last bit of unattached binding

One side of binding is attached.

12. With your fingers, open the binding outwards so you can see its right side and give it a good press with your iron.
Get right into the corners with the tip of the iron. A little iron helps, I use a travel iron.

This is how it looks on the underneath side.

13. Turn your mini quilt so the underside is facing you and along the edges (avoid the corners) turn the binding in so that the edge of the binding meets the edge of the mini quilt. Take your time here. Doing this bit really well will given you an even, narrow, close fitting binding.

14. This is how it will look. The corners are too fiddly to do with the iron, we'll do these with pins in the next step.

15. Take the pressed folded edge of binding and line it up ever so lightly above the stitching line, pin to secure.

You can fold and overlap to get your corners nice and sharp.

It ends up looking like this.

16. With a little needle and a thread with a quilters knot in the end, secure your thread into the mini quilt seam allowance to hide the end and we are going to hand sew the back of the binding with ladder stitch. If this is new to you there are lots of diagrams and you tube videos but it is pretty easy and the stitching is almost invisible. I take a stitch just above the machine stitching line where the binding was first attached...

and then a stitch through the pressed fold of the binding, pull gently and repeat- that is ladder stitch! Stitch all around the binding.

Your mini quilt/mug rug/coaster/placemat binding is complete!

This method is not super speedy but it gives me good results, I hope it works for you.

Any queries or problems with it- email me and let me know!