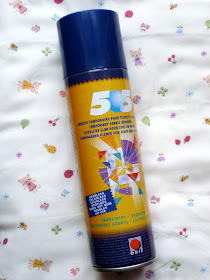
Now to make your quilt sandwich. If you want to add a quilt label to the back before this, go ahead! I always use basting spray, 505. I lay the backing fabric (in the background of pic below) out on a Durabac board which is a big foldable fabric cutting board made of cardboard, good for fixing fabric on with pins. You could use a table of a clean floor or carpet. I put some pins round the edges to make it taut. I always spray the batting, not the fabric and I do this outside on a washing line as the glue smells and gets everywhere inside. I lay the batting on to the backing fabric first.
Then repeat the spraying process with the partial sandwich hanging on the washing line, spraying the batting side and then laying it backing side down on the durabac, the tacky basting surface is on the top. I then pin out the edges and lay the quilt front on top. As 505 is temporary you can do as many readjustments as you need and I stuck some safety pins in as well to be extra safe.
My quilting was simple, just a quarter inch echo around the star and stitch around the edge of the central squares. I don't want it to be too dense so I kept it simple. For the quilting thread- I am using Gutermann Sulky col.1071 which matches Kona snow perfectly. I did try a contrast thread but I didn't like the look of it (you can see below), I'll use this in the binding instead.
The lighter colour is less dominant.
I used my walking foot and you can see how I lined up the foot with the star points to keep a regular quarter inch.
When I quilt I always position my needle start a quarter inch ahead of where I want to start, set the stitch length on the smallest setting, 1mm, and make sure the top thread tail is going right and the bobbin thread tail is going left- stops lumpy knots underneath. I backstitch to the point where I really want to start, change the stitch length to 3.5mm and stitch away. These longer stitches make for great quilting and cover up the tiny securing stitches at the beginning.
Before you stitch all the way round and back to the beginning, trim off the thread tails. This is how it should now look, securing stitched are hidden, all nice and neat.
This is how it looks on the back.
At the end of the stitching I reverse about quarter inch again changing the stitch length from 3.5mm to 1mm.
And this is how it looks on the back.
For general help on making a quilt sandwich without basting spray see: Oh Fransson!
Quilt your Circle of Wonky Stars baby quilt any way you want and I'll see you back for the binding!


Oh, this is really helpful, thank you very much. I've just gathered the materials and am about to embark on my first quilt, so perfect timing too! Laura x
ReplyDeleteThank you! My back-stitching always looks so sloppy, I love the way you do it with the shorter stitch length. :)
ReplyDelete