Thursday, 12 November 2015

Plush Jersey/Double Gauze Möbius Scarf Tutorial: Eternal Maker Kit

Anna at Eternal Maker had some wonderful Nani Iro plush jersey in teal and grey that has a soft and luxurious texture not unlike devore velvet and whipped up a quick Möbius style scarf.   So Anna put together a kit and I said I would write a quick tutorial.
 

As I was putting everything together, I found this great method for joining the ends by machine so I've incorporated that into a tutorial for a double sided scarf using two fabrics and credit to Maxiemakes where I saw the technique with Courtney Smith's video.

You will need:
Double Gauze (110cm wide) 30cm length -  cut in half along the width to make two pieces 15cm x 110cm.
Nani Iro Plush Jersey (65cm Width) 30cm length  - cut in half along the width to make two pieces 15cm x 65cm.
(These fabrics are available as a kit from Eternal Maker in two colour ways- teal/navy or grey/plum)
1 x Ballpoint sewing machine needle size 70
Gutermman sew all Polyester Thread-
Two different colour removable fabric markers e.g. chalk pencils.  The two colours will be known as A and B in the tutorial.

Finished scarf size: 13cm/5" wide x 136cm/53.5" long in a continuous loop.

1.  Join the two plush jersey fabric strips together at the short ends to make one long strip.  Use  the selvedges to make the seam allowance.  Seam allowance should be around 1cm/3/8"  wide depending on selvedge width. Press seam open.


2.  Join the two double gauze strip together at the short ends to make one long strip. Use the selvedges to make the seam allowance.  Seam allowance should be around 1.5cm/⅝" wide depending on selvedge width.  Press seam open.

3. Place the two strips right sides together aligning the short edges at one end:  the double gauze strip will be a lot longer than the jersey.  Pin together along the long edges.  Trim off the double gauze strip so it is the same length as the jersey strip.  Save the left over double gauze for another project!

4. On the top edge of the strips, sew a seam along the top long edges securing with back stitches at the start and end of the seam and using a ⅜"/1cm seam allowance.  At the lower edge, sew two seams with a 13cm/5" gap between them  following the diagram below for the precise seam placement.


TIP: Use a walking foot and a long stitch (3mm) to sew the fabrics together.  The plush jersey is quite thick and springy to sew compared to the double gauze and both the walking foot and longer stitch length make the sewing  process easier!  Optional: Trim the edges of the double gauze edges with pinking shears as they fray easily.

 5.  Make a mark in removable fabric marker (A) in the seam allowance at each end of the top edge.     Make a mark in a different colour removable fabric marker (B) in the seam allowance at each end of the lower edge. This makes an open-ended tube with a gap at either end plus a 13cm/5" gap on one long side which will be used for the turning through.   I used yellow chalk at each end of the long top seam and white chalk on the bottom seam.


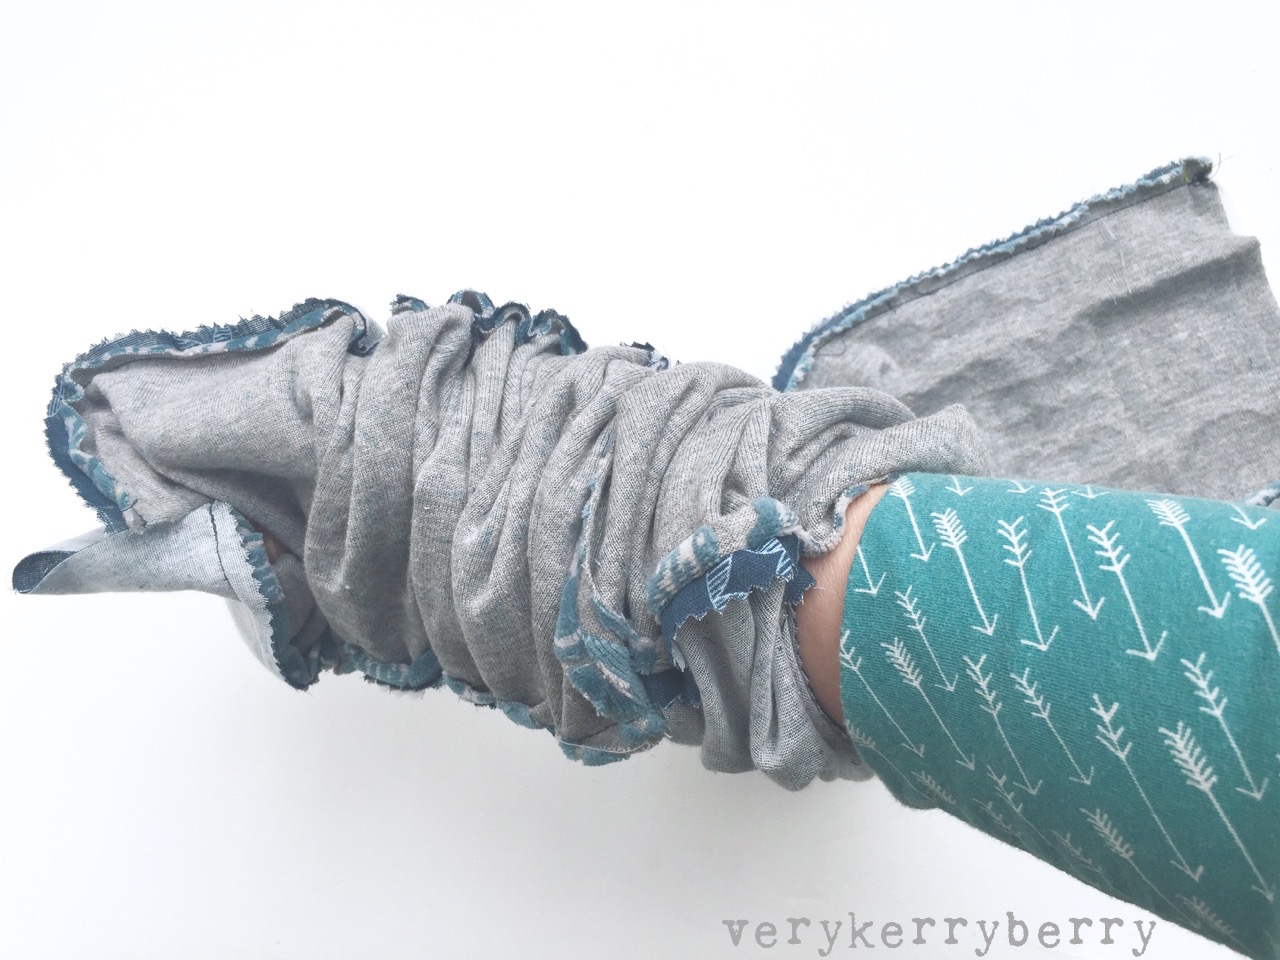
6.  Reach inside the  13cm/5" gap and pass your hand all the way down to the furthest end of the scarf.  Grab the end and pull it into the tube  and out of the 13cm/5" gap - it will be right side out as it comes out .  


There will still be a shorter part of the scarf that is wrong side out.


7.  On the end which is right side out,  holding the mark made with fabric marker A and feed the end of the scarf back though the 13cm/5" gap and towards the short side so that it meets the mark made with fabric marker B on the other end of the scarf.  Pin together, making sure the seams are open  Repeat with the remaining marks.  You should now have a wrong side out tube with the short edges pinned together.  Sew the edges together using a 1cm/⅜" seam allowance.  If you have a free arm sewing machine you can carefully fit the pinned tube over the free arm.  If don't have a free arm machine, sew on the inside of the tube, carefully working your way around it.


8.  Reach inside the 13cm/5" gap and pull out the short joined section of the scarf so it is now all right side out.   You should have a loop with a single twist.  Join the gap using slip stitch or ladder stitch.  You can now wear your scarf!


VARIATION: Loop Scarf
As an alternative, for a loop scarf with no twist join the short edges together in the same way but matching the same colour marks at the seams.

You can find other kits at Eternal Maker here.  The Whatever the Weather Doll Play Quilt Bundle particularly caught my eye, as did the Cotton+Steel needle roll- great gift for knitters!

sib blog

Wednesday, 11 November 2015

November at Village Haberdashery: Gift Ideas

We're almost at gift buying time so I've got that in mind for my visits to my sponsor shops this month.  Starting off with Village Haberdashery, there are always gift vouchers but for something to give or unwrap on the day, let's start with some big purchase items:

Carolyn Friedlander's 'The Collection' quilt kit.   This is a biggie, all the fabric and nine-part instructions to make the quilt.  It orginated as a block-of-the-month quilt on Carolyn's blog.  See here for a breakdown of the exact fabrics from Annie.  This item needs to be ordered in specially and takes four weeks to arrive so if you want it for Christmas, now would be the time to act!


For needlepoint fans, Annie stocks an extensive range of kits by Emily Peacock along with a selection of other designers.  This is Modern Mid-Century Flowers and includes printed canvas, a chart to show you which colour to use where and Anchor Tapisserie wools.


There's a very cute children's range called Buttonbag of   Miniature Designs are printed on 9-count cotton Aida (10cm panel) an all threads included.   This is the Penguin! Find other's here.


There are more advanced children's kits from Stitching Shed, a Ballerina and a Robot. 

It's hard to beat a big bundle of fabric as a great present, to give as well as receive.   Starting small with a charm pack like Tik Tok by Jen Ski for Moda:


Or build your own bundle of Loomnious, which even in a collage style photo like this you can see would make a lovely simple folksy quilt of squares and rectangles, I am definitely tempted!  It would also make a good man quilt:


I like receiving a pattern and fabric combo.  A good knit version of this would be the Coco which needs a knit fabric without too much stretch and 1.5-2m depending on size of beautiful Alison Glass jersey fabric to make the short Breton top version- I would choose a heavier fabric for the dress option.  


This knit is 100% cotton so beginner friendly  as they don't stretch much and perfect for this pattern too.   It's also extra wide so you made need slightly less than a pattern states for 150cm wide fabric.  Look for looser rather than highly fitted patterns. 

On the left if coral, on the right is Indigo.  Coco is a great pattern to use a little contrast so a fat quarter would be perfect to add an accent pocket.  Find the other Alison Glass Knit colourways here.

Another good duo gift set would be the Grainline Linden pattern, which is an easy-to-sew, raglan sleeve sweatshirt pattern and some luxurious Liberty sweatshirt fleece (I made one here using 1.5m and there are some tips on fleece and this pattern). 


Look out for more shop gift style posts this month with gift ideas and a tutorial coming up to make a quick Möbius scarf!  

sib blog

Tuesday, 10 November 2015

Liberty in Fashion Part Three: The Art of Pattern

Part three from the Liberty in Fashion exhibition at the Fashion and Textile Museum on Bermondsey Street.  For part one see here.  For part two see here.   The Art of Pattern is an accompanying exhibition  to the main Liberty in Fashion display and is in it's own space.  It features the work of Susan Collier and Sarah Campbell.  Susan became design consultant after Bernard Neville,  and her sister Sarah Campbell who assisted Susan and went on to Chelsea College of art.


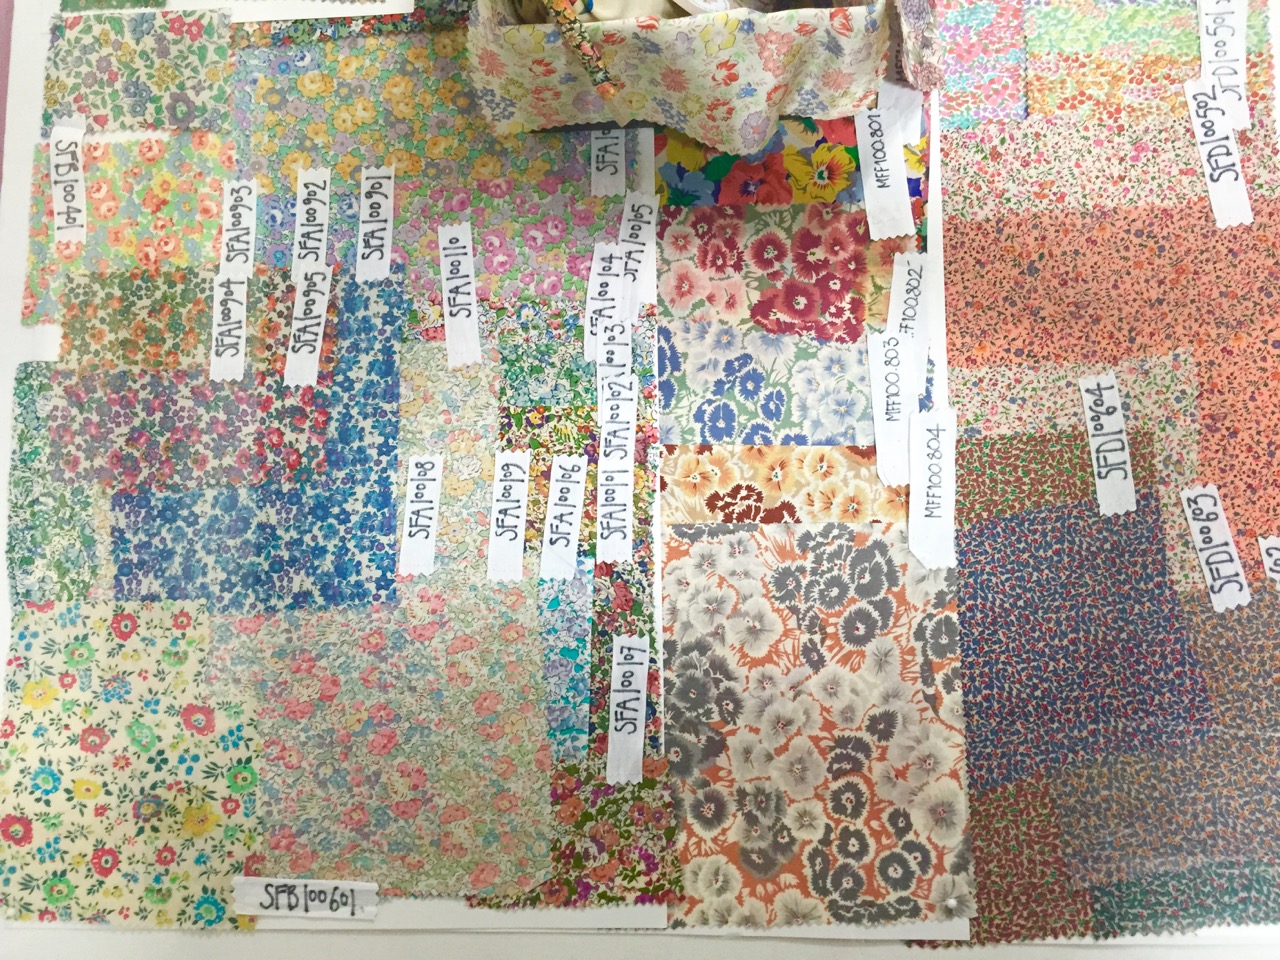
I didn't take as many notes in this room, I think I was so taken with all the colour around me I just looked and looked and looked!  Lots of the mood boards feature original designs painted on to paper in what looks like gouache paints.  Next to these mix fabric swatches and magazine clips from the time.


You may recognise the Modflowers dolls in the sea of Tana lawn prints.


Working sketch books are always a huge pleasure to peer in to. 


Lots of these massive collage mood boards showed Liberty in collaboration.  The board below was a set of fabrics developed from a Liberty print and customised for Yves Saint Laurent as part of a Rive Gauche collection. 


I left totally inspired to use more colour in my sewing and my wardrobe.  You can find out more about the exhibitions here.

sib blog

Monday, 9 November 2015

Farmer's Wife QAL Blocks 17 and 18: Bride and Carol

It's week 9 in the  Farmer's Wife 1930s Quilt Along.    Newcomers are invited to join in at any time - you can find all the QAL info here.   My block is Bride which is a version of the Nosegay or Bridal Bouquet traditional block (p.176, letter p114.).


Fabric credits:
Plus other ditsy unknown 1930s florals from my stash.

Bride is a fiddly block with lots of little pieces and sections to join a straightforward block, it's only the size of the pieces that gets fiddly.  As usual, I precut all my pieces before foundation piecing each section. For the half square triangles  I rotary cut as below.  This will give you triangles with ⅜" seam allowance so if you need a bit more wriggle room consider going bigger! 

Rotary Cutting for Foundation Paper Piecing
A4/B4: from background, cut (1) 2 ½" square, sub-cut  once diagonally to make 2 half square triangles 
B2/C2: from a ditsy print, cut (1) 2" square, sub-cut  once diagonally to make 2 half square triangles.  Repeat for J2/G2, F2/E2, H2/I2, D2/A2, I used a different fabric for each

For the remaining shapes, I used freezer paper templates.  I was kindly sent some ready-to-print Quilter's Freezer paper by Search Press.  This is ready-cut 8 ½" x 11" paper that you can run through a inkjet printer or, with a little preparation, also through a laser printer.  The block diagrams on the Farmer's Wife 1930s book CD are perfect for making quick templates.  Make sure your settings are on 100% or to scale.  The block should print at 6" square. On a laser printer (which I have), you need a piece of standard paper behind the waxy side of the freezer paper.  Then, seal the two together along the top short edge by using a hot iron to press the top inch of the freezer paper to the standard paper.  I then feed it through the manual slot on my printer as if it was a single sheet with the dull freezer side on top. Finally I write on the numbers and letters from the paper piecing pattern.  It is quite a pricey option but it's a great time saver product, handy if I am in a rush and don't want to trace carefully and a pack of 70 sheets is going to last me ages!   I freezer paper is very handy for templates for felt too- more on that soon. 


Once I had the templates, I worked my way through each square of the block.  Using solids with no right or wrong side makes cutting easier.  I tend to cut one shape using the template and adding a large ⅜" or ½" seam allowance, I then place that on the fabric and use that to cut multiples of the same shape.


Adding the diamonds is tricky.  I cut mine  with ⅜" seams using a template but larger seams would've been better/  You definitely need to pin and flip before you sew a seam to make sure your diamond covers the paper adequately.  This sort of placement worked for me:


Top tips for this block
  • Make a templates by tracing the block diagram onto freezer paper.
  • Only cut out the templates just before you are about to use them to avoid lots of small bits of paper getting lost or confusing things!
  • Use a water based glue stick- I use Sewline- to stick the first piece of each section and to hold seams in place when joining sections
  • Diamonds are tricky to join in accurately- make sure you pin before you sew to fabric/paper foundation and double check that when opened out the diamond covers the area with at least ¼" over the seam lines all round
  • When joining the sections I like to remove the paper on one of the pair of seams being joined and draw on the seam allowance (see below).  This gave me accuracy and stability with less bulk.
  • There are a lot of sections to join, keep your seams scant and accurate otherwise your block will start to shrink!

The traditional Nosegay block which this is based on has lots of inset seams so although this block is a little fiddly, there are no inset/Y seams and once you get sewing it should be plain sailing.  It is a great block for hand sewing, especially English Paper Piecing if that is your preference.  


Block 18 is Carol (p.177, letter p.79),   Tiffany of East Dakota Quilter is guest posting on this block, she's a talented and prolific quilter, hop over to her blog to read more .   She has used creative fussy cutting and done something very clever involving Spoonflower and Heather Ross's Prints book.   Here's my version:


Fabric credits:
Kona Candy pink
Moda Daysail Hatch in Green
DS Quilts Picnic and Fairgrounds range for Joann
  • Use the hashtags  Don't forget to use #fw1930sqal on Instagram and the Flickr group if you like to share there.  
  • For individual blocks, you can use #brideblock and #carolblock on Instagram. are using these hash tags, #fw17bride,  #fw18carol, I'm using both hashtag systems.
  • You can also copy and paste links to any blog posts you do on these blocks in the comments and I'd love to visit and take a look. 
  • I have a busy work day tomorrow so my usual periscope.tv/@verykb short broadcast might not happen but I am hoping it will and it will be around 2.30pm GMT today and will be available for 24 hours to replay before it disappears!   These broadcasts are conversational and are all about this week's blocks!  The link will be in my twitter feed @verykb and I'll post on Instagram and twitter about 15 minutes before it goes out.  
Please note:  I have linked to my sponsors on items bought through them and elsewhere for anything that has come from other shops.

You can join the quilt-along at any time, all the posts are here for you to catch up with.  Back next Monday with Jo Avery and blocks 19 and 20.   

sib blog

Sunday, 8 November 2015

Liberty in Fashion Part Two: 1970s-80s

Time for my second post, from the Liberty in Fashion exhibition at the Fashion and Textile Museum on Bermondsey Street.  For part one see here.   The dresses and separates below are 1960s, swinging London, amazing large prints and vivid colours.


The 1970s are my favourite style decade and there were Liberty garments from throughout the decade.  Starting at the beginning, the A-line skirt in front and matching scarf are different substrates of the Bauhaus design by Susan Collier and Sarah Campbell.  The influence for this print was a tapestry by Gunta Stolz for the Bauhaus in the late 1920s.  The skirt is heavy furnishing fabric weight and was for the Dollyrocker's boutique brand.  The scarf is silk.  The skirt seen to the bottom right is another Dollyrockers A-line, this time using Cunard print by Bernard Nevill who joined Liberty as Design Consultant  in 1962.  This, as with almost all the clothing was on loan form Liberty collectors Cleo and Mark Butterfield who have the most amazing collection of vintage clothing!
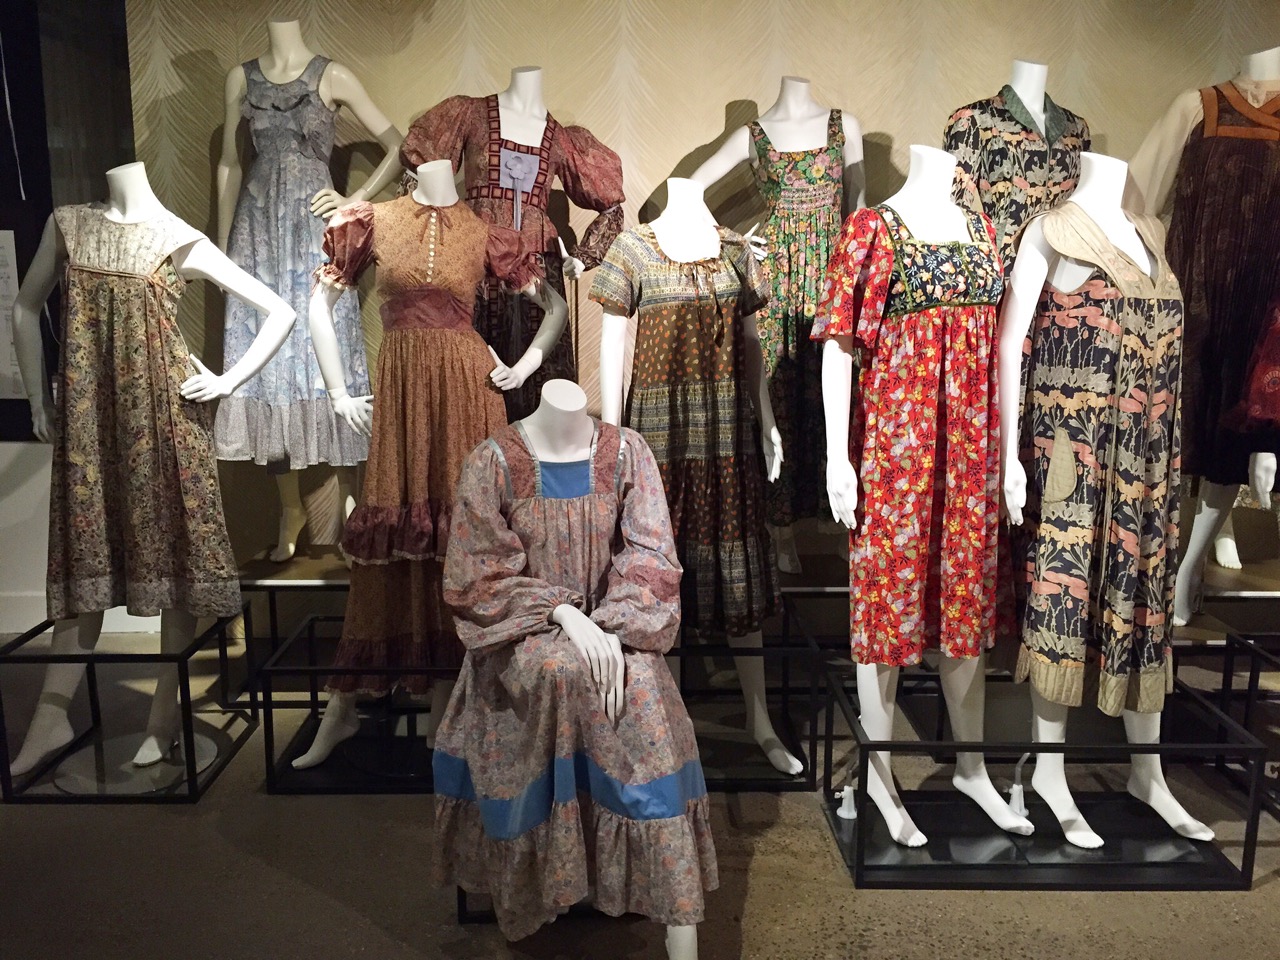

This dress is by AnnaBelinda, another boutique brand and fashion label but this time based in Oxford.  I had a little online chat with Jan of Isisjem who knows the area well and can remember the shop.   Belinda O'Hanlon is the founder  and she is giving a talk at the Fashion and Textile Museum as part of this exhibition on Wednesday 25th November, entry is free along with an exhibition ticket but needs to be booked.   Her designs have a Pre-Raphaelite, fairy-tale quality, very nostalgic, feminine and romantic.  This was an iconic style for AnnaBelinda and was repeated with many fabric variations.  The main body of the pinafore is cotton velveteen and the bib and pockets are furnishing weight fabric.  I loved this style and managed to find the same dress in velveteen with William Morris print for £40 in my size on Etsy, I snapped it up- photos to come soon!


The mini smock dress by a Welsh company called Noyadd Rhulen was a delight.  All in cotton twill, it features saturated  bright colours and an intriguing button detail on the shoulder.  The geometric print features little houses. 


I was in my element looking at these beauties!   A mix of boutique dresses, fancy design houses like Cacherel and some homemade.  All were stunning with a plethora of detail.  The silky bib dresses far left and right were AnnaBelinda designs.


The puffy sleeves were fascinating.


Close up of an AnnaBelinda design.


This was by another of my favourite designers, Jean Muir.  Her 1970s and 1980s designs often feature controlled and extreme fullness.  This was in silk. 


I haven't a record of who designed this suit, maybe AnnaBelinda again? The lapels and pocket details are quilted and it was from the early 1980s.  The skirt is mid calf.


I really was in dress heaven.  Part three, which is all about the fabrics, to come soon!
Needless to say if you get a chance to visit this exhibition it is the most wonderful experience.   It is on until 28th February 2016.  

sib blog